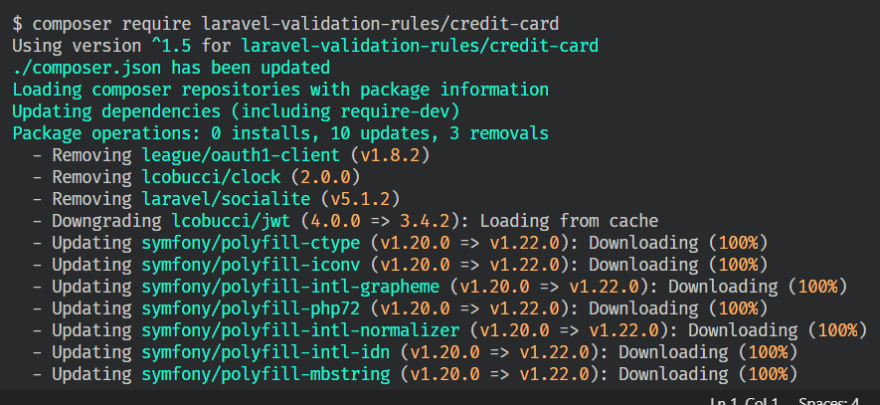
For a comprehensive explanation of this step, check out this material Laravel Form Validation
php artisan make:request CardVerificationRequest
Step 3: Write the Form Request Rules and Error Message
Open the file that is created in app/Http/Requests/, CardVerificationRequest.php and edit to this
<?php

namespace App\Http\Requests;

use LVR\CreditCard\CardCvc;
use LVR\CreditCard\CardNumber;
use LVR\CreditCard\CardExpirationYear;
use LVR\CreditCard\CardExpirationMonth;
use Illuminate\Foundation\Http\FormRequest;

class CardVerificationRequest extends FormRequest
{
    /**
     * Determine if the user is authorized to make this request.
     *
     * @return bool
     */
    public function authorize()
    {
        return true;
    }

    /**
     * Get the validation rules that apply to the request.
     *
     * @return array
     */
    public function rules()
    {
        return [
            'card_number' => ['required', 'unique:cards,cardNo', new CardNumber],
            'expiration_year' => ['required', new CardExpirationYear($this->get('expiration_month'))],
            'expiration_month' => ['required', new CardExpirationMonth($this->get('expiration_year'))],
            'cvc' => ['required', new CardCvc($this->get('card_number'))]
        ];
    }

    public function messages()
    {
        return [
            'card_number.required' => 'The card number is compulsory'
        ];
    }
}
Step 4: Type-hint the CardVerificationRequest in our Controller
Go to the controller method, where you want to use the validation and use my code as a guide
    /**
     * Store a newly created resource in storage.
     *
     * @param  \App\Http\Requests\CardVerificationRequest  $request
     * @return \Illuminate\Http\Response
     */
    public function store(CardVerificationRequest $request)
    {

        $validatedData = $request->validated();

        $newCard = new Card;

        $newCard->cardNo = $validatedData["card_number"];
        $newCard->cardExpiringMonth = $validatedData["expiration_month"];
        $newCard->cardExpiringYear = $validatedData["expiration_year"];
        $newCard->cardCVV = $validatedData["cvc"];

        $newCard->save();

        return response()->json([
            "status" => "success",
            "message" => "Card saved successfully.",
            "data" => $newCard
        ], StatusCodes::SUCCESS);
    }
Testing
Running the app with fields that violates the rules When the fields are correct
Follow me for more of my articles, you can leave comments, suggestions, and reactions. I am open to any vacancy as a PHP (Laravel) backend engineer, I am also available for any job.
publicfunctionauthorize(){returntrue;}publicfunctionrules(){return['card_number'=>['required','unique:cards,cardNo',newCardNumber],'expiration_year'=>['required',newCardExpirationYear($this->get('expiration_month'))],'expiration_month'=>['required',newCardExpirationMonth($this->get('expiration_year'))],'cvc'=>['required',newCardCvc($this->get('card_number'))]];}publicfunctionmessages(){return['card_number.required'=>'The card number is compulsory'];}
Type-hint the CardVerificationRequest in our Controller’s store method
Import cardVerificationRequest in controller
useApp\Http\Requests\CardVerificationRequest;
Store method to store the card with CardVerificationRequest
You can use laravel-validation-rules/credit-card package to validate credit card details in laravel. You can create a form request and use the controller's method with type hint to validate the provided credit card information by the user.
Representational state transfer (REST) is a software architectural style that defines a set of constraints to be used for creating Web services. Web services that conform to the REST architectural style, called RESTful Web services, provide interoperability between computer systems on the Internet. RESTful Web services allow the requesting systems to access and manipulate textual representations of Web resources by using a uniform and predefined set of stateless operations. Other kinds of Web services, such as SOAP Web services, expose their own arbitrary sets of operations. source: wikipedia
Laravel 9 REST API with Passport Authentication Tutorial
Laravel 9 REST API with Passport Authentication Tutorial
Last updated on: by Digamber
Do you want to know how to create a secure REST API using Passport in Laravel? If you have the same question, then with the conventional coherence about Laravel and Passport, we will learn the same thing.
In Laravel, you can take the holistic approach to build API. You won’t have to put intensive efforts; instead, you can give precedence to security. As far as security is concerned, Laravel Passport takes care of security and allows you to create Auth Token to provide authentication to users.
In this tutorial, we will learn to create robust, fast, and secure CRUD (CREATE, READ, UPDATE, DELETE) RESTful Authentication API with Passport Package in Laravel by following all the imperatives needed to be followed.
What is API (Application Programming Interface)?
API refers to the Application Programming Interface. It is a set of routines, protocols, and tools for creating software applications. An API interface makes communication possible between various software components.
In software development, API is a URL that handles the data for the web application through HTTP Requests GET, POST, UPDATE & DELETE, and manages the CRUD operations.
Representational state transfer (REST) is a software architectural style that defines a set of constraints to be used for creating Web services. Web services that conform to the REST architectural style, called RESTful Web services, provide interoperability between computer systems on the Internet. RESTful Web services allow the requesting systems to access and manipulate textual representations of Web resources by using a uniform and predefined set of stateless operations. Other kinds of Web services, such as SOAP Web services, expose their own arbitrary sets of operations. source: wikipedia
You must have either MAMP or XAMPP installed on your local development system, and the local server must be turned on.
This step explains how to make consensus between laravel and database, Incorporate the following code in .env file to establish the connection between both parties.
If you are using MAMPP, then you might get the given below error while running migration. Please add the following line of code right after your database configuration inside the .env file.
On an impulse, the second step leads us to install the passport package through Composer package manager. Without further ado run the following command in your terminal.
composer require laravel/passport
Bash
Ideally, we have to use the default migration to create a new table in the MySQL database.
php artisan migrate
Bash
Next, generate token keys for strengthening the security and restrain hackers from deteriorating the security of our applications.
php artisan passport:install
Bash
Configure Passport Module
We need to focus on some nitty-gritty to configure the Passport package in the Laravel application. First, open app/Models/User.php file and include HasApiTokens trait inside the User model, as mentioned below.
<?phpnamespaceApp\Models;useIlluminate\Contracts\Auth\MustVerifyEmail;useIlluminate\Database\Eloquent\Factories\HasFactory;useIlluminate\Foundation\Auth\Useras Authenticatable;useIlluminate\Notifications\Notifiable;useLaravel\Passport\HasApiTokens;classUserextendsAuthenticatable{useHasFactory, Notifiable, HasApiTokens;/**
* The attributes that are mass assignable.
*
* @var array
*/protected$fillable=['name','email','password',];/**
* The attributes that should be hidden for arrays.
*
* @var array
*/protected$hidden=['password','remember_token',];/**
* The attributes that should be cast to native types.
*
* @var array
*/protected$casts=['email_verified_at'=>'datetime',];}
PHP
Next, open app/Providers/AuthServiceProvider.php file and register the registerPolicies() method inside the boot() function, It will evoke the required routes.
<?phpnamespaceApp\Providers;useIlluminate\Foundation\Support\Providers\AuthServiceProvideras ServiceProvider;useIlluminate\Support\Facades\Gate;useLaravel\Passport\Passport;classAuthServiceProviderextendsServiceProvider{/**
* The policy mappings for the application.
*
* @var array
*/protected$policies=['App\Models\Model'=>'App\Policies\ModelPolicy',];/**
* Register any authentication / authorization services.
*
* @return void
*/publicfunctionboot(){$this->registerPolicies();
Passport::routes();}}
PHP
Register the PassportServiceProvider class in providers array inside the config/app.php file:
To make the consensus between client and server, we will have to create the Post model by executing the below command.
php artisan make:model Post -m
Bash
After executing the above command, you will see the archetype of posts migration file in database/migrations/timestamp_create_posts_table. Here, you have to add some values to create the internal coherence using Model.
<?phpuseIlluminate\Database\Migrations\Migration;useIlluminate\Database\Schema\Blueprint;useIlluminate\Support\Facades\Schema;classCreatePostsTableextendsMigration{/**
* Run the migrations.
*
* @return void
*/publicfunctionup(){
Schema::create('posts',function(Blueprint $table){$table->increments('id');$table->unsignedBigInteger('user_id');$table->text('title');$table->longText('description');$table->timestamps();$table->foreign('user_id')->references('id')->on('users');});}/**
* Reverse the migrations.
*
* @return void
*/publicfunctiondown(){
Schema::dropIfExists('posts');}}
PHP
Next, create the app/Models/Post.php file and register the following values inside the $fillable array.
Then, run the migration by using the below command.
php artisan migrate
Bash
Create a New Controller
Let us take another imperative in the consideration and, on the same impetus, execute the following command. It will create a new controller in our laravel app to create a login and registration REST API.
Controller is the quintessential file in Laravel application development. So, without further insert the given below code in PassportAuthController.php file.
Before we move to next step, establish consensus between Post and User model. Gradually incorporate the following method inside the app/Models/User.php file.
<?phpnamespaceApp\Models;useIlluminate\Contracts\Auth\MustVerifyEmail;useIlluminate\Database\Eloquent\Factories\HasFactory;useIlluminate\Foundation\Auth\Useras Authenticatable;useIlluminate\Notifications\Notifiable;useLaravel\Passport\HasApiTokens;classUserextendsAuthenticatable{useHasFactory, Notifiable, HasApiTokens;/**
* The attributes that are mass assignable.
*
* @var array
*/protected$fillable=['name','email','password',];/**
* The attributes that should be hidden for arrays.
*
* @var array
*/protected$hidden=['password','remember_token',];/**
* The attributes that should be cast to native types.
*
* @var array
*/protected$casts=['email_verified_at'=>'datetime',];publicfunctionposts(){return$this->hasMany(Post::class);}}
PHP
Run command to create Post Controller.
php artisan make:controller PostController
Bash
Add the following code in PostController.php file.
<?phpnamespaceApp\Http\Controllers;useIlluminate\Http\Request;useApp\Models\Post;classPostControllerextendsController{publicfunctionindex(){$posts=auth()->user()->posts;returnresponse()->json(['success'=>true,'data'=>$posts]);}publicfunctionshow($id){$post=auth()->user()->posts()->find($id);if(!$post){returnresponse()->json(['success'=>false,'message'=>'Post not found '],400);}returnresponse()->json(['success'=>true,'data'=>$post->toArray()],400);}publicfunctionstore(Request $request){$this->validate($request,['title'=>'required','description'=>'required']);$post=newPost();$post->title=$request->title;$post->description=$request->description;if(auth()->user()->posts()->save($post))returnresponse()->json(['success'=>true,'data'=>$post->toArray()]);elsereturnresponse()->json(['success'=>false,'message'=>'Post not added'],500);}publicfunctionupdate(Request $request,$id){$post=auth()->user()->posts()->find($id);if(!$post){returnresponse()->json(['success'=>false,'message'=>'Post not found'],400);}$updated=$post->fill($request->all())->save();if($updated)returnresponse()->json(['success'=>true]);elsereturnresponse()->json(['success'=>false,'message'=>'Post can not be updated'],500);}publicfunctiondestroy($id){$post=auth()->user()->posts()->find($id);if(!$post){returnresponse()->json(['success'=>false,'message'=>'Post not found'],400);}if($post->delete()){returnresponse()->json(['success'=>true]);}else{returnresponse()->json(['success'=>false,'message'=>'Post can not be deleted'],500);}}}
PHP
Define API Routes
Now, we will define API routes. Go to routes/api.php file and declare the foundational code.
<?phpuseIlluminate\Http\Request;useIlluminate\Support\Facades\Route;useApp\Http\Controllers\PassportAuthController;useApp\Http\Controllers\PostController;/*
|--------------------------------------------------------------------------
| API Routes
|--------------------------------------------------------------------------
|
| Here is where you can register API routes for your application. These
| routes are loaded by the RouteServiceProvider within a group which
| is assigned the "api" middleware group. Enjoy building your API!
|
*/
Route::post('register',[PassportAuthController::class,'register']);
Route::post('login',[PassportAuthController::class,'login']);
Route::middleware('auth:api')->group(function(){
Route::resource('posts', PostController::class);});
PHP
Test Laravel 9 Passport API
Eventually, we have completed all the foundational steps that were required to build REST API with Passport authentication in Laravel. Now, the time has come to test out the API, so run the following command to start the laravel app.
php artisan serve
Bash
We have to rely on Postman for testing our newly formed endpoints.
Register API: You can test the Laravel Passport API for registering the user:
Please open the Postman app and Headers tab, define "Accept": application/json header value:
http://localhost:8000/api/register
Markup
Login Passport API: After sign up, copy the Bearer token, set into the Headers section in the Postman app. Check out the Laravel Passport Endpoint for logging-in:
http://localhost:8000/api/login
Markup
Passport Post Create API:
http://localhost:8000/api/posts
Markup
To perform the CRUD operation, we need to set the correct authenticity. After successful registration and login, you will receive the access token. The manifestation of access token creates coherence with authorization, and It establishes secure communication with the server. You need to set this access token as a Bearer Token in the Authorization header.
Eventually, we have completed the Laravel 9 Passport API Tutorial. In this tutorial, we have shed light on every aspect needed to build secure REST APIs in Laravel.
We have gone through every foundation step and put everything at its place without falling into the trap of procrastination. This tutorial is useful for those who are new and want to try their hands to create a secure REST API with Passport in Laravel.
I have tried to shape things from my outlook on the entire journey, i haven’t been skeptical about anything. Anyhow, If i have skipped anything due to recklessness, you must download the full code of this tutorial from the GitHub.