CoderFunda
  • Home
  • About us
    • Contact Us
    • Disclaimer
    • Privacy Policy
    • About us
  • Home
  • Php
  • HTML
  • CSS
  • JavaScript
    • JavaScript
    • Jquery
    • JqueryUI
    • Stock
  • SQL
  • Vue.Js
  • Python
  • Wordpress
  • C++
    • C++
    • C
  • Laravel
    • Laravel
      • Overview
      • Namespaces
      • Middleware
      • Routing
      • Configuration
      • Application Structure
      • Installation
    • Overview
  • DBMS
    • DBMS
      • PL/SQL
      • SQLite
      • MongoDB
      • Cassandra
      • MySQL
      • Oracle
      • CouchDB
      • Neo4j
      • DB2
      • Quiz
    • Overview
  • Entertainment
    • TV Series Update
    • Movie Review
    • Movie Review
  • More
    • Vue. Js
    • Php Question
    • Php Interview Question
    • Laravel Interview Question
    • SQL Interview Question
    • IAS Interview Question
    • PCS Interview Question
    • Technology
    • Other

16 June, 2021

How to Install WordPress Themes

 Programing Coderfunda     June 16, 2021     Wordpress, wordpress-tutorial     No comments   

 How to Install WordPress Themes

For theme installation, first you need to select a theme either free or a premium one. There are a lot of sites from where you can download a theme. Theme will be downloaded in zip format. The next process is installation process. Installation has some steps to be followed.

There are two methods from which you can install a theme:

  • Installing WordPress using admin theme search
  • Installing WordPress using upload method

Installing WordPress using admin theme search

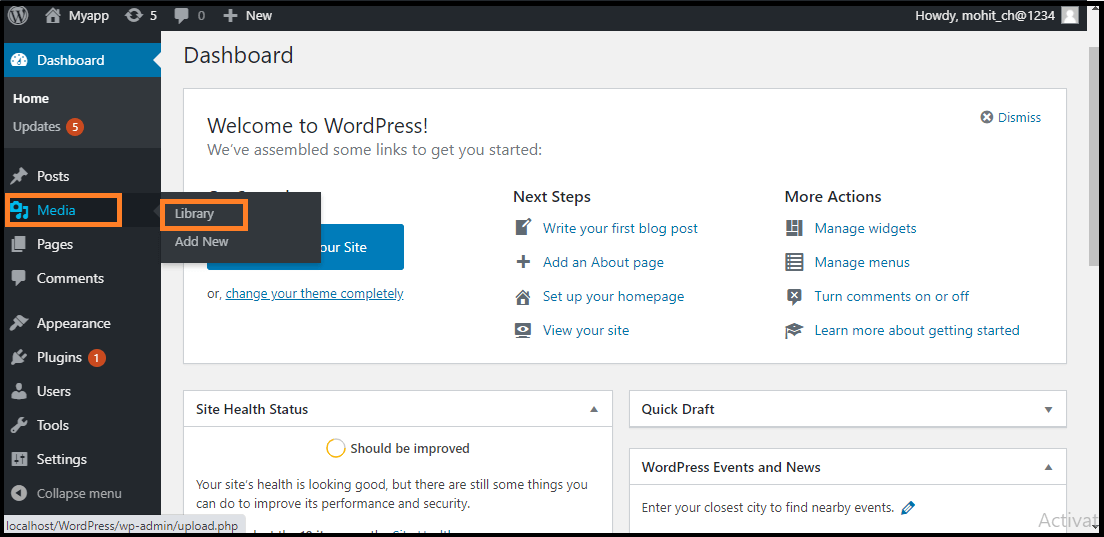
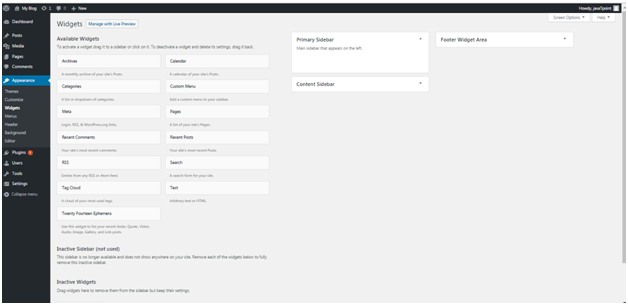
To install free themes from WordPress.org directory, login into your account and click Appearance > Themes.

Wordpress How to install wordpress themes1

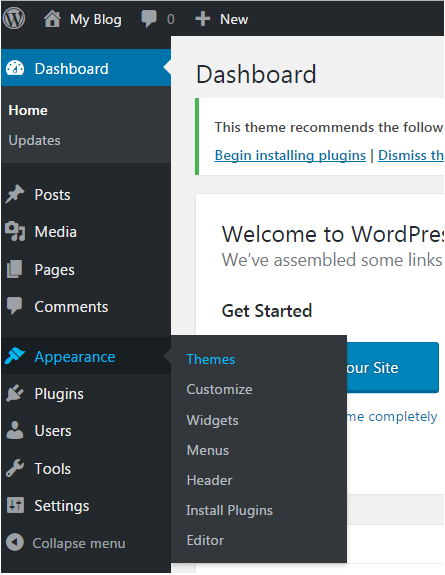
Look at the above snapshot, click on Themes option. Following page will appear in front of you.

Wordpress How to install wordpress themes2

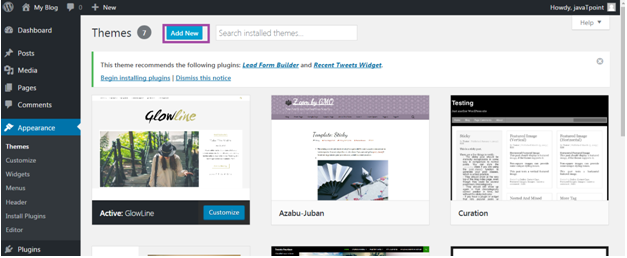
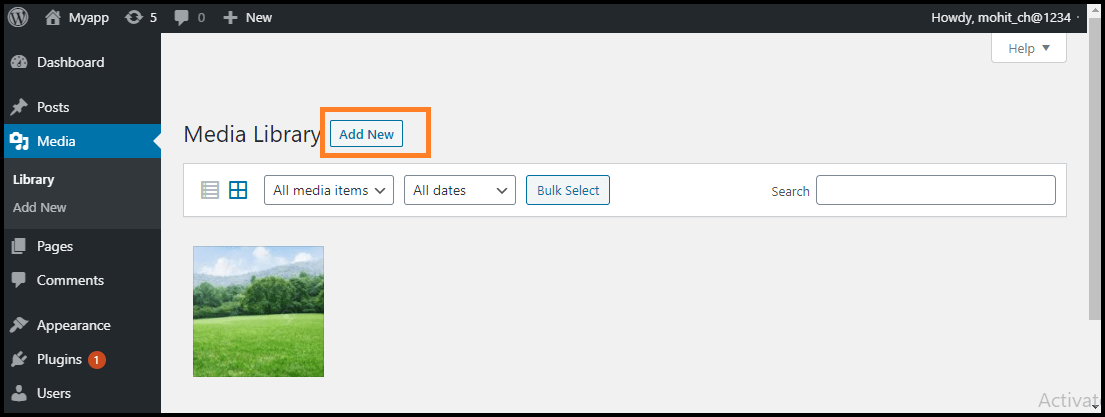
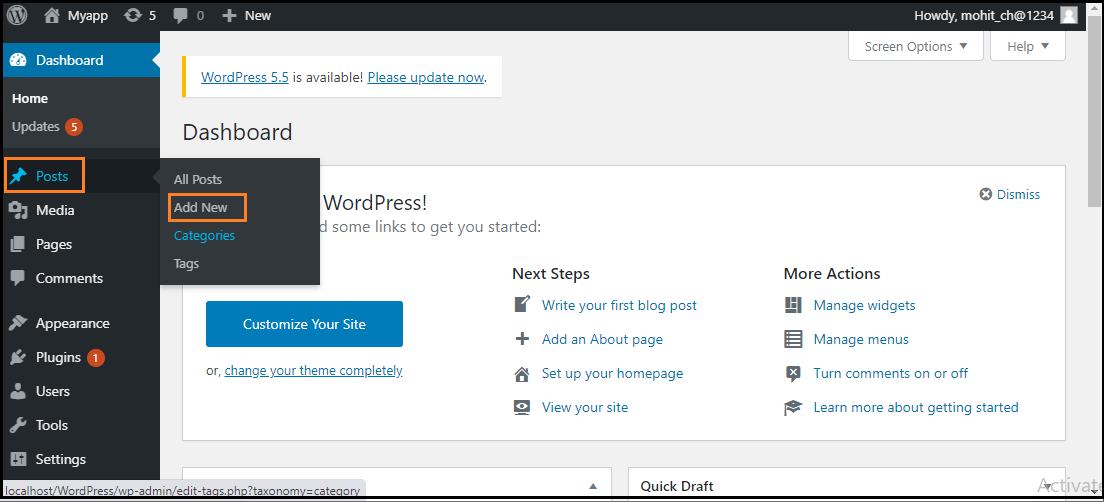
Click on Add New button to Add New themes.

Wordpress How to install wordpress themes3

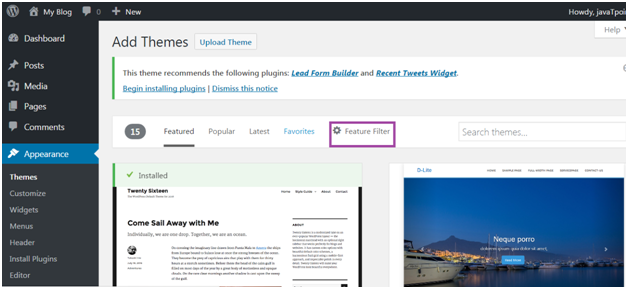
Look at the above snapshot, here you'll see an option for Feature Filter.

Wordpress How to install wordpress themes4

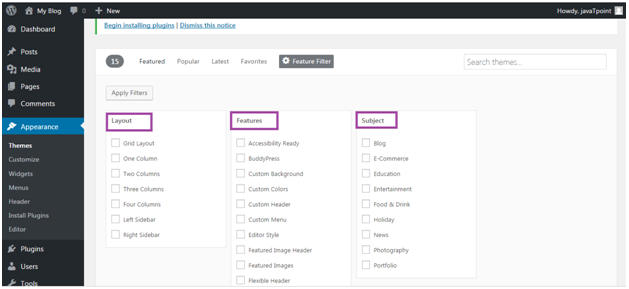
Look at the above snapshot, here you can filter your search for themes by applying your choice for Layout, Features and Subject.

Wordpress How to install wordpress themes5

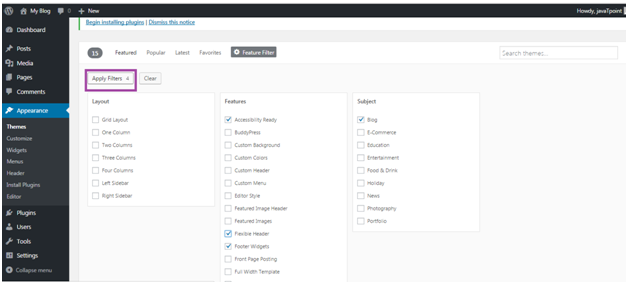
Look at the above snapshot, we have selected 4 filter criteria, now click on button Apply Filters 4 to apply the filters.

Wordpress How to install wordpress themes6

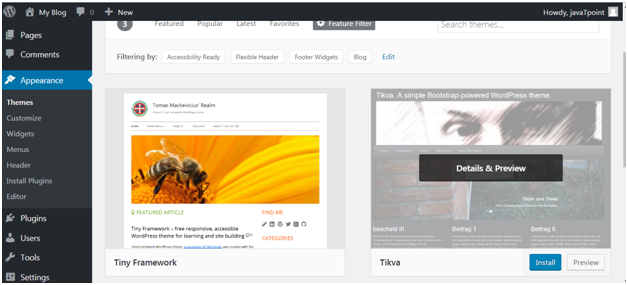
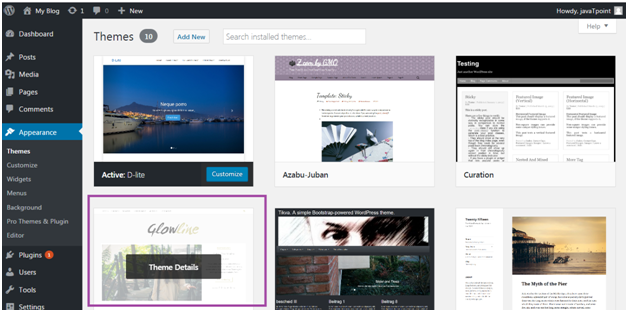
Look at the above snapshot, select a theme and take your mouse above it. Click on Install button.

Wordpress How to install wordpress themes7

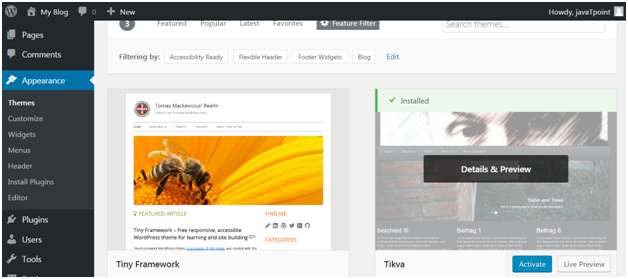
Look at the above snapshot, our theme is installed. To activate it click on Activate button. And you have successfully activated your WordPress theme.


Installing WordPress using upload method

The above method was only to install free themes that are available in WordPress directory only. But if you want to install premium themes, then you have to choose this option which includes following steps. This method can be used to install premium as well as free themes.


Downloading theme

WordPress site itself has a large collection of themes. All the themes on the WordPress site is fully examined and tested. If you are not satisfied with these themes you can go to other sites to download a theme. Make sure you select trusted site to download a theme as anyone can create a theme for WordPress.

Themes are downloaded in the zip format.

Go to wordpress.org site.

Wordpress How to install wordpress themes8

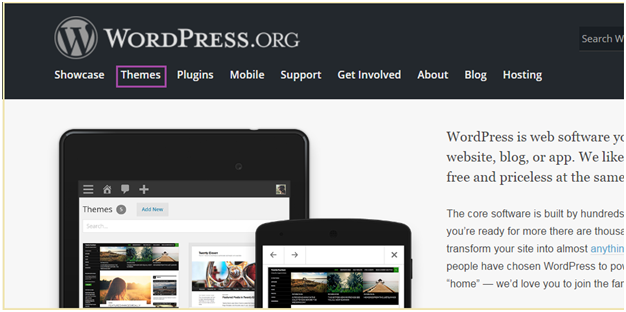
Look at the above snapshot, this is the site. Here click on Themes. You will be directed to the following page.

Wordpress How to install wordpress themes9

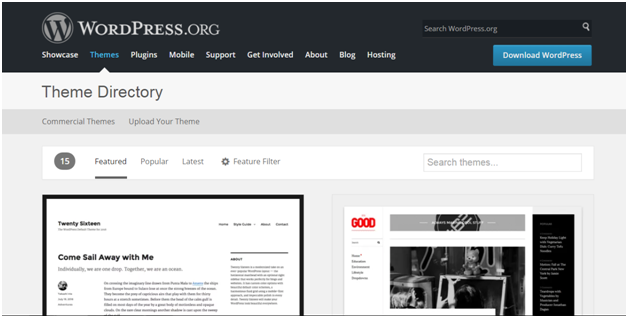
Look at the above snapshot, on this page you'll have a lot of options to select themes.

Select a theme and then click on Download button.

Theme will be downloaded in zip format in your system.


Installing theme

To install the downloaded theme, you have to login to your WordPress and click on Appearance > Themes.

Now click on Add New button, following screen will appear in front of you.

Wordpress How to install wordpress themes10

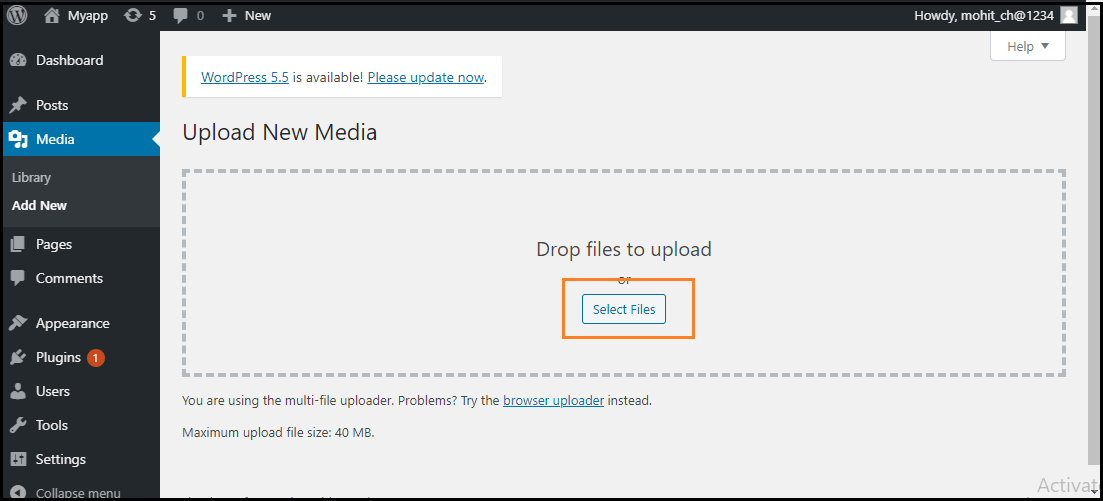
Look at the above snapshot, click on Upload Theme button.

Wordpress How to install wordpress themes11

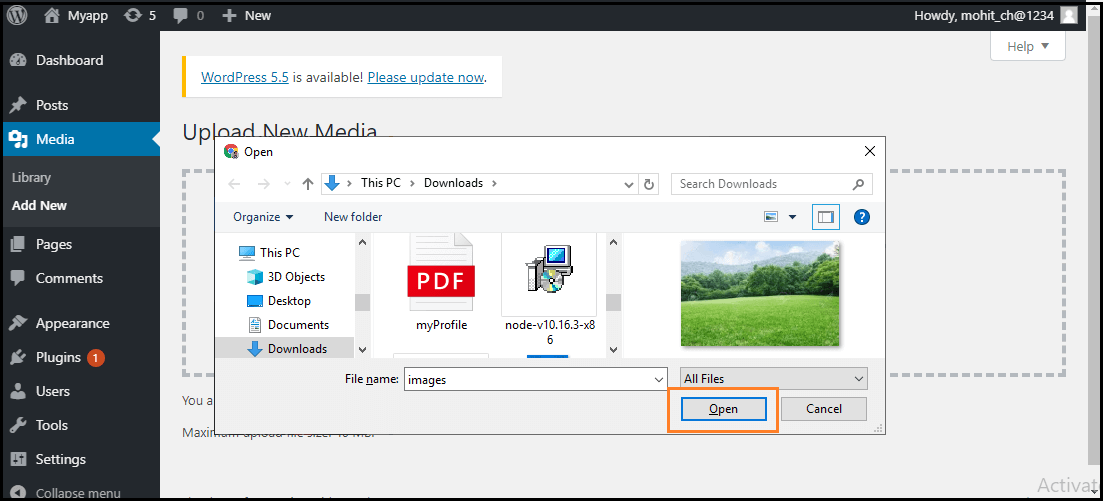
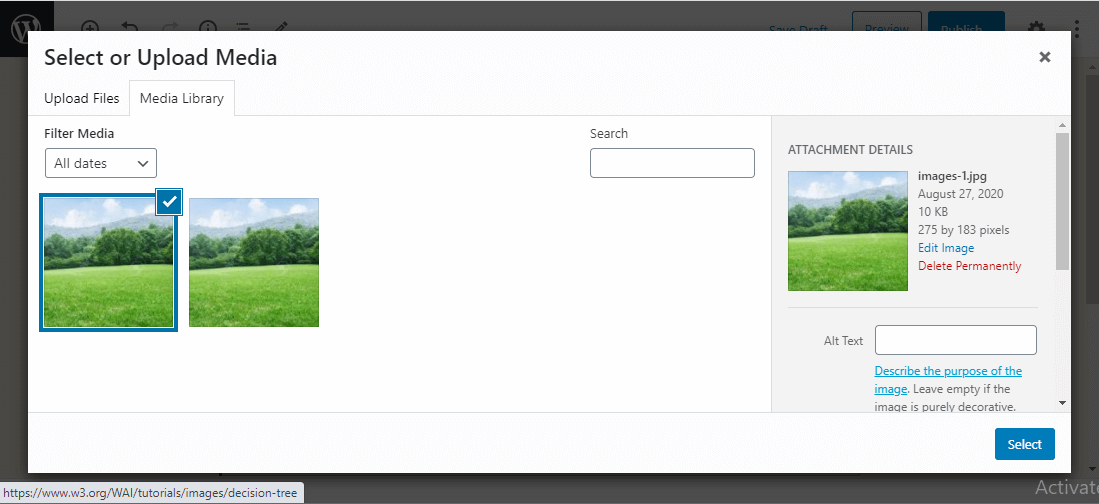
Look at the above snapshot, choose the file that you installed and click Install Now.

Wordpress How to install wordpress themes12

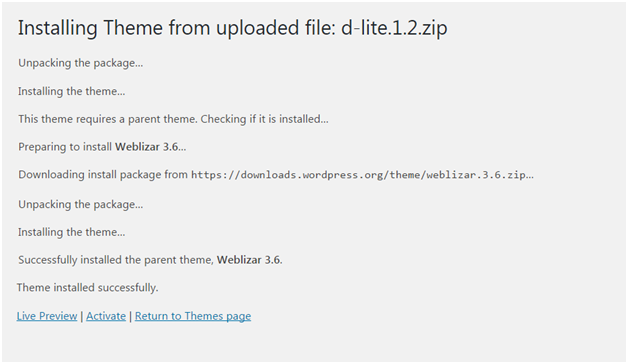
Look at the above snapshot, once your theme is installed, you will get a successfully installed message. Now click on Activate button, and your theme will be successfully installed.

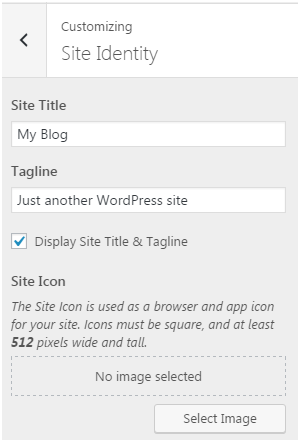
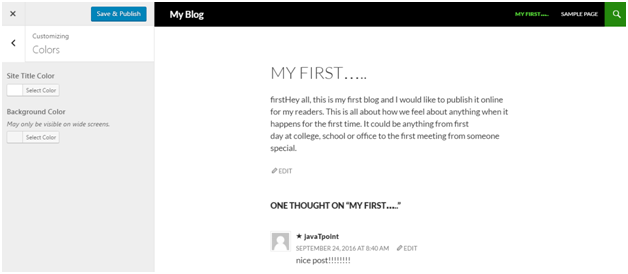
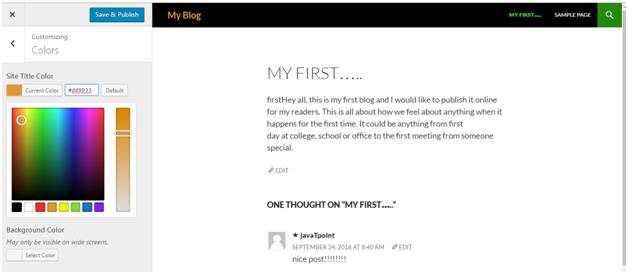
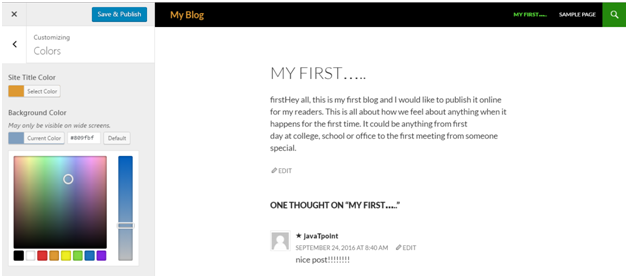
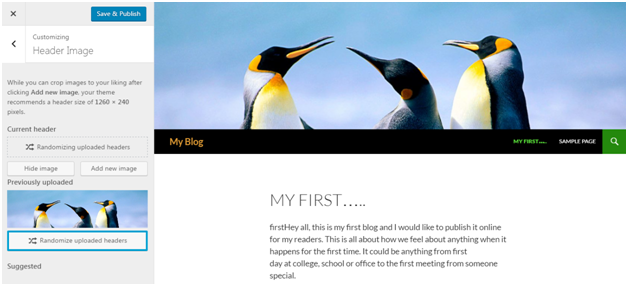
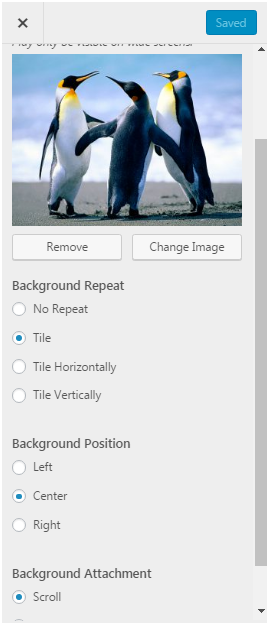
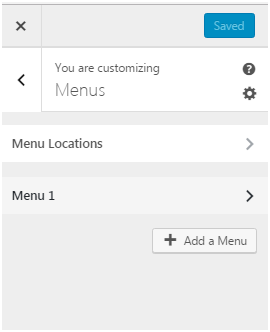
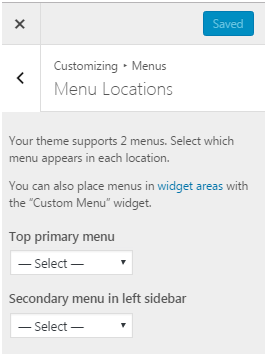
Now you can customize it according to your choice.

Read More
  • Share This:  
  •  Facebook
  •  Twitter
  •  Google+
  •  Stumble
  •  Digg

Free vs Paid WordPress Theme

 Programing Coderfunda     June 16, 2021     Wordpress, wordpress-tutorial     No comments   


Free vs Paid WordPress Theme

As you already know there are two types of WordPress themes, one is paid (premium) and other one is free. Both are from WordPress community but they possess some differences in their functionality. For some users free themes may be suitable and for some users premium themes may be suitable. It all depends upon their need. A huge number of WordPress themes are available as free but still people go for premium themes. There are multiple reasons why one should go for paid one.

Let's have a look on some of the functions of free as well as premium themes. It will help you in choosing a theme for you.


Cost

Free themes of course as name suggests are absolutely free. You can use them any time without any money.

For premium you have to pay. Its range starts from $1000 which varies depending upon the designing of theme. It is good when you are earning enough from your site but if you are using your site just as a hobby then it may cost you a lot.


Quality

If you want your site at a good rank then you need to improve its quality.

Free theme will not make your site unique. Same theme will be used by other sites because it is free for everyone.

To make your site unique go for the premium one. There are some other qualities which need to be fulfilled. Like your site has to be responsive and should support different browsers. Free theme is not guaranteed to provide these qualities.


Support

In free themes if you need any type of help, you have to search for help and ask on forums. If someone will be willing then you may get your answer but it will take some time.

Premium themes designer offer some support system. You will get timely support from reliable developers. Your problem will be solved very quickly.


Update

WordPress is constantly updated in every few months, so your themes and plugins need to be compatible with the updated version.

Free themes may not be updated regularly. If you are using a free theme and an updated version comes, then you have two options. Either don't update your site or install a new them. Both the options are not right.

Premium theme developers update it on a regular basis to make it compatible with the new WordPress version. So if you are using a premium theme, then it is the responsibility of company to update it. You don't have to worry about it.


SEO

SEO plays an important role in the ranking of your website. It is important for your site to have an SEO options and clean code.

In free themes there are many structural bugs and they don't provide inbuilt SEO options.

Premium themes provide better coding which helps to load your site faster.


Features

Theme developers have to offer latest features for their customers according to the trend.

Free themes provide limited features. Their developers do not update their theme. They are more compatible to the plugins than premium themes.

Premium theme developers provide latest features and much more functionality than free themes. They provide an easy user interface that allows users to make any type of changes in the design of their site.


Encrypted Links

In free themes there are some unwanted links in the footer area. These links are irrelevant from the content of your website. It seriously affects the SEO of your site.

Free themes developers add some links at the footer of their themes which is very annoying.


Security

Security should be of a high level in order to prevent your site. wordPress provides a better security by updating it every few months. An out dated theme may cause a lot of security issues.

Free themes generally have high security threat.

On the other hand, premium themes give high security standards to their customers.

Read More
  • Share This:  
  •  Facebook
  •  Twitter
  •  Google+
  •  Stumble
  •  Digg

WordPress Media Library

 Programing Coderfunda     June 16, 2021     Wordpress, wordpress-tutorial     No comments   


WordPress Media Library

WordPress Media Library contains images, videos, audios, and files that can be included in the content when writing a WordPress page or post. We can see many things related to the media in the Media Library, like add, delete, and edit. In this topic, we are going to discuss the different phases of the WordPress Media Library. The following are the steps to understand the WordPress Media Library.

Step 1: Firstly, go to the WordPress dashboard and select the "Media" option and then click on the "Library" option.

WordPress Media Library

Step 2: When we click on the Library option, we can see the various media files, such as images, videos, and audios. If we want to add new items, click on the "Add New" button.

WordPress Media Library

Step 3: We can see a menu bar in the Media Library that consists of many things like List view, Grid view, Filter the images and videos, and search box, as shown in the following screenshot

WordPress Media Library

There are various tabs in the Media Library bar, which are as follows:

  1. List View: It shows the media files in the list form.
  2. Grid View: It helps to show all the media files in the grid format.
  3. Filter the images and videos: It filters the images and videos in the media library.
  4. Search box: It helps to find a media file by inserting the file name into the search box.

Adding the Media Files

Now, we are going to know how to add the Media Files in WordPress. WordPress permits us to add various media files, such as images, videos, and audios.

The following are the steps to add Media Files in WordPress.

Step 1: Firstly, go to the WordPress dashboard and select the "Media" option, and then click on the "Add New" option.

Step 2: After clicking on the "Add New" option, click on the "Select Files" option to select the files from our local storage, as shown in the following screenshot.

WordPress Media Library

Step 3: After clicking on the Select Files, add the media files by selecting them and then click on the open button, as shown in the following screenshot.

WordPress Media Library

Step 4: Now, we will see the media files list that we added in the list.

WordPress Media Library

Inserted the Media Files

We are going to know how we can insert the media files into a WordPress Page or Post. Media Files can be inserted from the Media Libraries, URLs, or local storage in the WordPress Page or WordPress Post. The following are the steps to insert the Media Files:

Step 1: Firstly, go to the WordPress dashboard and click on the "Posts" and then click on the "Add New" option to insert the media file in WordPress.

WordPress Media Library

Step 2: After clicking on the "Add New" option, click on the "Add Media" button.

WordPress Media Library

Step 3: Now, we can choose the media file from the library section.

WordPress Media Library

All information on the selected media file will be shown in the Attachment Details on the right side of the screen.

Step 4: Now, click on the "Select" button, then the image will be inserted in the page or post of the site.

We can also upload a file directly from the device by clicking the Upload Files button. Just click on the "Select" button.

Edit Media Files

Here, we are going to know how to Edit Media Files in WordPress. We can handle information about the Media File, which is stored in the Media Library. The following are the steps to edit the Media Files in WordPress.

Step 1: Firstly, go to the WordPress dashboard and select the "Media" option, and then click on the "Library" option. After that, click on the media file name or the edit link.

WordPress Media Library

Step 2: Here, we will see the Media Files list. Now, we can select an image that we want to edit.

Step 3: Finally, we can see the media page with some options shown on the site. The options are as follows:

WordPress Media Library

URL: It helps us to read only a link from the media file.

Title: It shows the media name. If the themes and plugins are designed to be displayed, the title will often show up in the galleries and attachment pages.

Permalink: It is the media attachment page URL. It is also a link to see the attachment page of the media file.

Edit Image button: It helps to edit the position of the image like rotate anti-clockwise, rotate clockwise, flip vertically, horizontally, crop, flip, and more.

Caption: It allows us to provide a detailed explanation of the media file.

Alternate Text: The alternate text for the image is used to describe media and is also used for the availability of images.

Description: It allows us to explain the media file.

Delete Permanently: It helps us to delete the file permanently.

Step 4: After completing all these steps, click on the Update button to save the changes.

WordPress Media Library
Read More
  • Share This:  
  •  Facebook
  •  Twitter
  •  Google+
  •  Stumble
  •  Digg

WordPress Themes

 Programing Coderfunda     June 16, 2021     Wordpress, wordpress-tutorial     No comments   


WordPress Themes

With the help of WordPress theme, you can design the layout and appearance of your website in the front-end.

When WordPress is installed, it has a pre-installed theme which is very simple and unattractive. But no one wants a website to be that much simple. To make it more attractive one can install and apply different themes from WordPress.

Themes provide a style (including font styling), colors, page layouts, widget positions, etc. You can change the theme of your site without changing the content of the site. Themes provide a unique look to your site.

Types of WordPress theme

There are thousands of themes available on the WordPress. Some are free and some are paid. You can choose a theme according to your choice.

Free

WordPress provides many good looking themes absolutely free in the WordPress theme directory. If you are using your site for a small audience or yourself, go for free one. Because there are some chances that same theme is being used by another site.

Premium

Premium themes may cost you starting from $1,000. Prize varies depending upon the design and requirement of your site.

One advantage in premium themes is that they provide a reliable code base and offer support. It gives you a more enhanced security.

How to make a WordPress theme

Building a WordPress theme is somewhat technical work. To build a theme you should have a little knowledge about the following development languages.

  • HTML
  • CSS
  • JavaScript
  • PHP
  • Database

You should know how to use a web server.

Selecting WordPress Theme

WordPress theme should be selected very wisely, so that it perfectly fits on your site. You can select any one either paid or free. It should be complemented to your site.

Themes affect a website in a lot of way. Heavy themes which look great may slow down your website and Google will degrade its ranking. If a theme is not coded properly, it becomes difficult to add any plugin or change that theme.

Theme selection is very important as everything for your website depends upon theme.

Given below are some of the points which may help the users to select a theme for their website.

Look for Simplicity

Your website should look good, but for that you shouldn't compromise with your site's functionality. Theme styling should not be complicated. Complexity will make things difficult for your users. All you need is a good theme, so don't go for an attractive one compromising your users.

Responsive

Your theme should be compatible with all type of screen sizes. A large number of traffic generates from devices other than laptops and PCs. Google also gives better ranking to the responsive sites. Lot of themes is by default responsive but still there are some themes which are not responsive. So look for a theme which is responsive to make your website accessible by all device users.

Browser Support

Make sure the theme you select is supported by all the browsers. Before selecting it, test it on different browsers for mobiles as well as laptops like Chrome, Internet Explorer, and Firefox.

Plugin Support

Plugins are very important for a WordPress site. They enhance the functionality of your site. Make sure that your selected theme must support all the popular plugins.

Multilingual Support

Your theme should support multilingual to support different languages for users.

Help Option

Only some developers provide support option with free themes, not all. So, if you messed up with your site then you may have to solve it on your own. So rather than facing all these problems, you should better choose a theme which has a good documentation and support help option.

SEO Friendliness

To increase your site performance on search engines, choose a theme which is SEO friendly. Many theme developers will let you know whether their theme is SEO friendly or not.

Ratings and Reviews

Before downloading a theme, have a look on its rating and reviews. A theme has both good and bad reviews, but if there are more negative reviews then read it carefully and consider it once again.

Read More
  • Share This:  
  •  Facebook
  •  Twitter
  •  Google+
  •  Stumble
  •  Digg

WordPress Appearance

 Programing Coderfunda     June 16, 2021     Wordpress, wordpress-tutorial     No comments   


WordPress Appearance

Appearance is to manage your theme. From here you can install, delete, update and activate themes. Its menus allow you to change your site's appearance and behavior.

Depending upon the theme, some of the appearance menu may not appear to you because some of the options under appearance are theme based.


How to Manage Theme

For theme management, go to Themes

All the installed themes will be displayed. Hover a theme and click it for theme description.

Wordpress Appearence1

Look at the above snapshot, these are the themes installed in our site. After clicking on a theme, theme description page will appear in front of you.

Wordpress Appearence2

Look at the above snapshot, it displays theme description like version, tags and information. If you want to implement this theme then click on Activate button, and to see the preview of theme click on Live Preview button.

We have activated a theme and got a message as shown in below snapshot.

Wordpress Appearence3

How to Customize Theme

Theme customizer allows you to design your site with your theme. It gives a new look to your site.

Go to Appearance > Customize

Wordpress Appearence4

Look at the above snapshot, on the left side it is customizing section and on the right side it is the theme we have selected. Any changes made on the left side will be displayed on the right side of the screen.

At the left side of the screen, following options are present,

  • Active Theme -It shows which theme is currently activated on your site. On our site, Twenty Fourteen theme is activated.
  • There is an option to Change the theme. When you'll click on it, you?ll see other themes which you can activate.

  • Site Identity - It specifies basic site information.
  • Wordpress Appearence5

    Look at the above snapshot,

    Site Title - Enter your site title in the text box.

    Tagline - Enter a tag line matching to your site.

    Checkbox will enable and disable the site title and tag line.

    Site Icon - it is used as an icon for your site in the browser.

  • Colors - This option allows you to change the color of your site by changing site color and background color.
  • Wordpress Appearence6

    Look at the above snapshot, you can see the options for site color and background color.

    To change site color

    Wordpress Appearence7

    Look at the above snapshot, by clicking on site Title color, many color options will be shown. We have chosen color with code #dd9933. My site title has been changed to the same color. There is a base color scheme as a vertical bar from where you can set the color of your choice.

    To change background color

    Wordpress Appearence8
  • Header Image - It will select an image for the header of your site.
  • Wordpress Appearence9

    Look at the above snapshot, this is the image we have selected as the header. By clicking on Hide image, we can remove this photo from the header.

    You will get an option here to crop your image as you want.

  • Background Image - Select an image for your background from here.
  • Wordpress Appearence10

    Look at the above snapshot, after selecting an image above options will appear.

    You can Remove the image if you want. And from Change Image option, you can change the image.

    Background Repeat determines if your image is repeated or not.

    Background Position determines image to be positioned left, right or center.

    Background Attachment determines whether to display image as fixed or scroll.

  • Menus - Select the menu type to appear on your site.
  • Wordpress Appearence11

    Look at the above snapshot, there are two options or menu.

    In Menu Locations, two types of menu locations are there.

    Wordpress Appearence12

    Look at the above snapshot, there are two positions for the menu, one is top and other is sidebar.

    In Menu 1, following screen will appear.

    Wordpress Appearence13

    Look at the above snapshot, you can select the checkboxes according to your need.

  • Widgets - Themes have sidebars either on left or right. You can add, remove, move up or down widgets into sidebars according to your choice.

    Wordpress Appearence14

    Look at the above snapshot, you can move the widgets according to your need in all the three sidebars.

    Wordpress Appearence15

    Look at the above snapshot, we have added Recent posts widget in the Footer widget area. Just choose a widget from the given options and it will be on your sidebar menu.

  • Static Front Page - Home page will be either static or display latest posts.
  • Wordpress Appearence16

    Look at the above snapshot, you can choose an option to display static or latest posts.

How to Manage Widget

Widgets are like blocks having specific codes for different functions. In any sidebar you can add and remove widget as per need through drag and drop.

Wordpress Appearence17

Look at the above snapshot, following options are available,

Available widgets, these are available to you to add to the sidebar.

Inactive sidebar (not used), these are not used.

Inactive widgets, these are the removed widgets from sidebar.

Select a menu and use drag and drop option to any widget in the desired location.

Read More
  • Share This:  
  •  Facebook
  •  Twitter
  •  Google+
  •  Stumble
  •  Digg
Newer Posts Older Posts Home

Meta

Popular Posts

  • Write API Integrations in Laravel and PHP Projects with Saloon
    Write API Integrations in Laravel and PHP Projects with Saloon Saloon  is a Laravel/PHP package that allows you to write your API integratio...
  • Credit card validation in laravel
      Validation rules for credit card using laravel-validation-rules/credit-card package in laravel Install package laravel-validation-rules/cr...
  • Fast Excel Package for Laravel
      Fast Excel is a Laravel package for importing and exporting spreadsheets. It provides an elegant wrapper around Spout —a PHP package to ...
  • iOS 17 Force Screen Rotation not working on iPAD only
    I have followed all the links on Google and StackOverFlow, unfortunately, I could not find any reliable solution Specifically for iPad devic...
  • Features CodeIgniter
    Features CodeIgniter There is a great demand for the CodeIgniter framework in PHP developers because of its features and multiple advan...

Categories

  • Ajax (26)
  • Bootstrap (30)
  • DBMS (42)
  • HTML (12)
  • HTML5 (45)
  • JavaScript (10)
  • Jquery (34)
  • Jquery UI (2)
  • JqueryUI (32)
  • Laravel (1017)
  • Laravel Tutorials (23)
  • Laravel-Question (6)
  • Magento (9)
  • Magento 2 (95)
  • MariaDB (1)
  • MySql Tutorial (2)
  • PHP-Interview-Questions (3)
  • Php Question (13)
  • Python (36)
  • RDBMS (13)
  • SQL Tutorial (79)
  • Vue.js Tutorial (68)
  • Wordpress (150)
  • Wordpress Theme (3)
  • codeigniter (108)
  • oops (4)
  • php (853)

Social Media Links

  • Follow on Twitter
  • Like on Facebook
  • Subscribe on Youtube
  • Follow on Instagram

Pages

  • Home
  • Contact Us
  • Privacy Policy
  • About us

Blog Archive

  • September (100)
  • August (50)
  • July (56)
  • June (46)
  • May (59)
  • April (50)
  • March (60)
  • February (42)
  • January (53)
  • December (58)
  • November (61)
  • October (39)
  • September (36)
  • August (36)
  • July (34)
  • June (34)
  • May (36)
  • April (29)
  • March (82)
  • February (1)
  • January (8)
  • December (14)
  • November (41)
  • October (13)
  • September (5)
  • August (48)
  • July (9)
  • June (6)
  • May (119)
  • April (259)
  • March (122)
  • February (368)
  • January (33)
  • October (2)
  • July (11)
  • June (29)
  • May (25)
  • April (168)
  • March (93)
  • February (60)
  • January (28)
  • December (195)
  • November (24)
  • October (40)
  • September (55)
  • August (6)
  • July (48)
  • May (2)
  • January (2)
  • July (6)
  • June (6)
  • February (17)
  • January (69)
  • December (122)
  • November (56)
  • October (92)
  • September (76)
  • August (6)

Loading...

Laravel News

Loading...

Copyright © CoderFunda | Powered by Blogger
Design by Coderfunda | Blogger Theme by Coderfunda | Distributed By Coderfunda