CoderFunda
  • Home
  • About us
    • Contact Us
    • Disclaimer
    • Privacy Policy
    • About us
  • Home
  • Php
  • HTML
  • CSS
  • JavaScript
    • JavaScript
    • Jquery
    • JqueryUI
    • Stock
  • SQL
  • Vue.Js
  • Python
  • Wordpress
  • C++
    • C++
    • C
  • Laravel
    • Laravel
      • Overview
      • Namespaces
      • Middleware
      • Routing
      • Configuration
      • Application Structure
      • Installation
    • Overview
  • DBMS
    • DBMS
      • PL/SQL
      • SQLite
      • MongoDB
      • Cassandra
      • MySQL
      • Oracle
      • CouchDB
      • Neo4j
      • DB2
      • Quiz
    • Overview
  • Entertainment
    • TV Series Update
    • Movie Review
    • Movie Review
  • More
    • Vue. Js
    • Php Question
    • Php Interview Question
    • Laravel Interview Question
    • SQL Interview Question
    • IAS Interview Question
    • PCS Interview Question
    • Technology
    • Other

28 December, 2020

Vue.js Events

 Programing Coderfunda     December 28, 2020     Vue.js Tutorial     5 comments   


In Vue.js, Events are used to respond to an action. Suppose, you have to build a dynamic website using Vue.js then you'll most likely want it to be able to respond to events.

For example, if your Vue.js website has clickable buttons, forms, etc., you would surely want that if a user clicks a button, submits a form, or even moves their mouse Vue.js website would respond somehow.

Vue.js Event Handling

To handle an event with Vue.js, we have to add the v-on directive to the relevant DOM element. For example, if you want to handle a click on a button element then you should add the following code to your Vue template:

Syntax:

  1. <button v-on:click="clickHandler"></button>   

You can also use convenient shorthand @ instead of the v-on directive. It would look like this:

  1. <button @click="clickHandler"></button>  

We add an argument to the v-on directive, which will be the name of the event we want to handle. In the above example case, it is a click event. After that, we have to bind an expression to the directive, which will normally be a method you want to use to handle the event. In this case, we've called it clickHandler.

Types of Vue.js events that you can handle

You can handle a lot of other Vue.js DOM events besides click. Vue.js can handle any kind of web or mobile native events as well as custom events. The most common events that are generally used to be handled:

  • submit
  • keyup
  • drag
  • scroll
  • error
  • abort
  • mouseover
  • mouseout
  • load etc.

Event Handling Methods

Let's see some simple examples to deploy s event handling methods.

Click Event

See the following example to demonstrate the click event handling in Vue.js.

Index.html file:

  1. <html>  
  2.    <head>  
  3.       <title>Vue.js Event Handling</title>  
  4.       <link rel="stylesheet" href="index.css">  
  5.         <script src="https://cdn.jsdelivr.net/npm/vue/dist/vue.js"></script>  
  6.     </head>  
  7.     <body>  
  8.       <div id="app">  
  9.   <button v-on:click = "displaynumbers">Click Me to Add No.</button>  
  10.          <h2> Add Number 100 + 200 = {{total}}</h2>  
  11.       </div>  
  12.       <script src="index.js"></script>  
  13.    </body>  
  14. </html>  

Index.js file:

  1. var vm = new Vue({  
  2.             el: "#app",  
  3.             data: {  
  4.                num1: 50,  
  5.                num2 : 100,  
  6.                total : ''  
  7.             },  
  8.             methods : {  
  9.                displaynumbers : function(event) {  
  10.                   console.log(event);  
  11.                   return thisthis.total =  this.num1+ this.num2;  
  12.                }  
  13.             },  
  14.          })  

Let's use a simple CSS file to make the output more attractive.

Index.css file:

  1. html, body {  
  2.     margin: 5px;  
  3.     padding: 0;  
  4. }  

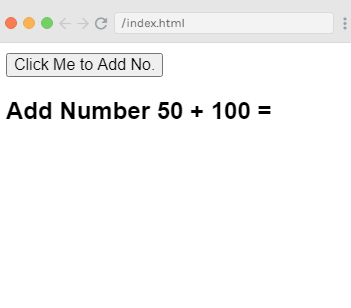
After the execution of the program, you will see the following output:

Output:
Vue.js Events

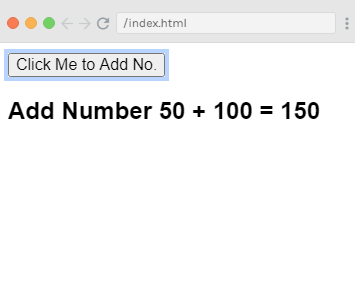
When you click on the above button, you can see that it has added the number. See the output:
Vue.js Events

Example explanation

In the above example, we have assigned the following click event for the DOM element.

  1. <button v-on:click = "displaynumbers">Click Me to Add No.</button>   

When you click on the button, it will call the method 'displaynumbers', which takes in the event, and we see the output.

We can also assign a shorthand @ instead of v-on directive. You can call the following event, and the result will be the same.

  1. <button @click = "displaynumbers">Click ME</button>  

Mouseover and Mouseout Event

Now, let's check two new Vue.js events named mouseover & mouseout. See the following example.

Index.html file:

  1. <html>  
  2.    <head>  
  3.       <title>Vue.js Event Handling</title>  
  4.       <link rel="stylesheet" href="index.css">  
  5.         <script src="https://cdn.jsdelivr.net/npm/vue/dist/vue.js"></script>  
  6.     </head>  
  7.     <body>  
  8.       <div id = "databinding">  
  9.          <div v-bind:style = "styleobj" v-on:mouseover = "changebgcolor" v-on:mouseout = "originalcolor"></div>  
  10.       </div>  
  11.       <script src="index.js"></script>  
  12.    </body>  
  13. </html>  

Index.js file:

  1. var vm = new Vue({  
  2.    el: '#databinding',  
  3.    data: {  
  4.       num1: 100,  
  5.       num2 : 200,  
  6.       total : '',  
  7.       styleobj : {  
  8.          width:"100px",  
  9.          height:"100px",  
  10.          backgroundColor:"red"  
  11.       }  
  12.    },  
  13.    methods : {  
  14.       changebgcolor : function() {  
  15.          this.styleobj.backgroundColor = "blue";  
  16.       },  
  17.       originalcolor : function() {  
  18.          this.styleobj.backgroundColor = "brown";  
  19.       }  
  20.    },  
  21. })  

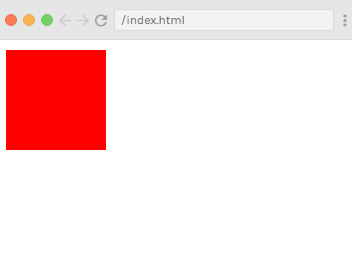
After the execution of the program, you will see the following output:

Output:
Vue.js Events

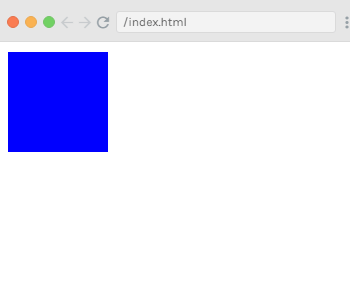
You can see in the output that the default background color is red. Now, move your mouse cursor to the box, and the box color will be changed to blue. See the output.
Vue.js Events

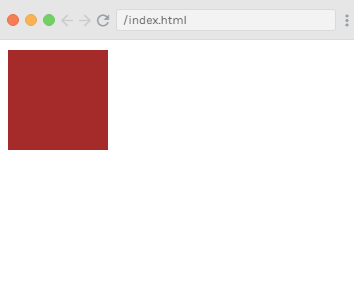
Now, move your mouse cursor out of the box, and the box color will be changed to brown. See the output.
Vue.js Events

Example explanation

In the above example, we have created a div element with width and height as 100px. The default background color of this div is red. On mouseover, the background color is changed to blue, and on mouseout, it is changed to brown.

During the mouseover, a method is called changebgcolor and once we move the mouse out of the div, a method is called originalcolor.

  1. <div v-bind:style = "styleobj" v-on:mouseover = "changebgcolor" v-on:mouseout = "originalcolor"></div>   

Here, we have used two events mouseover and mouseout and assigned them to the div. We have created a styleobj variable and given the required style to be assigned to the div.

The same variable is binded to the div using v-bind:style = "styleobj". In changebgcolor, we are changing the color to green using the following code.

  1. changebgcolor : function() {  
  2.    this.styleobj.backgroundColor = "blue";  
  3. }  

Using the stylobj variable, the color is changed to green. Similarly, we used the following code to change color to brown

  1. originalcolor : function() {  
  2.    this.styleobj.backgroundColor = "brown";   

Vue.js Event Modifiers

Vue.js provides some event modifiers available on v-on attribute. We can very easily call event.preventDefault() or event.stopPropagation() inside event handlers. Here, .prevent and .stop are event modifiers.

These modifiers are directive postfixes denoted by a dot. Following is the list of most common modifiers available on v-on attribute:

  • .once
  • .prevent
  • .stop
  • .capture
  • .self
  • .passive

The .once Event Modifier

It allows the event to execute only once.

Syntax:

  1. <button v-on:click.once = "buttonclicked">Click Once</button>  

You must add the dot operator while calling the modifiers as shown in the syntax above.

Let's see a simple example to understand the concept and working of the once modifier.

Example

Index.html file:

  1. <html>  
  2.    <head>  
  3.       <title>Vue.js Event Handling</title>  
  4.       <link rel="stylesheet" href="index.css">  
  5.         <script src="https://cdn.jsdelivr.net/npm/vue/dist/vue.js"></script>  
  6.     </head>  
  7.     <body>  
  8.       <div id = "eg_2">  
  9.          <button v-on:click.once = "buttonclickedonce" v-bind:style = "styleobj">Just once clickable</button>  
  10.          Output:{{clicknum}}  
  11.          <br/><br/>  
  12.          <button v-on:click = "buttonclicked"  v-bind:style = "styleobj">Click Me anytime</button>  
  13.          Output:{{clicknum1}}  
  14.       </div>  
  15.       <script src="index.js"></script>  
  16.    </body>  
  17. </html>  

Index.js file:

  1. var vm = new Vue({  
  2.             el: '#eg_2',  
  3.             data: {  
  4.                clicknum : 0,  
  5.                clicknum1 :0,  
  6.                styleobj: {  
  7.                   backgroundColor: '#2196F3!important',  
  8.                   cursor: 'pointer',  
  9.                   padding: '8px 16px',  
  10.                   verticalAlign: 'middle',  
  11.                }  
  12.             },  
  13.             methods : {  
  14.                buttonclickedonce : function() {  
  15.                   this.clicknum++;  
  16.                },  
  17.                buttonclicked : function() {  
  18.                   this.clicknum1++;  
  19.                }  
  20.             }  
  21.          })  

After the execution of the program, you will see the following output:

Output:
Vue.js Events

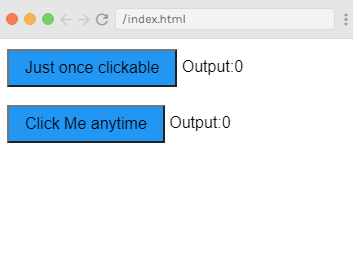
You can see that we have created two buttons in the above example. The button with Just once clickable label has added the once modifier and the other button is without any modifier.

  1. <button v-on:click.once = "buttonclickedonce" v-bind:style = "styleobj">Just once clickable</button>  
  2. <button v-on:click = "buttonclicked"  v-bind:style = "styleobj">Click Me anytime</button>  

When you click on the first button, it calls the method "buttonclickedonce" and after clicking on the second button, it calls the method "buttonclicked".

  1. buttonclickedonce : function() {  
  2.    this.clicknum++;  
  3. },  
  4. buttonclicked : function() {  
  5.    this.clicknum1++;  
  6. }  

We have also defined two variables in the clicknum and clicknum1. Both are incremented when the button is clicked. Both variables are initialized to 0. You can see it on the above output.

When you click on the first button, the variable clicknum is incremented by 1. On the second click, the number is not incremented as the modifier prevents it from executing or performing any action item assigned on the click of the button.

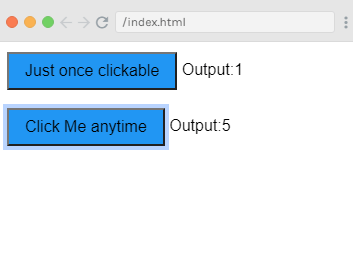
When you click on the second button, the same action is carried out, i.e. the variable is incremented. On every click, the value is incremented and displayed. See the following output:
Vue.js Events

After clicking both buttons five times, you can see that the first button is shown just one time clicked and second button is shown 5 times.

The .prevent Event Modifier

The .prevent event modifier is used when you don't want to open a specific id or url by clicking on a button.

Syntax:

  1. <a href = "An specific url" v-on:click.prevent = "clickme">Click Me</a>  

Let's see two examples, one without .prevent event modifier and one with it to understand it clearly.

Index.html file:

  1. <html>  
  2.    <head>  
  3.       <title>Vue.js Event Handling</title>  
  4.       <link rel="stylesheet" href="index.css">  
  5.         <script src="https://cdn.jsdelivr.net/npm/vue/dist/vue.js"></script>  
  6.     </head>  
  7.     <body>  
  8.       <div id = "eg_3">  
  9.          <a href = "http://www.google.com" v-on:click = "clickme" target = "_blank" v-bind:style = "styleobj">Click Me</a>  
  10.       </div>  
  11.       <script src="index.js"></script>  
  12.    </body>  
  13. </html>  

Index.js file:

  1. var vm = new Vue({  
  2.             el: '#eg_3',  
  3.             data: {  
  4.                clicknum : 0,  
  5.                clicknum1 :0,  
  6.                styleobj: {  
  7.                   color: '#4CAF50',  
  8.                   marginLeft: '20px',  
  9.                   fontSize: '30px'  
  10.                }  
  11.             },  
  12.             methods : {  
  13.                clickme : function() {  
  14.                   alert("Anchor tag is clicked");  
  15.                }  
  16.             }  
  17.          })  

After the execution of the program, you will see the following output:

Output:
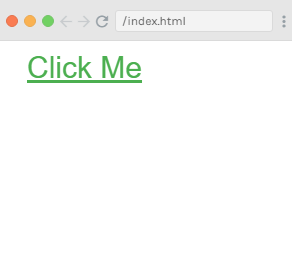
Vue.js Events

When you click on the "Click Me" button, you will see a pop-up message. See the below image.

Vue.js Events

After clicking on the "OK" button, the targeted url will be open as the following image:
Vue.js Events

Now, we will use the .prevent event modifier to see the result. Add the following code in Index.html file.

  1. <a href = "http://www.google.com" v-on:click.prevent = "clickme" target = "_blank" v-bind:style = "styleobj">Click Me</a>  

Once you added the code, if we click on the button, it will send an alert message but will not open the url anymore.

Replace the Index.html file with the following code:

  1. <html>  
  2.    <head>  
  3.       <title>Vue.js Event Handling</title>  
  4.       <link rel="stylesheet" href="index.css">  
  5.         <script src="https://cdn.jsdelivr.net/npm/vue/dist/vue.js"></script>  
  6.     </head>  
  7.     <body>  
  8.       <div id = "eg_3">  
  9.         <a href = "http://www.google.com" v-on:click.prevent = "clickme" target = "_blank" v-bind:style = "styleobj">Click Me</a>  
  10.       </div>  
  11.       <script src="index.js"></script>  
  12.    </body>  
  13. </html>  

Output:

Vue.js Events

Click on the "Click Me" button, and you will see that the pop-up box is open.

Vue.js Events

Now, click on the "OK" button, and you will see that the specified url is not open anymore.

Vue.js Event Key Modifiers

In Vue.js, key modifiers are used to handle and control the event handling. While listening for keyboard events, we require checking for specific keys. Vue.js provides a way to add key modifiers for v-on while listening for key events.

For example, suppose you have a textbox and want to call the method only when we press the Enter button. You can achieve it by adding key modifiers to the events as follows.

Syntax:

  1. <input type = "text"  v-on: event_name.key_name= "showinputvalue"/>   

Example: If you want to apply keyup and enter button to your event, you can achieve it by using the following code:

  1. <input type = "text"  v-on:keyup.enter = "showinputvalue"/>   

Note: You can also use multiple keynames to your event. For example: Let's use keyup, ctrl, and enter keynames.

  1. <input type = "text"  v-on.keyup.ctrl.enter= "showinputvalue"/>   

Let's see an example to demonstrate key modifiers with Vue.js events and understand it well.

Index.html file:

  1. <html>  
  2.    <head>  
  3.       <title>Vue.js Event Handling</title>  
  4.       <link rel="stylesheet" href="index.css">  
  5.         <script src="https://cdn.jsdelivr.net/npm/vue/dist/vue.js"></script>  
  6.     </head>  
  7.     <body>  
  8.      <div id = "key_1">  
  9.          <input type = "text" v-on:keyup.enter = "showinputvalue" v-bind:style = "styleobj" placeholder = "Type your name here.."/>  
  10.          <h3> {{name}}</h3>  
  11.       </div>  
  12.       <script src="index.js"></script>  
  13.    </body>  
  14. </html>  

Index.js file:

  1. var vm = new Vue({  
  2.             el: '#key_1',  
  3.             data: {  
  4.                name:'',  
  5.                styleobj: {  
  6.                   width: "100%",  
  7.                   padding: "12px 20px",  
  8.                   margin: "8px 0",  
  9.                   boxSizing: "border-box"  
  10.                }  
  11.             },  
  12.             methods : {  
  13.                showinputvalue : function(event) {  
  14.                   this.name=event.target.value;  
  15.                }  
  16.             }  
  17.          })  

After the execution of the program, you will see the following output:

Output:
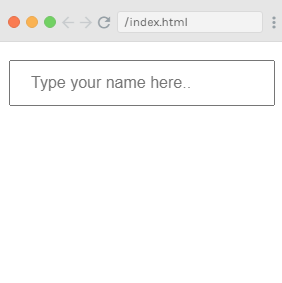
Vue.js Events

Write something in the textbox and see the result.
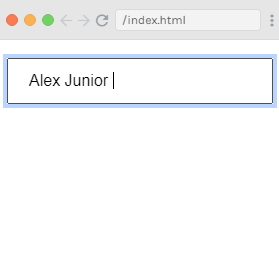
Vue.js Events

In the above output, you can see that even after typing the name in the textbox, it does not appear in the result. Now, press the enter button, and the name will be displayed. See the following output:
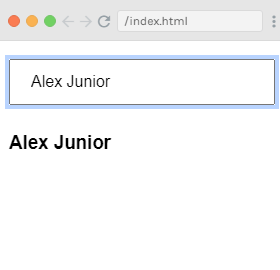
Vue.js Events

You can use the following key modifiers with your events.

  • .enter
  • .tab
  • .delete (It reads both "Delete" and "Backspace" keys)
  • .esc
  • .space
  • .up
  • .down
  • .left
  • .right

Vue.js Custom Events

Custom events are used when we need to tell the parent that we want to make changes in the child component. The parent component can pass data to its component using the prop attribute.

The parent component can listen to the child component event using v-on attribute.

Let's see an example:

Index.html file:

  1. <html>  
  2.    <head>  
  3.       <title>Vue.js Event Handling</title>  
  4.       <link rel="stylesheet" href="index.css">  
  5.         <script src="https://cdn.jsdelivr.net/npm/vue/dist/vue.js"></script>  
  6.     </head>  
  7.     <body>  
  8.      <div id = "eg_2">  
  9.          <div id = "custom-event-example">  
  10.             <p style = "font-size:25px;">Language displayed : <b>{{ languageclicked }}</b></p>  
  11.             <button-counter  
  12.             v-for = "(item, index) in languages"  
  13.             v-bind:item = "item"  
  14.             v-bind:index = "index"  
  15.             v-on:showlanguage = "languagedisp">  
  16.             </button-counter>  
  17.          </div>  
  18.       </div>  
  19.       <script src="index.js"></script>  
  20.    </body>  
  21. </html>  

Index.js file:

  1. vue.component('button-counter', {  
  2.             template: '<button v-on:click = "displayLanguage(item)"><span style = "font-size:25px;">{{ item }}</span></button>',  
  3.             data: function () {  
  4.                return {  
  5.                   counter: 0  
  6.                }  
  7.             },  
  8.             props:['item'],  
  9.             methods: {  
  10.                displayLanguage: function (lng) {  
  11.                   console.log(lng);  
  12.                   this.$emit('showlanguage', lng);  
  13.                }  
  14.             },  
  15.          });  
  16.          var vm = new Vue({  
  17.             el: '#eg_2',  
  18.             data: {  
  19.                languageclicked: "",  
  20.                languages : ["Java", "C", "C++", "Python", "Javascript", "Angular", "Data Structure", "jQuery"]  
  21.             },  
  22.             methods: {  
  23.                languagedisp: function (a) {  
  24.                   this.languageclicked = a;  
  25.                }  
  26.             }  
  27.          })  

After the execution of the program, you will see the following output:

Output:

Vue.js Events

If you click on any of the buttons, it will be displayed in the output. Let's click on the Python button and see the result.

Vue.js Events

Example Explanation

The above example shows the data transfer between the parent component and the child component. The parent component is created using the following code.

  1. <button-counter  
  2.    v-for = "(item, index) in languages"  
  3.    v-bind:item = "item"  
  4.    v-bind:index = "index"  
  5.    v-on:showlanguage = "languagedisp">  
  6. </button-counter>  

Here, the v-for attribute will loop with the languages array that contains a list of languages in it. We have to send the details to the child component, so the values of the array are stored in the item and the index.

  1. v-bind:item = "item"  
  2. v-bind:index = "index"  

To use the values of the array, first bind it first to a variable and then variable is referred using props property:

  1. vue.component('button-counter', {  
  2.    template: '<button v-on:click = "displayLanguage(item)"><span style = "font-size:25px;">{{ item }}</span></button>',  
  3.    data: function () {  
  4.       return {  
  5.          counter: 0  
  6.       }  
  7.    },  
  8.    props:['item'],  
  9.    methods: {  
  10.       displayLanguage: function (lng) {  
  11.          console.log(lng);  
  12.          this.$emit('showlanguage', lng);  
  13.       }  
  14.    },  
  15. });  

The name of the event is showlanguage and it calls a method named languagedisp which which we have defined in the Vue instance.

In the component, the template is defined as follows -

  1. template: '<button v-on:click = "displayLanguage(item)"><span style = "font-size:25px;">{{ item }}</span></button>',  

The method displayLanguage is used to call this.$emit('showlanguage', lng);

$emit is used to call the parent component method. The method showlanguage is the event name given on the component with v-on.

Now, we have passed a parameter. The passed parameter is the name of the language clicked to the method of the main parent Vue instance. It is defined as follows:

  1. var vm = new Vue({  
  2.    el: '#databinding',  
  3.    data: {  
  4.       languageclicked: "",  
  5.       languages : ["Java", "C", "C++", "Python", "Javascript", "Angular", "Data Structure", "jQuery"]  
  6.    },  
  7.    methods: {  
  8.       languagedisp: function (a) {  
  9.          this.languageclicked = a;  
  10.       }  
  11.    }  
  12. })  

Now, emit triggers the showlanguage which in turn calls languagedisp from the Vue instance methods. It assigns the clicked button value to the variable languageclicked and then the clicked value language is displayed in the output which you have seen in the above image.


by :javatpoint
  • Share This:  
  •  Facebook
  •  Twitter
  •  Google+
  •  Stumble
  •  Digg
Email ThisBlogThis!Share to XShare to Facebook

Related Posts:

  • Vue.js Reactivity System Vue.js Reactivity System The reactivity system is one of the most distinctive features of Vue.js. In Vue.js, models are plain JavaScript object… Read More
  • File Upload using Vue js AxiosIn this tutorial, i will show you files uploading with vuejs and axios. Vue and Axios are working together awesome for making HTTP requests. you can s… Read More
  • Vue toastr notifications with code examplewe will integrate toast notification using vue-toasted npm package.vue-toasted npm package will provide method to generate toastr notifications like s… Read More
  • Vue.js Render functions Vue.js Render functions Vue.js recommends us to use templates to build HTML. Here, we can use the render function as a closer-to-the-compiler a… Read More
  • Vue.js TutorialVue.js TutorialVue.js Tutorial Vue.js Tutorial open link Vue.js Installation Vue.js Getting started Declarative Rendering Con… Read More
Newer Post Older Post Home

5 comments:

  1. RGB Web TechJanuary 25, 2021 at 1:29 AM

    Nice Blog ,your blog is sharing unique information....

    We provide Web Design, Web Development, Digital Marketing (SEO, SEM, SMO, SMM), and Mobile App Development services.

    * Web Design Services | Web Design Solutions
    * Web Design Packages | Web Development Packages
    * Technical SEO Checklist | Website Audit Checklist
    * Online HTML Editor | Wysiwyg HTML Editor
    * Career opportunities | Online Jobs From Home
    * Web Designing Course | Free Online Courses with Certificates

    For more information visit our website at Digital Marketing Services | Online Marketing Services

    ReplyDelete
    Replies
      Reply
  2. CnX PlayerJanuary 28, 2021 at 1:09 AM

    Nice Post, CnX Player offers a fantastic Video Casting feature that gives an absolute freedom to all its users to cast ANY (literally ANY) video format and ANY video codec from PC to TV within a fraction of seconds! It is a Best Media Player.

    Features @ CnX Player - Best Media Player

    * Stream ANY video from PC to Chromecast
    * Cast ALL Videos From PC To All Smart TV
    * Stream ANY video from PC to Chromecast
    * Cast Videos from iPhone iPad to Firestick TV
    * Stream any videos from PC to MI TV
    * Cast ALL Videos from PC to Android TV
    * Stream ANY Video From PC To SAMSUNG TV

    For more information visit our website at Best Media Player - CnX Player

    ReplyDelete
    Replies
      Reply
  3. CnX PlayerJanuary 28, 2021 at 1:10 AM

    Nice Post, CnX Player offers a fantastic Video Casting feature that gives an absolute freedom to all its users to cast ANY (literally ANY) video format and ANY video codec from PC to TV within a fraction of seconds! It is a Best Media Player.

    Features @ CnX Player - Best Media Player

    * Stream ANY video from PC to Chromecast
    * Cast ALL Videos From PC To All Smart TV
    * Stream ANY video from PC to Chromecast
    * Cast Videos from iPhone iPad to Firestick TV
    * Stream any videos from PC to MI TV
    * Cast ALL Videos from PC to Android TV
    * Stream ANY Video From PC To SAMSUNG TV

    For more information visit our website at Best Media Player - CnX Player

    ReplyDelete
    Replies
      Reply
  4. AbhiApril 9, 2021 at 1:56 AM

    How To Create a Top Navigation Bar
    How to loop json data in jQuery
    Advanced Search form using PHP and MySQL
    How To Create a Side Navigation Menu
    Send and Receive Emails with Node JS
    Create Simple Pagination with PHP and MySQL
    Formatting the Current Date and Time in PHP
    IP address tools for node.js
    Types of plots in R

    ReplyDelete
    Replies
      Reply
  5. Kailey RobinsonApril 12, 2021 at 3:25 AM

    Thanks for the always useful information. This is great information to help peoples and nice article written by writer. CnX Player is a powerful & efficient 4K ultra HD enabled video player for Windows 10 PC & Tablet, Android and iOS – iPhone & iPad.

    Download Media Player for Windows 10 - Microsoft Store
    Download Video Player for Android from Google Play
    Download Video Player for iPhone/iPad from Apple App Store

    ReplyDelete
    Replies
      Reply
Add comment
Load more...

Thanks

Meta

Popular Posts

  • Spring boot app (error: method getFirst()) failed to run at local machine, but can run on server
    The Spring boot app can run on the online server. Now, we want to replicate the same app at the local machine but the Spring boot jar file f...
  • Log activity in a Laravel app with Spatie/Laravel-Activitylog
      Requirements This package needs PHP 8.1+ and Laravel 9.0 or higher. The latest version of this package needs PHP 8.2+ and Laravel 8 or hig...
  • Laravel auth login with phone or email
          <?php     Laravel auth login with phone or email     <? php     namespace App \ Http \ Controllers \ Auth ;         use ...
  • Failed to install 'cordova-plugin-firebase': CordovaError: Uh oh
    I had follow these steps to install an configure firebase to my cordova project for cloud messaging. https://medium.com/@felipepucinelli/how...
  • Vue3 :style backgroundImage not working with require
    I'm trying to migrate a Vue 2 project to Vue 3. In Vue 2 I used v-bind style as follow: In Vue 3 this doesn't work... I tried a...

Categories

  • Ajax (26)
  • Bootstrap (30)
  • DBMS (42)
  • HTML (12)
  • HTML5 (45)
  • JavaScript (10)
  • Jquery (34)
  • Jquery UI (2)
  • JqueryUI (32)
  • Laravel (1017)
  • Laravel Tutorials (23)
  • Laravel-Question (6)
  • Magento (9)
  • Magento 2 (95)
  • MariaDB (1)
  • MySql Tutorial (2)
  • PHP-Interview-Questions (3)
  • Php Question (13)
  • Python (36)
  • RDBMS (13)
  • SQL Tutorial (79)
  • Vue.js Tutorial (68)
  • Wordpress (150)
  • Wordpress Theme (3)
  • codeigniter (108)
  • oops (4)
  • php (853)

Social Media Links

  • Follow on Twitter
  • Like on Facebook
  • Subscribe on Youtube
  • Follow on Instagram

Pages

  • Home
  • Contact Us
  • Privacy Policy
  • About us

Blog Archive

  • September (100)
  • August (50)
  • July (56)
  • June (46)
  • May (59)
  • April (50)
  • March (60)
  • February (42)
  • January (53)
  • December (58)
  • November (61)
  • October (39)
  • September (36)
  • August (36)
  • July (34)
  • June (34)
  • May (36)
  • April (29)
  • March (82)
  • February (1)
  • January (8)
  • December (14)
  • November (41)
  • October (13)
  • September (5)
  • August (48)
  • July (9)
  • June (6)
  • May (119)
  • April (259)
  • March (122)
  • February (368)
  • January (33)
  • October (2)
  • July (11)
  • June (29)
  • May (25)
  • April (168)
  • March (93)
  • February (60)
  • January (28)
  • December (195)
  • November (24)
  • October (40)
  • September (55)
  • August (6)
  • July (48)
  • May (2)
  • January (2)
  • July (6)
  • June (6)
  • February (17)
  • January (69)
  • December (122)
  • November (56)
  • October (92)
  • September (76)
  • August (6)

  • Failed to install 'cordova-plugin-firebase': CordovaError: Uh oh - 9/21/2024
  • pyspark XPath Query Returns Lists Omitting Missing Values Instead of Including None - 9/20/2024
  • SQL REPL from within Python/Sqlalchemy/Psychopg2 - 9/20/2024
  • MySql Explain with Tobias Petry - 9/20/2024
  • How to combine information from different devices into one common abstract virtual disk? [closed] - 9/20/2024

Laravel News

  • Auto-translate Application Strings with Laratext - 5/16/2025
  • Simplify Factory Associations with Laravel's UseFactory Attribute - 5/13/2025
  • Improved Installation and Frontend Hooks in Laravel Echo 2.1 - 5/15/2025
  • Filter Model Attributes with Laravel's New except() Method - 5/13/2025
  • Arr::from() Method in Laravel 12.14 - 5/14/2025

Copyright © 2025 CoderFunda | Powered by Blogger
Design by Coderfunda | Blogger Theme by Coderfunda | Distributed By Coderfunda