
Vue.js Render functions
Vue.js recommends us to use templates to build HTML. Here, we can use the render function as a closer-to-the-compiler alternative to templates.
Vue.js render functions are also used along with Vue.js components. Most of the time, the render function is created by the Vue.js compiler. When you specify a template on your component, this template's content is processed by the Vue.js compiler that will return a render function. The render function essentially returns a virtual DOM node, which will be rendered by Vue.js in your browser DOM.
What is the virtual Document Object Model or "DOM"?
The virtual DOM allows Vue.js to render your component in its memory before updating your browser. This makes everything faster because it has to do only a few interactions with the browser. When Vue.js updates the browser DOM, it compares the updated virtual DOM to the previous one and updates the real DOM with the modified parts. That's how it enhances performance.
Let's take an example of a simple component and see what the render function puts the effect when we use it within the example.
Index.html file:
- <html>
- <head>
- <title>Vue.js Component</title>
- <link rel="stylesheet" href="index.css">
- <script src="https://cdn.jsdelivr.net/npm/vue/dist/vue.js"></script>
- </head>
- <body>
- <div id = "component_test">
- <testcomponent></testcomponent>
- </div>
- <script src="index.js"></script>
- </body>
- </html>
Index.js file:
- Vue.component('testcomponent',{
- template : '<h1>Hello Students!</h1>'
- });
- var vm = new Vue({
- el: '#component_test'
- })
Let's use a simple CSS file to make the output more attractive.
Index.css file:
- html, body {
- margin: 5px;
- padding: 0;
- }
After the execution of the program, you will see the following output:
Output:
Here, you can see that the component shows the above result as Hello Students. Now, if you reuse the component repeatedly, you will see that the result would be printed again and again. For example,
- <div id = "component_test">
- <testcomponent></testcomponent>
- <testcomponent></testcomponent>
- <testcomponent></testcomponent>
- <testcomponent></testcomponent>
- <testcomponent></testcomponent>
- </div>
Output:

Suppose, you don't want the same text to be printed again and again so, what will you do? Let's make some changes and type something inside the component as follows:
Index.html file:
- <html>
- <head>
- <title>Vue.js Component</title>
- <link rel="stylesheet" href="index.css">
- <script src="https://cdn.jsdelivr.net/npm/vue/dist/vue.js"></script>
- </head>
- <body>
- <div id = "component_test">
- <testcomponent>Hello Rahul!</testcomponent>
- <testcomponent>Hello James!</testcomponent>
- <testcomponent>Hello Alex!</testcomponent>
- <testcomponent>Hello Priti!</testcomponent>
- <testcomponent>Hello Mohan!</testcomponent>
- </div>
- <script src="index.js"></script>
- </body>
- </html>
Index.js file will be same as above.
After the execution of the program, you will see the following output:
Output:
You can see that the output remains the same as earlier. It does not change the text as we want.
Use of Slot
Now, we will use slots that are provided by components to get the desired result.
Syntax:
- template : '<h1><slot></slot></h1>',
See the following example:
Index.html file:
- <html>
- <head>
- <title>Vue.js Component</title>
- <link rel="stylesheet" href="index.css">
- <script src="https://cdn.jsdelivr.net/npm/vue/dist/vue.js"></script>
- </head>
- <body>
- <div id = "component_test">
- <testcomponent>Hello Rahul!</testcomponent>
- <testcomponent>Hello James!</testcomponent>
- <testcomponent>Hello Alex!</testcomponent>
- <testcomponent>Hello Priti!</testcomponent>
- <testcomponent>Hello Mohan!</testcomponent>
- </div>
- <script src="index.js"></script>
- </body>
- </html>
Index.js file:
- Vue.component('testcomponent',{
- template : '<h1><slot></slot></h1>',
- });
- var vm = new Vue({
- el: '#component_test'
- })
After the execution of the program, you will see the following output:
Output:

How to use render Function?
Suppose, you have to change the color and size of the results in output for example, we were using h1 tag in our previous examples and we want to change the HTML tag to p tag or div tag or any other tag for the same component. We have all the flexibility to do the changes by using the render function. Render function helps make the component dynamic and use the way it is required by keeping it common and helping pass arguments using the same component.
Let's see an example to demonstrate the use of render function:
Index.html file:
- <html>
- <head>
- <title>Vue.js Component</title>
- <link rel="stylesheet" href="index.css">
- <script src="https://cdn.jsdelivr.net/npm/vue/dist/vue.js"></script>
- </head>
- <body>
- <div id = "component_test">
- <testcomponent :elementtype = "'div,red,25,div1'">Hello Rahul!</testcomponent>
- <testcomponent :elementtype = "'h2,brown,25,div1'">Hello James!</testcomponent>
- <testcomponent :elementtype = "'p,blue,25,ptag'">Hello Alex!</testcomponent>
- <testcomponent :elementtype = "'div,green,25,divtag'">Hello Priti!</testcomponent>
- <testcomponent :elementtype = "'h4,blue,25,ptag'">Hello Mohan!</testcomponent>
- </div>
- <script src="index.js"></script>
- </body>
- </html>
Index.js file:
- Vue.component('testcomponent',{
- render :function(createElement){
- var a = this.elementtype.split(",");
- return createElement(a[0],{
- attrs:{
- id:a[3],
- style:"color:"+a[1]+";font-size:"+a[2]+";"
- }
- },
- this.$slots.default
- )
- },
- props:{
- elementtype:{
- attributes:String,
- required:true
- }
- }
- });
- var vm = new Vue({
- el: '#component_test'
- })
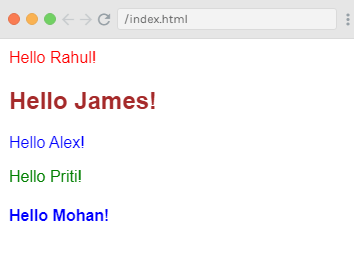
After the execution of the program, you will see the following output:
Output:
Example Explanation
In the above example, you can see that we have changed the component and added the render function with props property using the following code in the Index.js file:
- Vue.component('testcomponent',{
- render :function(createElement){
- var a = this.elementtype.split(",");
- return createElement(a[0],{
- attrs:{
- id:a[3],
- style:"color:"+a[1]+";font-size:"+a[2]+";"
- }
- },
- this.$slots.default
- )
- },
- props:{
- elementtype:{
- attributes:String,
- required:true
- }
- }
- });
Here, the props property looks like the following code:
- props:{
- elementtype:{
- attributes:String,
- required:true
- }
- }
- });
When we use components with render functions, they do not have a template tag or property. Instead of them, they define a function called render that receives a createElement in the following structure:
Syntax:
- (renderElement: String | Component, definition: Object, children: String | Array) argument
You can see it in the example as follows:
- render :function(createElement){
- var a = this.elementtype.split(",");
- return createElement(a[0],{
- attrs:{
- id:a[3],
- style:"color:"+a[1]+";font-size:"+a[2]+";"
- }
We have also defined a property named elementtype, which takes attributes field of type string. In another required field, we have mentioned that the field is mandatory.
See the render function code where we have used the elementtype property as follows:
- render :function(createElement){
- var a = this.elementtype.split(",");
- return createElement(a[0],{
- attrs:{
- id:a[3],
- style:"color:"+a[1]+";font-size:"+a[2]+";"
- }
- },
- this.$slots.default
- )
- },
The render function gets createElement as the argument and returns the same. The CreateElement creates the DOM element in the same way as it does in JavaScript. We have also split the elementtype on comma, using the values in the attrs field.
CreateElement takes the first param as the elementtag to be created. It is passed to the component as follows:
- <testcomponent :elementtype = "'div,red,25,div1'">Hello Rahul!</testcomponent>
The component accepts the props field as the above code. It starts with the symbol : and after that the name of the props is specified. After specifying the prop's name, we have to pass the element tag, color, fontsize, and the id of the element.
In the render function, you can see that the first element is the elementtag in createElement field which is given to the createElemet as follows:
- return createElement(a[0],{
- attrs:{
- id:a[3],
- style:"color:"+a[1]+";font-size:"+a[2]+";"
- }
- },
- this.$slots.default
- )
- },
In the above code, the a[0] is the html element tag. The next parameters are the attributes for the element tag. They are defined in the attr field as follows:
- attrs:{
- id:a[3],
- style:"color:"+a[1]+";font-size:"+a[2]+";"
- }
- },
Here, we have defined two attributes for the element tag: id tag and style tag.
- In the id tag, we have passed a[3], which is the value we have after splitting on comma.
- In the style tag, we have passed a[1] and a[2] respectively to define color and fontsize.
The message we have given in component is specified as follows:
- <testcomponent :elementtype = "'div,red,25,div1'">Hello Rahul!</testcomponent>
The slots field is used to define the text that we want to print in the createElement using the following code:
- this.$slots.default
After the execution of the program when you see the output, you will see that all the output entries are displayed in a specific way. This is because of the elements f the component structure we have defined in a specific way.
- <div id = "component_test">
- <testcomponent :elementtype = "'div,red,25,div1'">Hello Rahul!</testcomponent>
- <testcomponent :elementtype = "'h2,brown,25,div1'">Hello James!</testcomponent>
- <testcomponent :elementtype = "'p,blue,25,ptag'">Hello Alex!</testcomponent>
- <testcomponent :elementtype = "'div,green,25,divtag'">Hello Priti!</testcomponent>
- <testcomponent :elementtype = "'h4,blue,25,ptag'">Hello Mohan!</testcomponent>
- </div>
Event binding in Vue.js render functions
Let's see an example to demonstrate event binding in Vue.js render function. See the following example:
Example
Index.html file:
- <html>
- <head>
- <title>Vue.js Event binding in render function</title>
- <link rel="stylesheet" href="index.css">
- <script src="https://cdn.jsdelivr.net/npm/vue/dist/vue.js"></script>
- </head>
- <body>
- <div id="render_1"></div>
- <script src="index.js"></script>
- </body>
- </html>
Index.js file:
- new Vue({
- el: '#render_1',
- data() {
- return {
- clickCount: 0,
- }
- },
- methods: {
- onClick() {
- this.clickCount += 1;
- }
- },
- render(createElement) {
- const button = createElement('button', {
- on: {
- click: this.onClick
- }
- }, 'Click me');
- const counter = createElement('span', [
- 'Number of clicks:',
- this.clickCount
- ]);
- return createElement('div', [
- button, counter
- ])
- }
- });
After the execution of the program, you will see the following output:
Output:
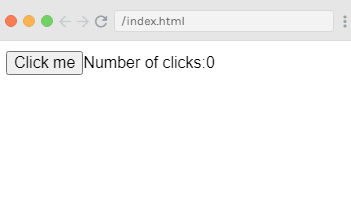
When you click on the "Click me" button, you will see that the number of clicks has been displayed as how many times you have clicked on the button. See the output:
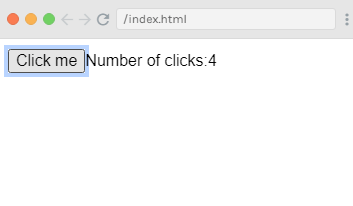
In the above example, the button is clicked four times.


0 comments:
Post a Comment
Thanks