
How to edit the custom style of checkout step
Customize the style of a checkout step means removing , disabling or adding a component in the checkout page.
Using custom checkout steps enables you to create special checkout steps that are visible to your customers and support them during the checkout process.
You can explore more about Magento 2 One-step checkout module
Since the topic covers quite a wide range, We will start with the example from Magento Official Devdocs document. And then we will add our own component (newsletter register component)
Related Topics
- Magento 2 Customize Checkout topic
- Add a custom checkout field in Magento 2
- Magento 2 Optimized Checkout Page
- How to add a new input form to checkout
- Customization Checkout Page
- Checkout Page 2 Columns
- How to add a new step in checkout page
Customize the style of a checkout step.
- Step 1: Understand the example from Devdocs document
- Step 2: Add our new Newsletter Register component
- Step 2.1: Create a js file
- Step 2.2: Create the template html file
- Step 2.3: Add our component to the checkout page’s layout
- Step 2.4: Disable newsletter register component
- Step 2.5: Remove our component
You should know how to create a basic Magento 2 module. All of customized files will be inside this module.
Let’s begin.
Step 1: Understand the example from Devdocs document.
Devdocs gives us the example from Magento Shipping module which creates a policy component.
Here is the code that adds the component to the layout.
<item name="shipping_policy" xsi:type="array">
  <item name="component" xsi:type="string">Magento_Shipping/js/view/checkout/shipping/shipping-policy</item>
</item>
As you can see, the component is just a javascript file (js). Let’s open it vendor/magento/module-shipping/view/frontend/web/js/view/checkout/shipping/shipping-policy.js
/**
 * Copyright © 2013-2017 Magento, Inc. All rights reserved.
 * See COPYING.txt for license details.
 */
define([
    'uiComponent',
    'Magento_Shipping/js/model/config'

], function (Component, config) {
    'use strict';

    return Component.extend({
        defaults: {
            template: 'Magento_Shipping/checkout/shipping/shipping-policy'
        },
        config: config()
    });
});
Not much here, it just defines its template vendor/magento/module-shipping/view/frontend/web/template/checkout/shipping/shipping-policy.html
So to conclude, a component contains a js and take a html file as its template.
Step 2: Add our new Newsletter Register component.
Step 2.1: Create a js file.
Create the newsletter.js file under Mageplaza/HelloWorld/view/frontend/web/js/view directory.
The code:
define(
    [
        'ko',
        'uiComponent'
    ],
    function (ko, Component) {
        "use strict";

        return Component.extend({
            defaults: {
                template: 'Mageplaza_HelloWorld/newsletter'
            },
            isRegisterNewsletter: true
        });
    }
);
Step 2.2: Create the template html file.
Create the newsletter.html file under Mageplaza/HelloWorld/view/frontend/web/template directory.
The code:
<div class="col-mp mp-12">
    <input type="checkbox" name="newsletter" data-bind="checked: isRegisterNewsletter, attr: {id: 'place-order-newsletter'}"/>
    <label data-bind="attr: {for: 'place-order-newsletter'}"><span data-bind="i18n: 'Register for newsletter'"></span></label>
</div>
Step 2.3: Add our component to the checkout page’s layout.
Add the following code to Mageplaza/HelloWorld/view/frontend/layout/checkout_index_index.xml
We add our component just before the shippingMethod form.
<page xmlns:xsi="http://www.w3.org/2001/XMLSchema-instance" layout="1column" xsi:noNamespaceSchemaLocation="urn:magento:framework:View/Layout/etc/page_configuration.xsd">
    <body>
        <referenceBlock name="checkout.root">
                <arguments>
                    <argument name="jsLayout" xsi:type="array">
                        <item name="components" xsi:type="array">
                            <item name="checkout" xsi:type="array">
                                <item name="children" xsi:type="array">
                                    <item name="steps" xsi:type="array">
                                        <item name="children" xsi:type="array">
                                            <!-- Modifying an existing step-->
                                            <item name="shipping-step" xsi:type="array">
                                                <item name="children" xsi:type="array">
                                                    <item name="shippingAddress" xsi:type="array">
                                                        <item name="children" xsi:type="array">
                                                            <item name="before-form" xsi:type="array">
                                                                <item name="children" xsi:type="array">
                                                                    <item name="newsletter" xsi:type="array">
                                                                        <item name="component" xsi:type="string">Mageplaza_HelloWorld/js/view/newsletter</item>
                                                                    </item>
                                                                </item>
                                                            </item>
                                                        </item>
                                                    </item>
                                                </item>
                                            </item>

                                        </item>
                                    </item>
                                </item>
                            </item>
                        </item>
                    </argument>
                </arguments>
        </referenceBlock>
    </body>
</page>
Clean cache, refresh your browser, the result will appear like this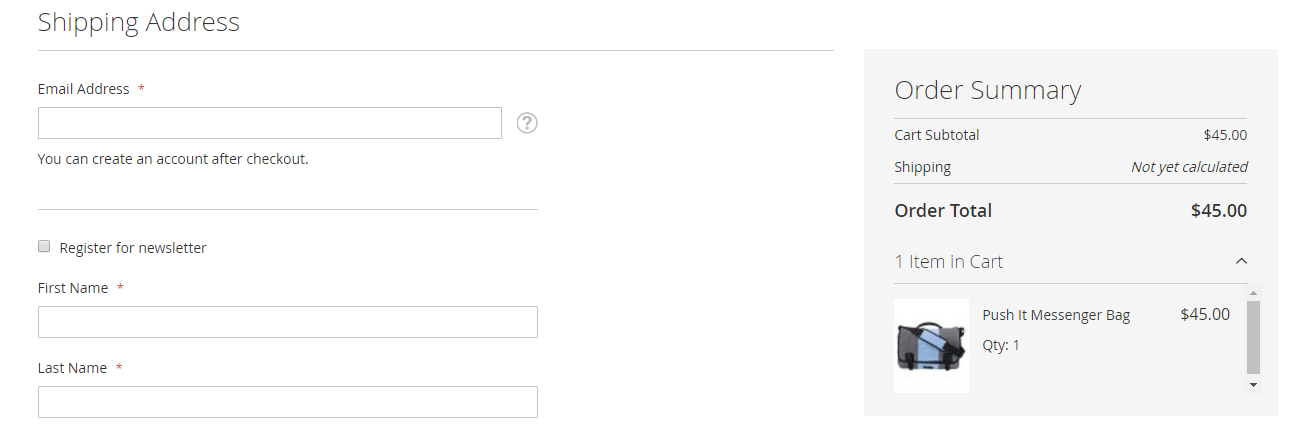
Step 2.4: Disable newsletter register component.
Here is the code to disable a component.
<item name="config" xsi:type="array">
       <item name="componentDisabled" xsi:type="boolean">true</item>
</item>
How it is in the whole node
<item name="newsletter" xsi:type="array">
       <item name="component" xsi:type="string">Mageplaza_HelloWorld/js/view/newsletter</item>
       <item name="config" xsi:type="array">
             <item name="componentDisabled" xsi:type="boolean">true</item>
       </item>
</item>
Step 2.5: Remove our component.
To remove a component, you need to create a plugin for the \Magento\Checkout\Block\Checkout\LayoutProcessor::process method. And implement the around method. This is what Devdocs advices.
As suggested, we implement the aroundProcess method and add the following code
public function aroundProcess($subject, $proceed, $jsLayout)
{
        unset($jsLayout['components']['checkout']['children']['steps']['children']['shipping-step']['children']['shippingAddress']['children']['before-form']['children']['newsletter']);
        $returnValue = $proceed($jsLayout);
        return $returnValue;
}
Here is the difference between Disabling and Removing a component when rendering in real time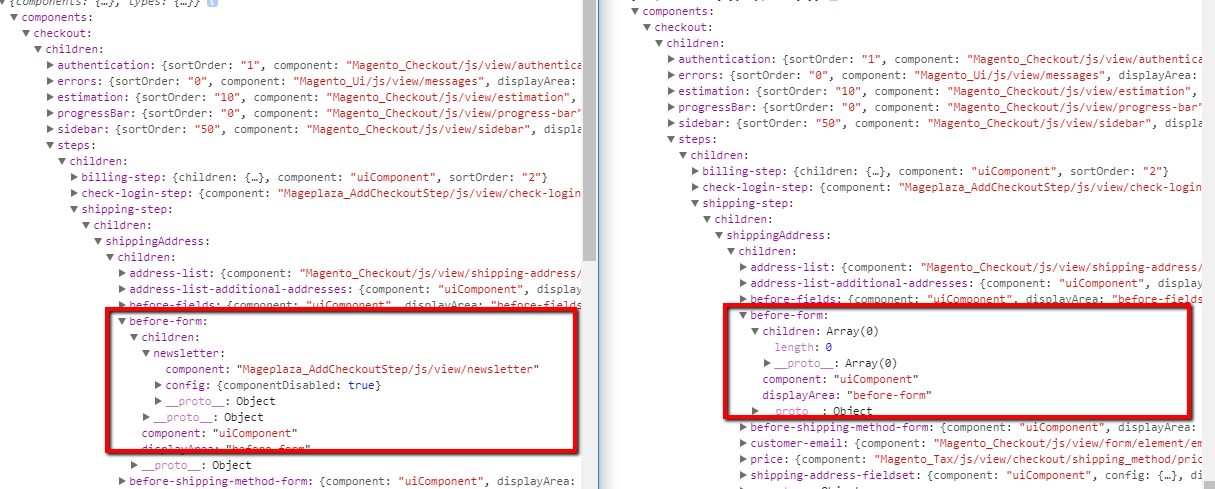
Conclusion
This tutorial has guided you through how to customize a checkout step in Magento 2. It particularly shows you how to enable and disable the newsletter register component which is one of the important components in Magento 2 checkout. I hope this tutorial is helpful for you to customize your Magento 2 Default checkout and expand your store’s checkout functionalities.
by mageplaza . com

0 comments:
Post a Comment
Thanks