
We have seen components and the usage of it. For example, we have a content that needs to be reused across the project. We can convert the same as a component and use it.
Let’s take a look at an example of a simple component and see what the render function has to do within it.
Example
<html>
   <head>
      <title>VueJs Instance</title>
      <script type = "text/javascript" src = "js/vue.js"></script>
   </head>
   <body>
      <div id = "component_test">
         <testcomponent></testcomponent>
      </div>
      <script type = "text/javascript">
         Vue.component('testcomponent',{
            template : '<h1>Hello World</h1>',
            data: function() {
            },
            methods:{
            }
         });
         var vm = new Vue({
            el: '#component_test'
         });
      </script>
   </body>
</html>
Consider the above example of a simple component that prints Hello World as shown in the following screenshot.
Now, if we want to reuse the component, we can do so by just printing it again. For example,
<div id = "component_test">
   <testcomponent></testcomponent>
   <testcomponent></testcomponent>
   <testcomponent></testcomponent>
   <testcomponent></testcomponent>
</div>
And the output will be the following.
However, now we need some changes to the component. We don’t want the same text to be printed. How can we change it? In case, we type something inside the component, will it be take into consideration?
Let us consider the following example and see what happens.
<div id = "component_test">
   <testcomponent>Hello Jai</testcomponent>
   <testcomponent>Hello Roy</testcomponent>
   <testcomponent>Hello Ria</testcomponent>
   <testcomponent>Hello Ben</testcomponent>
</div>
The output remains the same as we had seen earlier. It does not change the text as we want.
Component does provide something called as slots. Let’s make use of it and see if we get the desired results.
Example
<html>
   <head>
      <title>VueJs Instance</title>
      <script type = "text/javascript" src = "js/vue.js"></script>
   </head>
   <body>
      <div id = "component_test">
         <testcomponent>Hello Jai</testcomponent>
         <testcomponent>Hello Roy</testcomponent>
         <testcomponent>Hello Ria</testcomponent>
         <testcomponent>Hello Ben</testcomponent>
      </div>
      <script type = "text/javascript">
         Vue.component('testcomponent',{
            template : '<h1><slot></slot></h1>',
            data: function() {
            },
            methods:{
            }
         });
         var vm = new Vue({
            el: '#component_test'
         });
      </script>
   </body>
</html>
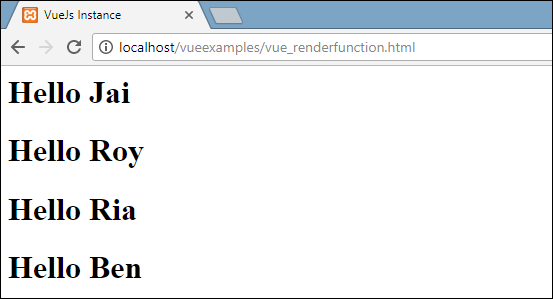
As seen in the above code, in the template we have added slot, hence now it takes the value to send inside the component as shown in the following screenshot.
Now, let us consider we want to change the color and size. For example, currently we are using h1 tag and we want to change the HTML tag to p tag or div tag for the same component. How can we have the flexibility to carry out so many changes?
We can do so with the help of the render function. Render function helps make the component dynamic and use the way it is required by keeping it common and helping pass arguments using the same component.
Example
<html>
   <head>
      <title>VueJs Instance</title>
      <script type = "text/javascript" src = "js/vue.js"></script>
   </head>
   <body>
      <div id = "component_test">
         <testcomponent :elementtype = "'div,red,25,div1'">Hello Jai</testcomponent>
         <testcomponent :elementtype = "'h3,green,25,h3tag'">Hello Roy</testcomponent>
         <testcomponent :elementtype = "'p,blue,25,ptag'">Hello Ria</testcomponent>
         <testcomponent :elementtype = "'div,green,25,divtag'">Hello Ben</testcomponent>
      </div>
      <script type = "text/javascript">
         Vue.component('testcomponent',{
            render :function(createElement){
               var a = this.elementtype.split(",");
               return createElement(a[0],{
                  attrs:{
                     id:a[3],
                     style:"color:"+a[1]+";font-size:"+a[2]+";"
                  }
               },
               this.$slots.default
               )
            },
            props:{
               elementtype:{
                  attributes:String,
                  required:true
               }
            }
         });
         var vm = new Vue({
            el: '#component_test'
         });
      </script>
   </body>
</html>
In the above code, we have changed the component and added the render function with props property using the following piece of code.
Vue.component('testcomponent',{
   render :function(createElement){
      var a = this.elementtype.split(",");
      return createElement(a[0],{
         attrs:{
            id:a[3],
            style:"color:"+a[1]+";font-size:"+a[2]+";"
         }
      },
      this.$slots.default
      )
   },
   props:{
      elementtype:{
         attributes:String,
         required:true
      }
   }
});
The props look like the following.
props:{
   elementtype:{
      attributes:String,
      required:true
   }
}
We have defined a property called elementtype, which takes attributes field of type string. Another required field, which mentions that the field is mandatory.
In the render function, we have used the elementtype property as seen in the following piece of code.
render :function(createElement){
   var a = this.elementtype.split(",");
   return createElement(a[0],{
      attrs:{
         id:a[3],
         style:"color:"+a[1]+";font-size:"+a[2]+";"
      }
   },
   this.$slots.default
   )
}
Render function takes createElement as the argument and returns the same. CreateElement creates the DOM element the same way as in JavaScript. We have also split the elementtype on comma, using the values in the attrs field.
CreateElement is taking the first param as the elementtag to be created. It is passed to the component using the following piece of code.
<testcomponent :elementtype = "'div,red,25,div1'">Hello Jai</testcomponent>
The component needs to take the props field as shown above. It starts with : and the name of the props. Here, we are passing the element tag, color, fontsize, and the id of the element.
In render function, in createElement, we are splitting on comma, so the first element is the elementtag, which is given to the createElemet as shown in the following piece of code.
return createElement(
   a[0],{
      attrs:{
         id:a[3],
         style:"color:"+a[1]+";font-size:"+a[2]+";"
      }
   },
   this.$slots.default
)
a[0] is the html element tag. The next parameter is the attributes for the element tag. They are defined in the attr field in the following piece of code.
attrs:{
   id:a[3],
   style:"color:"+a[1]+";font-size:"+a[2]+";"
}
We have defined two attributes for the element tag - id and style. To id, we are passing a[3], which is the value we have after splitting on comma. Using style, we have defined color and fontsize.
Last is the slot, that is the message we have given in the componentin the following piece of code.
<testcomponent :elementtype = "'div,red,25,div1'">Hello Jai</testcomponent>
We have defined the text to be printed in the createElement using the following piece of code.
this.$slots.default
It takes the default assigned in the component field.
Following is the output we get in the browser.
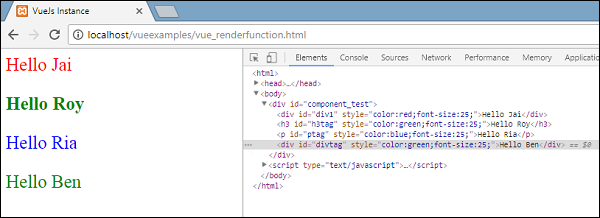
The elements also show the structure. These are the components we have defined −
<div id = "component_test">
   <testcomponent :elementtype = "'div,red,25,div1'">Hello Jai</testcomponent>
   <testcomponent :elementtype = "'h3,green,25,h3tag'">Hello Roy</testcomponent>
   <testcomponent :elementtype = "'p,blue,25,ptag'">Hello Ria</testcomponent>
   <testcomponent :elementtype = "'div,green,25,divtag'">Hello Ben</testcomponent>
</div>

0 comments:
Post a Comment
Thanks