CoderFunda
  • Home
  • About us
    • Contact Us
    • Disclaimer
    • Privacy Policy
    • About us
  • Home
  • Php
  • HTML
  • CSS
  • JavaScript
    • JavaScript
    • Jquery
    • JqueryUI
    • Stock
  • SQL
  • Vue.Js
  • Python
  • Wordpress
  • C++
    • C++
    • C
  • Laravel
    • Laravel
      • Overview
      • Namespaces
      • Middleware
      • Routing
      • Configuration
      • Application Structure
      • Installation
    • Overview
  • DBMS
    • DBMS
      • PL/SQL
      • SQLite
      • MongoDB
      • Cassandra
      • MySQL
      • Oracle
      • CouchDB
      • Neo4j
      • DB2
      • Quiz
    • Overview
  • Entertainment
    • TV Series Update
    • Movie Review
    • Movie Review
  • More
    • Vue. Js
    • Php Question
    • Php Interview Question
    • Laravel Interview Question
    • SQL Interview Question
    • IAS Interview Question
    • PCS Interview Question
    • Technology
    • Other

17 July, 2021

WordPress Live Chat

 Programing Coderfunda     July 17, 2021     Wordpress, wordpress-tutorial     No comments   

WordPress Live Chat

WordPress Live Chat plugin adds a live chat button at the bottom of the website, which helps the visitors to talk with us in real-time. Live chat technology is ideal for companies of all sizes, allowing them to close more sales and improve customer satisfaction ratings.

If we want to add live chat support in our WordPress website easily, it is required to use the Live Chat Plugin. This plugin provides good customer service by resolving customer problems instantly. Live chat plugin helps us to increase our sales and build a strong relationship with customers.

WordPress live chat plugin is built to work with any website developer such as Page Builder by SiteOrigin, WordPress Page Builder by Beaver Builder, Elementor Page builder, and others.

It works well with most of the WordPress theme or prototype, and we may use it without any modifications. A liveChat plugin is collaborated with several big e-commerce sites, like WooCommerce, BigCommerce, and Ecwid Ecommerce Shopping Cart.


Installation of Live Chat Plugin

If we want to use the live chat plugin in WordPress site, we need to install it. Use the following steps to install the Live Chat plugin:

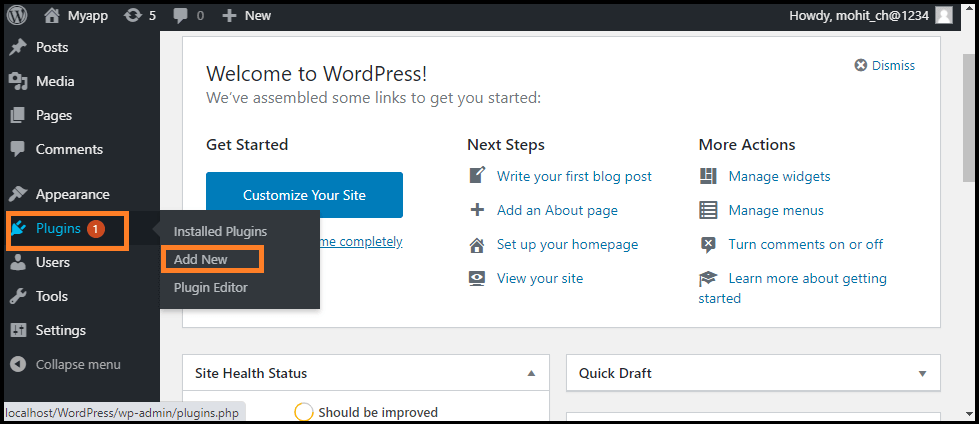
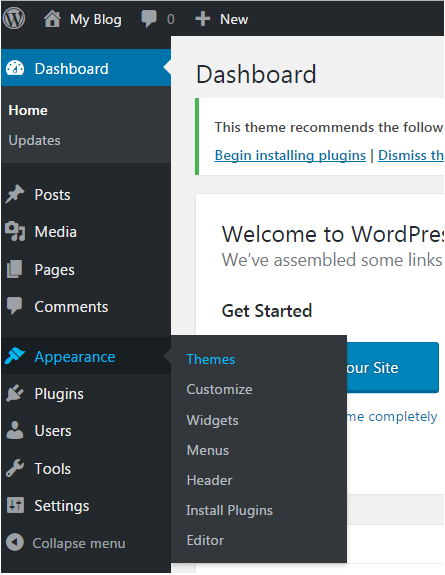
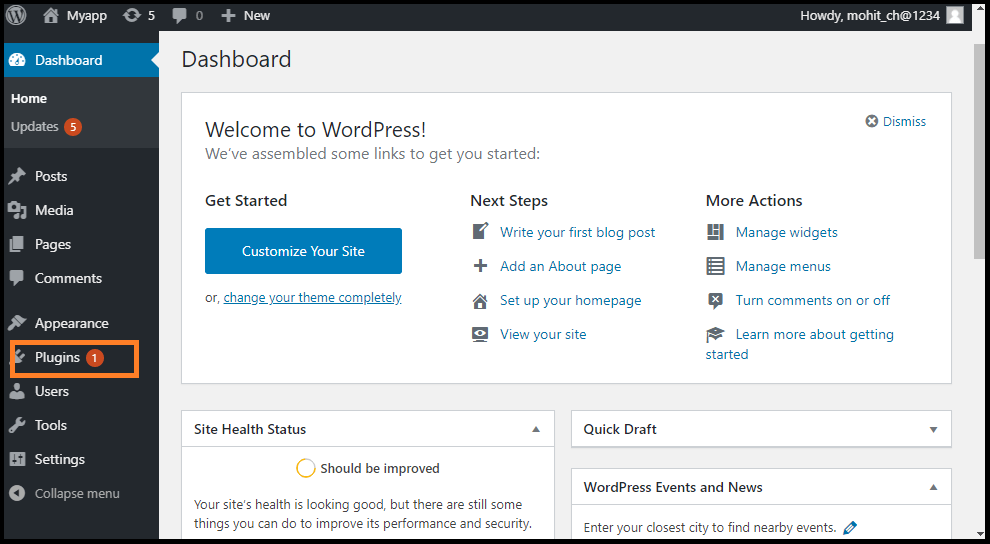
Step 1: Firstly, go to the WordPress dashboard and click on the "Plugins" menu.

WordPress Live Chat

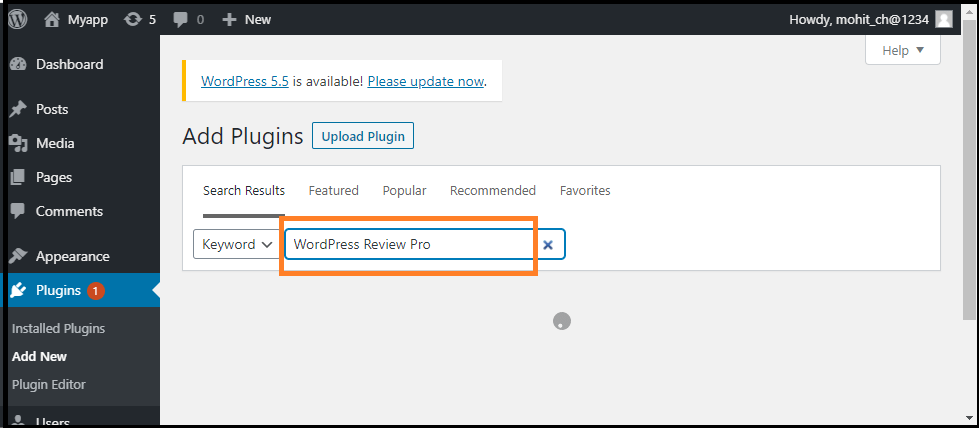
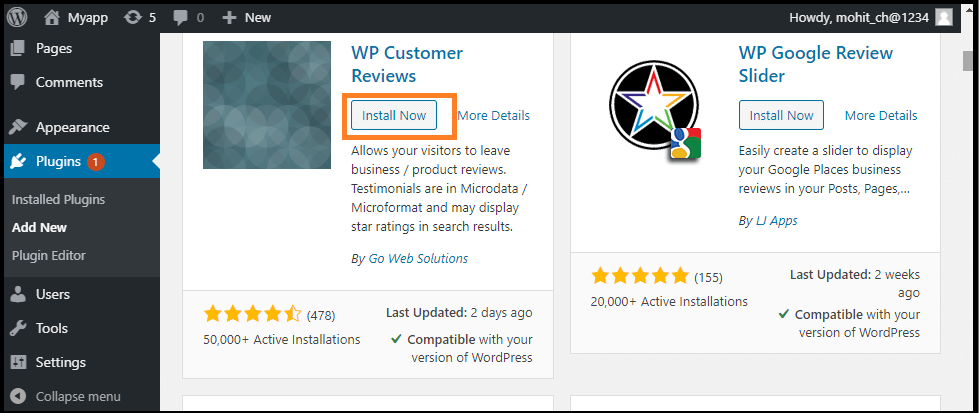
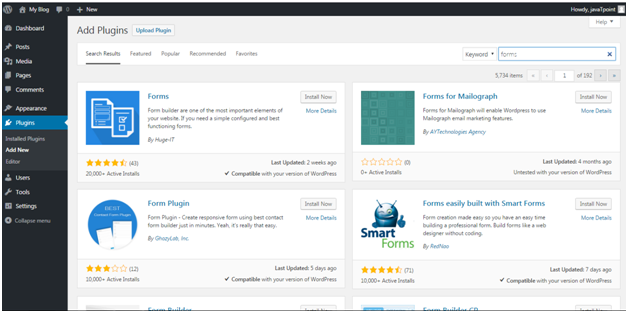
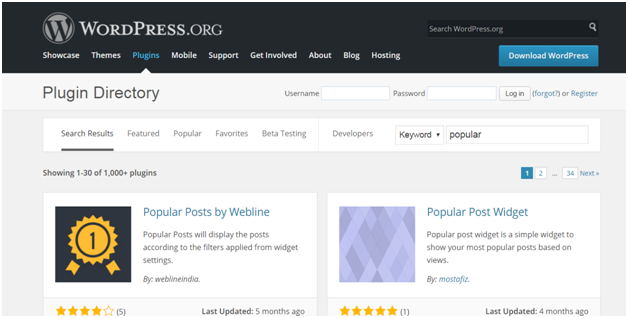
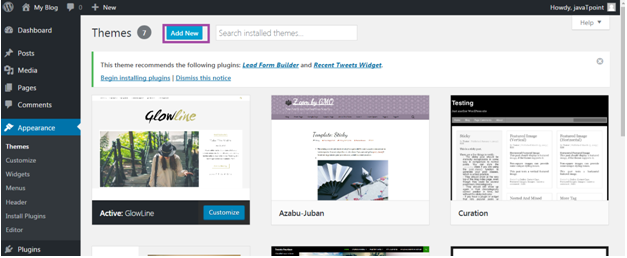
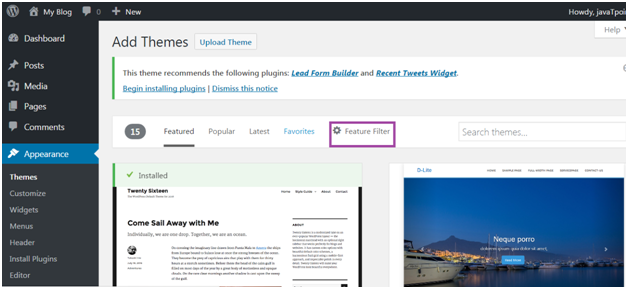
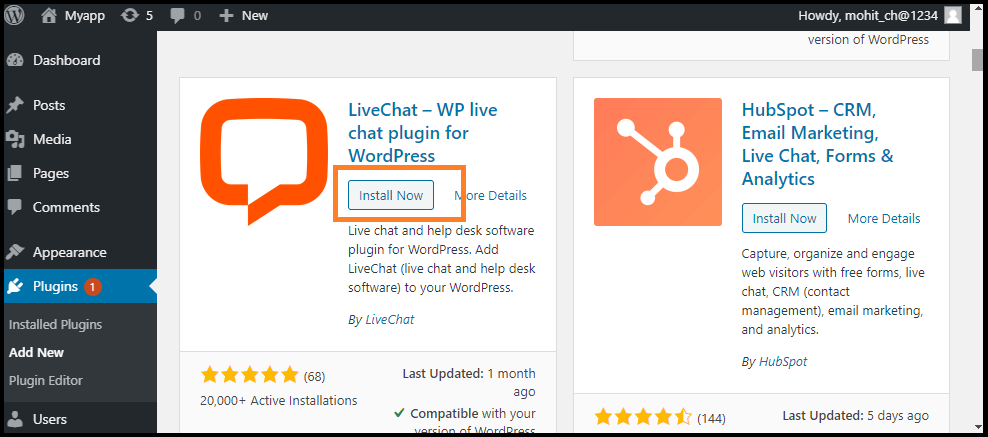
Step 2: Click on the "Add New" button and search "LiveChat" plugin in the search box, and then click on the "Install Now" button.

WordPress Live Chat
WordPress Live Chat

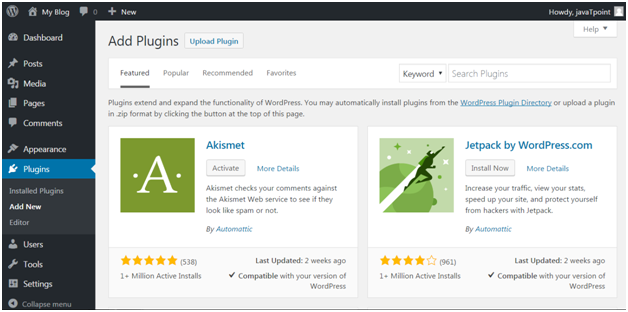
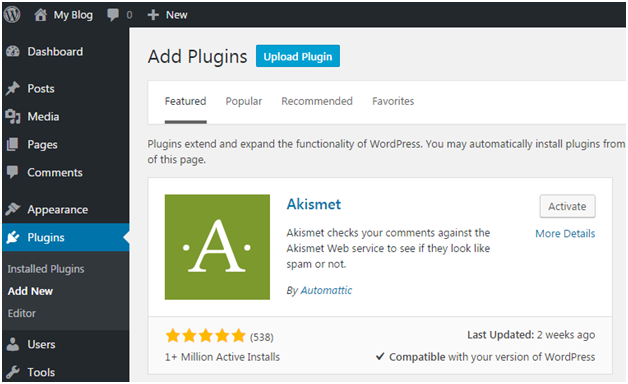
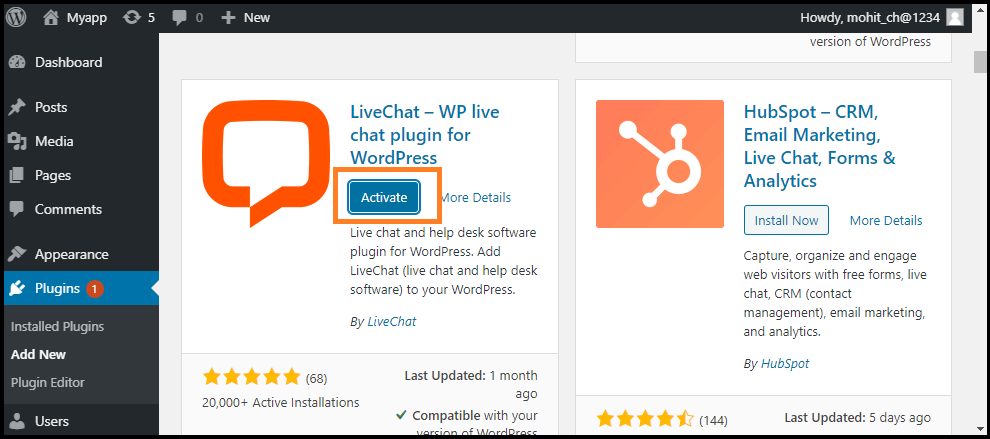
Step 3: After successful installation, activate the "Live Chat" plugin via the WordPress Plugins menu.

WordPress Live Chat

Step 4: Now, click on the "LiveChat" menu that appears on the screen's left side.

WordPress Live Chat

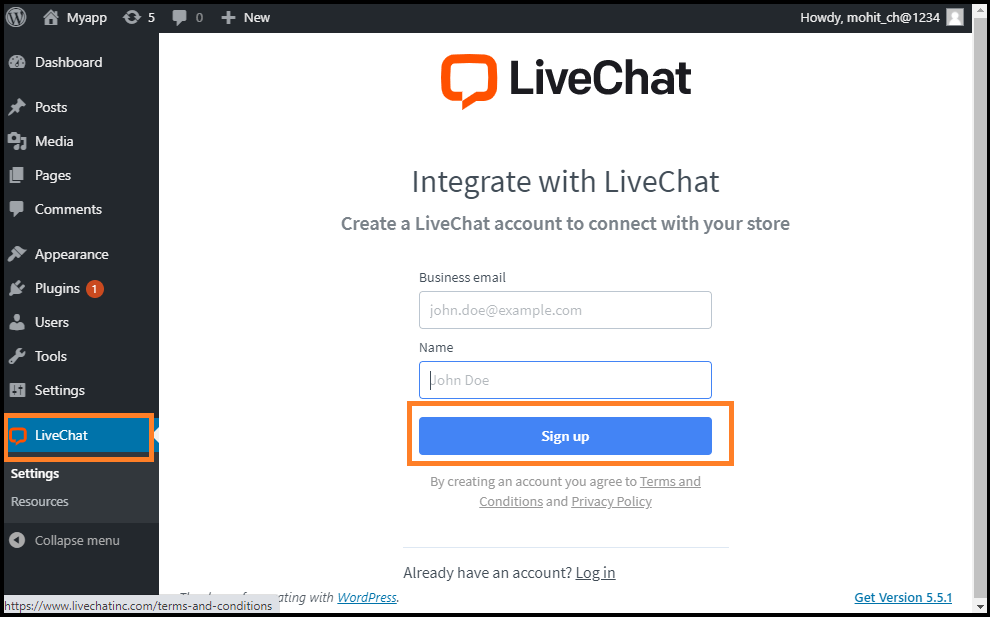
Step 5: Now, create a new account in LiveChat. If we already have an account on it, simply sign-in.

Features of LiveChat Plugin

The following are the features of the LiveChat plugin:

  1. Chat on multiple websites: It allows us to connect all of our WordPress websites to a single LiveChat account and maintain consistent chat widget across all the pages.
  2. Chat through a direct live chat link: With this feature, customers can be invited to chat by sending a link to the website, emails, and social media.
  3. Chat Widget Customization: It improves the chat app with eye-catchers, chat-buttons and many more. Select a theme, show your logo, select a color, and add more modifications to the chat widget.
  4. File Upload support: To better understand the customers, we can send and receive files through the Live Chat widget.
  5. Support and agent ratings: This feature allows us to better understand customer satisfaction by enabling them to rate the conversation during or after a live chat.
  6. Chat Surveys: Add surveys to the live chat window and collect customer information and feedback at each conversation's start and end.
  7. Multi-Channel Communication: Provide quick customer support through various channels like an online chat app, WhatsApp, Apple Business Chat, etc.
  8. Reports and Analytics: The integrated live chat and ticket metrics optimize communication with the customers. Access reports gathered data into the CSV format via the API and export.

Advantages of Live Chat Plugin

The following are the advantages of Live Chat Plugin:

  1. It solves the instant issues for customers. The fastest and easiest customer service platform is the live talk, by far.
  2. It increases sales and communication with customers. Simplify the procurement process by addressing the concerns of the customers in real-time.
  3. Manage the goods and products more efficiently, keep strong customer relationships and stay ahead of our rivals by providing live chat on our WordPress store.
  4. It provides easy customer service by offering the guests a free and straightforward opportunity for asking any help.

Best WordPress Live Chat plugins

There are various Live Chat plugins available in WordPress. Now, we will discuss the best WordPress Live chat plugins, which are as follows:

  1. ChatBot
  2. Sendinblue
  3. LiveAgent
  4. Freshchat

ChatBot

The ChatBot is the future of live chat software that helps us to communicate 24/7 with the customers. It is easy for small business to use artificial intelligence chatbot to develop their business. It comes with a simple drag and drop interface where we can use to build our ChatBot. Chatbots also have various ready-made templates for different industries, which make it easy to create custom conversation scenarios that suit our business needs.

It allows us to add a website, messaging apps, Facebook pages to a virtual assistant. If the user wants to interact with a real person, we can easily forward them to the phone support, customer support agent, Facebook Messenger, etc.

Sendinblue

It provides a powerful, user-friendly live chat software. The chatbox can be easily set up and use a WordPress plugin to connect it with the website. It allows us to convert the website visitors to customers by answering their last-minute questions through live chat. Sendinblue marketing automation integrates with the chat that allows us to capture more leads. This plugin comes with various features like segmentation, retargeting for Facebook ads, built-in email marketing integration, complete marketing automation, etc. It provides a full marketing package, including CRM, landing pages, SMS and email marketing, etc. Its toolkit helps us to convert the users into paid customers.

LiveAgent

It is one of the essential WordPress Live chat plugins that provides various software, including live chat, call center, email ticketing, time tracking, etc. It provides integration with WordPress and other website builders. Also, they integrate with CRMs, email marketing services, etc.

Freshchat

It is one of the popular WordPress Live chat plugins. It is designed to be a conversation and messenger app. it helps us to use agents or AI-powered bots to start real-time chats with clients. It provides various features, including live profiles, in-app ads, and customer timeline views for automated conversations. We can use the labels, desktop notifications, smart plugs, canned responses, and private notes to be more productive.


Read More
  • Share This:  
  •  Facebook
  •  Twitter
  •  Google+
  •  Stumble
  •  Digg

WordPress Review Plugin

 Programing Coderfunda     July 17, 2021     Wordpress, wordpress-tutorial     No comments   


WordPress Review Plugin

The review plugins help us to make the content more attractive and SEO friendly when we write product reviews on the site. There are several types of review plugins available in WordPress. We can choose any one of them and use it on our site.

In this topic, we will discuss the different WordPress Review plugins that can be used on the WordPress Site.

Why should we use WordPress Review Plugins?

When people want to shop online, they search for item reviews to make the right purchase decision. People check the rating of a product on the internet before choosing or buying any online shopping item.

So, it is very important to display reviews that may be beneficial to the website. It helps the user bring more visitors to the site and also helps in making the decision to buy something. Most importantly, the review plugin helps us gather feedback on improving the product and the website. This kind of tool may help us to increase the website's rank in search engines via schema markup.

Using the review plugin, we can rate a specific item on the site, and this information provides more context for search engines so that it becomes more SEO friendly.

Usually, there are two essential functions that the WordPress review can perform:

  1. Create a unique review box that provides clear reviews for the items.
  2. Provide a rich snippet to higher ranking in search engines of the site.

Installation

WordPress Review Plugins installation is very easy. We can directly install these plugins in WordPress using the following steps:

Step 1: Firstly, go to the "WordPress dashboard".

Step 2: After that, visit the "Plugins" menu and click on the "Add New" option.

WordPress Review Plugin

Step 3: Now, go to the search box and enter the plugin's name that we want to install and then click on the "Search Plugins" button.

WordPress Review Plugin

Step 4: Once we have found the plugin, click on the "Install Now" button.

WordPress Review Plugin

Best WordPress Review Plugins

There are several WordPress Review Plugins; some of them are as follows:

  1. WordPress Review Pro
  2. WordPress Customer Reviews
  3. Site Reviews
  4. Reviewer
  5. WordPress Product Review Lite

WordPress Review Pro

WordPress Review Pro is one of the important review plugins on WordPress that we can get right now. Importantly, it supports a wide variety of rich snippets that suit a wide range of subjects, including books, paintings, and films.

Besides the 16 default design templates, we also have a range of customization options. The analysis box has an infinite choice of color and 5 rating system options like star, points, circle, thumbs up, and percentage. It allows the website to be integrated with Facebook, Yelp, Google, and other social media platforms to increase rating credibility.

It starts at $67, and we can get all these features 24/7 with customer support.

WordPress Customer Reviews

Many sites are currently searching for user-generated feedback, including Google Places and Google Local Search. WordPress Customer Reviews help us to set up a dedicated page on our blog to collect customer testimonials for business/service or write product reviews. We are free to modify the review design and display admin responses in a separate file in the review plugin.

It is also lightweight and supports a custom theme plugin. The page loading speed of this plugin will not be affected as it works well with caching plugins. It is free to install the WordPress Customer Review.

Site Reviews

Site reviews help visitors to submit their reviews on the website between 1-5-star ratings. It also provides shortcodes, blocks, and widgets with full documentation. We can add the best reviews to always be displayed first and requires the approval before new review submissions are published. It also allows the visitors to sign-in to write a review, submit custom updates on a new submission, etc.

Reviewer

It allows us to quickly and easily add the checkbox and comparison table. All we have to do is set the title, add the number, and we are ready to go. It can help us to make a better relationship with the audience.

We will get the user details by their name and emails after giving reviews when we used it. After that, we can use their ratings on various customizable widgets to display visitors how their feedback is important. It provides us with spam protection by enabling Google Recaptcha and Administrative Moderation.

It comes at $28 with the option of extending one-year customer support by paying an additional cost for $8.63.

WordPress Product Review Lite

It is another one of the best review plugins for the WordPress site. It is lightweight and safe from packing with all the necessary features. When we want to create a post, simply go to the setting WordPress Review Lite's and click on the "Is this post a review?" option to quickly make it a review page. Next, we need to add a score to the item and give our opinion about it. Then, below that comment, we may easily insert the buy button for conversion. It helps us to change the color of the element, which includes ratings and pros and cons.

If we want to move forward with things like integrating with Amazon, uploading a custom review icon, or creating a comparison table, we have to pay for the premium version that starts at $59 per year.

Read More
  • Share This:  
  •  Facebook
  •  Twitter
  •  Google+
  •  Stumble
  •  Digg

Difference between WordPress Themes and Plugins

 Programing Coderfunda     July 17, 2021     Wordpress, wordpress-tutorial     No comments   


Difference between WordPress Themes and Plugins

Although, themes also add some features and functionality to a site but they are different from plugins. A plugin can't change a websites design, look and feel but a theme can do everything. You can customize some functionality in themes instead of installing plugin but themes can't be replaced by plugin.

A theme is external effect like a website's presentation and designing. Whereas, a plugin is the interior effect which add or remove some functions to a site.

Theme organizes and displays the entire site's information to display it to the visitors.

If you want to change the appearance of your site by changing your theme, then all the customizations done will be gone (data and information will remain safe). But you can activate or deactivate a plugin whenever you want. It will not affect the site in any way.

Your site speed is mainly affected by designing of theme, number of images, cache power. Number of plugins installed and functionality code exist as plugin or theme does not contribute in site's speed.

It's better to allow themes to handle the look of a site and plugin to handle how a site should behave. Thus, when theme will be changed, all the functionalities of site will remain there.

Read More
  • Share This:  
  •  Facebook
  •  Twitter
  •  Google+
  •  Stumble
  •  Digg

How to install WordPress plugins

 Programing Coderfunda     July 17, 2021     wordpress-tutorial     No comments   


How to install WordPress plugins

Installing plugins will provide extra functionality to your site. To install a plugin, you just need to put the plugin file into your wordpress file. After installation, you may activate it or deactivate it.

There are three methods from which you can install plugins.

  • Installing plugin using search
  • Installing plugin using uploading
  • Installing plugin manually using FTP

Here, we'll discuss all three methods.


Installing plugin using search

This method is only available for the free plugins because search is applicable for the WordPress directory only.


Login to your WordPress, and go to Plugins > Add New.

Wordpress How-to-install-plugin1

Look at the above snapshot, this page will be displayed. Here in the search option, you can give a plugin name the function name for which you want that plugin.

For example, we are searching for form plugin.

Wordpress How-to-install-plugin2

Look at the above snapshot, results related to our search is displayed with a list of matching plugins. We can select a plugin matching our criteria.

Once you have selected a plugin, click on Install Now button. Your plugin will be installed but to activate it you have to click on Activate button.


Installing plugin using uploading

From this method paid plugins can also be installed.

First of all, download a plugin file from the source which will be in zip format. Now go to Plugins > Add New page.

Wordpress How-to-install-plugin3

Look at the above snapshot, click on Upload Plugin. It will bring you to the following page.


Wordpress How-to-install-plugin4

Look at the above snapshot, here you have to choose the downloaded plugin file and click on Install Now.

Wordpress How-to-install-plugin5

Look at the above snapshot, plugin has successfully installed showing a message. To activate this plugin you need to activate it.

Read More
  • Share This:  
  •  Facebook
  •  Twitter
  •  Google+
  •  Stumble
  •  Digg

WordPress Plugins

 Programing Coderfunda     July 17, 2021     Wordpress Theme, wordpress-tutorial     No comments   

WordPress Plugins

WordPress plugins are programs written in PHP scripting language that extends the functionality or add some new features to our WordPress site. They provide additional functions to an application.

Users can add some more functions in their site without any coding skills by adding plugins. There are thousands of freely and commercially plugins available. For each and every function there is a plugin available in the WordPress.

You can also uninstall a plugin from your site.


How to choose a plugin

It is difficult for the users to find out the best suited plugin for them, especially for beginners. As plugins are open source hence every plugin is maintained by different owners. Some of them may be a kind of busy or inexperienced which lead to outdated version of plugin. According to your need you may have to install more than one plugin, but that?s not a problem. You can install more than one plugin.


Here we'll show a list which may help you to choose a right plugin.

  • Make a list of your requirements
  • First of all, you need to know what you want in your site. Make a list of all the features you want to implement in your site. Remember to make them in descending order of your need, it will make decision making easier. It's not necessary that you'll find all of it in one plugin. Feel free to install more than one plugin.

  • Search plugins
  • It is recommended to search plugins through Google search rather than WordPress directory. wordpress.org search is not that much helpful.

    what are wordpress plugin1

    Look at the above snapshot, this is WordPress directory search. It shows the search result by relevancy which shows a lot of options. Use relevant words in your search otherwise you may not get the desired result.

    Enter a search, for example we entered Map as our search. It displays all map plugins from the directory.

    Select a plugin to see its description and information.

  • Compare them
  • Choose 4 or 5 plugins and compare them by reading their description. Description contains information about that plugin, why it is used, what are its functions, supported versions, etc.

    what are wordpress plugin2

    Look at the above snapshot, at the right hand side you can see what version it supports, when it was last updated, how many people have installed it and its ratings.

  • Reviews
  • what are wordpress plugin3

    Look at the above snapshot, this is the reviews of users with their ratings. When a user rates a plugin, he is asked to give a review. To read this review, click on the rating star and all the reviews with that star will be displayed.

  • Support Overview
  • what are wordpress plugin4

    Support gives an overview of number of support threads opened for last 2 months. It also tells how many support threads have been resolved. To view the details of support threads click on the support tab.

  • Compatibility
  • Compatibility displays the latest version of WordPress with version of plugin.

    what are wordpress plugin5

    Look at the above snapshot, WordPress latest version is 4.6.1 and plugin current version is 1.0.4

    Below this people's vote for the given combination of WordPress and plugin is displayed. If more number of people say it works then the number of people saying it is broken then this combination will work. Here no one has voted for this.

  • Screenshots
  • Plugins screenshots shows a preview of how the plugin will look like from front-end and back-end. Screenshots can be more helpful than plugin descriptions.

  • FAQ
  • Frequently Asked Questions help in a lot of way. Before start using a plugin in your website, go through all these questions. It will help you in the smoother use of plugin.

  • Testing speed
  • A d\site's speed depends upon the plugin installed in it. Check your site's speed before and after installing a plugin. If speed slows down then better watch for a new plugin.

Read More
  • Share This:  
  •  Facebook
  •  Twitter
  •  Google+
  •  Stumble
  •  Digg

16 June, 2021

How to Install WordPress Themes

 Programing Coderfunda     June 16, 2021     Wordpress, wordpress-tutorial     No comments   

 How to Install WordPress Themes

For theme installation, first you need to select a theme either free or a premium one. There are a lot of sites from where you can download a theme. Theme will be downloaded in zip format. The next process is installation process. Installation has some steps to be followed.

There are two methods from which you can install a theme:

  • Installing WordPress using admin theme search
  • Installing WordPress using upload method

Installing WordPress using admin theme search

To install free themes from WordPress.org directory, login into your account and click Appearance > Themes.

Wordpress How to install wordpress themes1

Look at the above snapshot, click on Themes option. Following page will appear in front of you.

Wordpress How to install wordpress themes2

Click on Add New button to Add New themes.

Wordpress How to install wordpress themes3

Look at the above snapshot, here you'll see an option for Feature Filter.

Wordpress How to install wordpress themes4

Look at the above snapshot, here you can filter your search for themes by applying your choice for Layout, Features and Subject.

Wordpress How to install wordpress themes5

Look at the above snapshot, we have selected 4 filter criteria, now click on button Apply Filters 4 to apply the filters.

Wordpress How to install wordpress themes6

Look at the above snapshot, select a theme and take your mouse above it. Click on Install button.

Wordpress How to install wordpress themes7

Look at the above snapshot, our theme is installed. To activate it click on Activate button. And you have successfully activated your WordPress theme.


Installing WordPress using upload method

The above method was only to install free themes that are available in WordPress directory only. But if you want to install premium themes, then you have to choose this option which includes following steps. This method can be used to install premium as well as free themes.


Downloading theme

WordPress site itself has a large collection of themes. All the themes on the WordPress site is fully examined and tested. If you are not satisfied with these themes you can go to other sites to download a theme. Make sure you select trusted site to download a theme as anyone can create a theme for WordPress.

Themes are downloaded in the zip format.

Go to wordpress.org site.

Wordpress How to install wordpress themes8

Look at the above snapshot, this is the site. Here click on Themes. You will be directed to the following page.

Wordpress How to install wordpress themes9

Look at the above snapshot, on this page you'll have a lot of options to select themes.

Select a theme and then click on Download button.

Theme will be downloaded in zip format in your system.


Installing theme

To install the downloaded theme, you have to login to your WordPress and click on Appearance > Themes.

Now click on Add New button, following screen will appear in front of you.

Wordpress How to install wordpress themes10

Look at the above snapshot, click on Upload Theme button.

Wordpress How to install wordpress themes11

Look at the above snapshot, choose the file that you installed and click Install Now.

Wordpress How to install wordpress themes12

Look at the above snapshot, once your theme is installed, you will get a successfully installed message. Now click on Activate button, and your theme will be successfully installed.

Now you can customize it according to your choice.

Read More
  • Share This:  
  •  Facebook
  •  Twitter
  •  Google+
  •  Stumble
  •  Digg

Free vs Paid WordPress Theme

 Programing Coderfunda     June 16, 2021     Wordpress, wordpress-tutorial     No comments   


Free vs Paid WordPress Theme

As you already know there are two types of WordPress themes, one is paid (premium) and other one is free. Both are from WordPress community but they possess some differences in their functionality. For some users free themes may be suitable and for some users premium themes may be suitable. It all depends upon their need. A huge number of WordPress themes are available as free but still people go for premium themes. There are multiple reasons why one should go for paid one.

Let's have a look on some of the functions of free as well as premium themes. It will help you in choosing a theme for you.


Cost

Free themes of course as name suggests are absolutely free. You can use them any time without any money.

For premium you have to pay. Its range starts from $1000 which varies depending upon the designing of theme. It is good when you are earning enough from your site but if you are using your site just as a hobby then it may cost you a lot.


Quality

If you want your site at a good rank then you need to improve its quality.

Free theme will not make your site unique. Same theme will be used by other sites because it is free for everyone.

To make your site unique go for the premium one. There are some other qualities which need to be fulfilled. Like your site has to be responsive and should support different browsers. Free theme is not guaranteed to provide these qualities.


Support

In free themes if you need any type of help, you have to search for help and ask on forums. If someone will be willing then you may get your answer but it will take some time.

Premium themes designer offer some support system. You will get timely support from reliable developers. Your problem will be solved very quickly.


Update

WordPress is constantly updated in every few months, so your themes and plugins need to be compatible with the updated version.

Free themes may not be updated regularly. If you are using a free theme and an updated version comes, then you have two options. Either don't update your site or install a new them. Both the options are not right.

Premium theme developers update it on a regular basis to make it compatible with the new WordPress version. So if you are using a premium theme, then it is the responsibility of company to update it. You don't have to worry about it.


SEO

SEO plays an important role in the ranking of your website. It is important for your site to have an SEO options and clean code.

In free themes there are many structural bugs and they don't provide inbuilt SEO options.

Premium themes provide better coding which helps to load your site faster.


Features

Theme developers have to offer latest features for their customers according to the trend.

Free themes provide limited features. Their developers do not update their theme. They are more compatible to the plugins than premium themes.

Premium theme developers provide latest features and much more functionality than free themes. They provide an easy user interface that allows users to make any type of changes in the design of their site.


Encrypted Links

In free themes there are some unwanted links in the footer area. These links are irrelevant from the content of your website. It seriously affects the SEO of your site.

Free themes developers add some links at the footer of their themes which is very annoying.


Security

Security should be of a high level in order to prevent your site. wordPress provides a better security by updating it every few months. An out dated theme may cause a lot of security issues.

Free themes generally have high security threat.

On the other hand, premium themes give high security standards to their customers.

Read More
  • Share This:  
  •  Facebook
  •  Twitter
  •  Google+
  •  Stumble
  •  Digg
Newer Posts Older Posts Home

Meta

Popular Posts

  • Write API Integrations in Laravel and PHP Projects with Saloon
    Write API Integrations in Laravel and PHP Projects with Saloon Saloon  is a Laravel/PHP package that allows you to write your API integratio...
  • Credit card validation in laravel
      Validation rules for credit card using laravel-validation-rules/credit-card package in laravel Install package laravel-validation-rules/cr...
  • iOS 17 Force Screen Rotation not working on iPAD only
    I have followed all the links on Google and StackOverFlow, unfortunately, I could not find any reliable solution Specifically for iPad devic...
  • C++ in Hindi Introduction
    C ++ का परिचय C ++ एक ऑब्जेक्ट ओरिएंटेड प्रोग्रामिंग लैंग्वेज है। C ++ को Bjarne Stroustrup द्वारा विकसित किया गया था। C ++ में आने से पह...
  • Python AttributeError: 'str' has no attribute glob
    I am trying to look for a folder in a directory but I am getting the error.AttributeError: 'str' has no attribute glob Here's ...

Categories

  • Ajax (26)
  • Bootstrap (30)
  • DBMS (42)
  • HTML (12)
  • HTML5 (45)
  • JavaScript (10)
  • Jquery (34)
  • Jquery UI (2)
  • JqueryUI (32)
  • Laravel (1017)
  • Laravel Tutorials (23)
  • Laravel-Question (6)
  • Magento (9)
  • Magento 2 (95)
  • MariaDB (1)
  • MySql Tutorial (2)
  • PHP-Interview-Questions (3)
  • Php Question (13)
  • Python (36)
  • RDBMS (13)
  • SQL Tutorial (79)
  • Vue.js Tutorial (68)
  • Wordpress (150)
  • Wordpress Theme (3)
  • codeigniter (108)
  • oops (4)
  • php (853)

Social Media Links

  • Follow on Twitter
  • Like on Facebook
  • Subscribe on Youtube
  • Follow on Instagram

Pages

  • Home
  • Contact Us
  • Privacy Policy
  • About us

Blog Archive

  • July (2)
  • September (100)
  • August (50)
  • July (56)
  • June (46)
  • May (59)
  • April (50)
  • March (60)
  • February (42)
  • January (53)
  • December (58)
  • November (61)
  • October (39)
  • September (36)
  • August (36)
  • July (34)
  • June (34)
  • May (36)
  • April (29)
  • March (82)
  • February (1)
  • January (8)
  • December (14)
  • November (41)
  • October (13)
  • September (5)
  • August (48)
  • July (9)
  • June (6)
  • May (119)
  • April (259)
  • March (122)
  • February (368)
  • January (33)
  • October (2)
  • July (11)
  • June (29)
  • May (25)
  • April (168)
  • March (93)
  • February (60)
  • January (28)
  • December (195)
  • November (24)
  • October (40)
  • September (55)
  • August (6)
  • July (48)
  • May (2)
  • January (2)
  • July (6)
  • June (6)
  • February (17)
  • January (69)
  • December (122)
  • November (56)
  • October (92)
  • September (76)
  • August (6)

Loading...

Laravel News

Loading...

Copyright © CoderFunda | Powered by Blogger
Design by Coderfunda | Blogger Theme by Coderfunda | Distributed By Coderfunda