CoderFunda
  • Home
  • About us
    • Contact Us
    • Disclaimer
    • Privacy Policy
    • About us
  • Home
  • Php
  • HTML
  • CSS
  • JavaScript
    • JavaScript
    • Jquery
    • JqueryUI
    • Stock
  • SQL
  • Vue.Js
  • Python
  • Wordpress
  • C++
    • C++
    • C
  • Laravel
    • Laravel
      • Overview
      • Namespaces
      • Middleware
      • Routing
      • Configuration
      • Application Structure
      • Installation
    • Overview
  • DBMS
    • DBMS
      • PL/SQL
      • SQLite
      • MongoDB
      • Cassandra
      • MySQL
      • Oracle
      • CouchDB
      • Neo4j
      • DB2
      • Quiz
    • Overview
  • Entertainment
    • TV Series Update
    • Movie Review
    • Movie Review
  • More
    • Vue. Js
    • Php Question
    • Php Interview Question
    • Laravel Interview Question
    • SQL Interview Question
    • IAS Interview Question
    • PCS Interview Question
    • Technology
    • Other

16 June, 2021

WordPress Menus

 Programing Coderfunda     June 16, 2021     Wordpress, wordpress-tutorial     No comments   

WordPress Menus

The Menu is a list of options presented to the user. They are mostly used as a navigation building method on WordPress websites. Usually, the common content management system's installation is followed by a default menu that provides links to pages at the top level. These menus can be used at the top of the sites with links. It is generally used as a horizontal menu with links like home, email, contact, or pages.

Defining a WordPress Menu

Firstly, we need to define a WordPress menu before adding items to it or use it. We can use the following steps to define a WordPress menu.

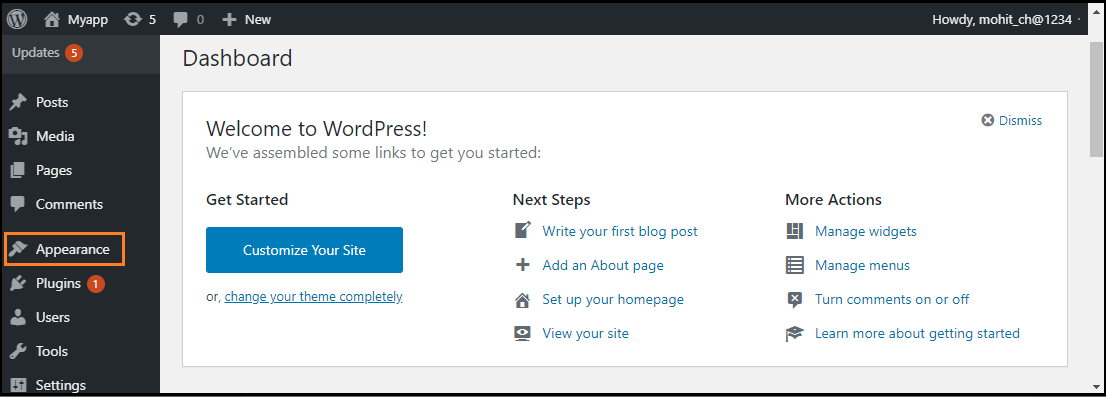
Step 1: First, log in to the WordPress Dashboard and click on the "Appearance" menu option, as shown in the below screenshot.

WordPress Menus

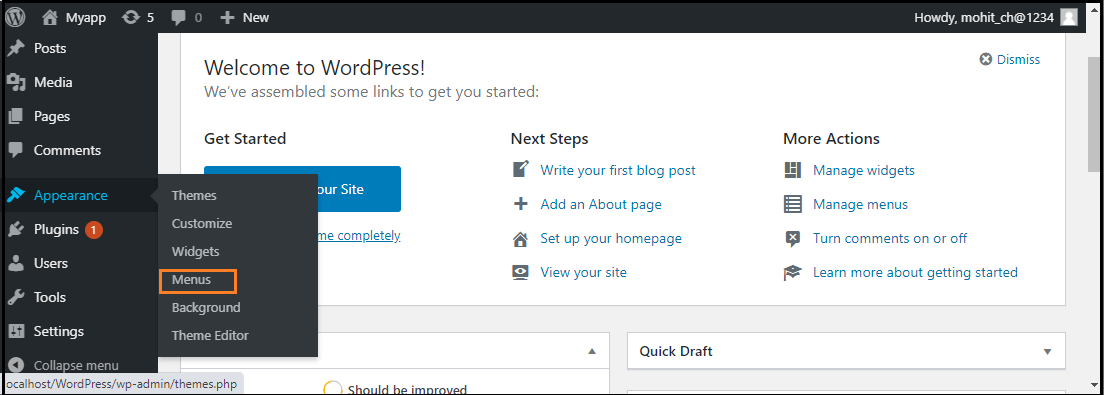
Step 2: The "Appearance" menu option opens a sub-menu where we choose the "Menus" option to bring up the Menu Editor.

WordPress Menus

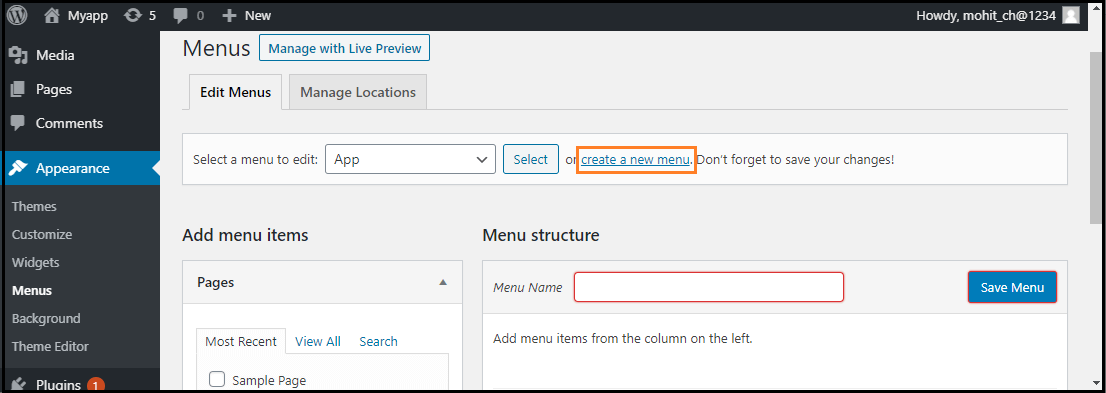
Step 3: After selecting the "Menus" option, choose the "Create a new menu" option shown in the red rectangular box at the top of the page.

WordPress Menus

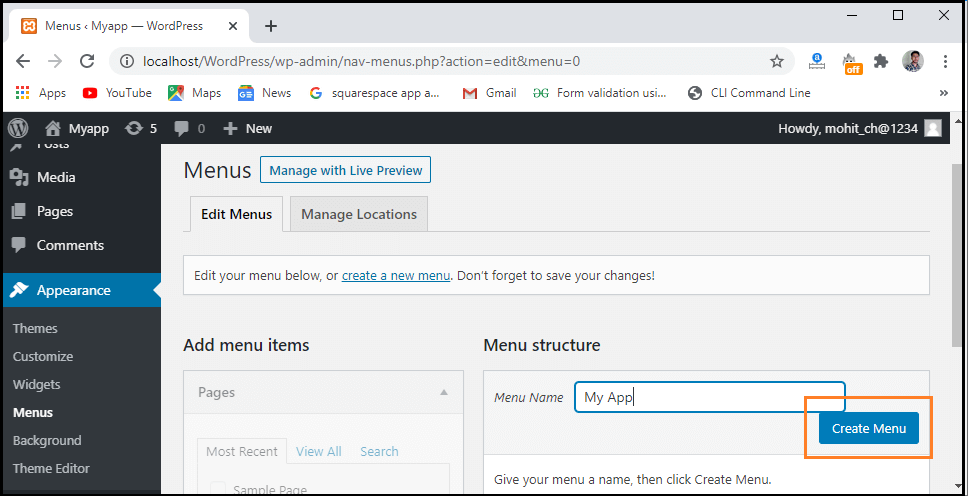
Step 4: Now, enter the name to create a new menu in the "Menu Name" box.

Step 5: After that, click on the "Create Menu" button to create a menu.

WordPress Menus

Adding Menu Items

In this section, we can add several link type options to the menu like Pages, Posts, Custom Links, and Categories. The following are the steps to add items in the menu.

Step 1: Firstly, Find the pane entitled Pages.

Step 2: Choose the "View All" link to see a list of all recently published pages on the WordPress site.

WordPress Menus

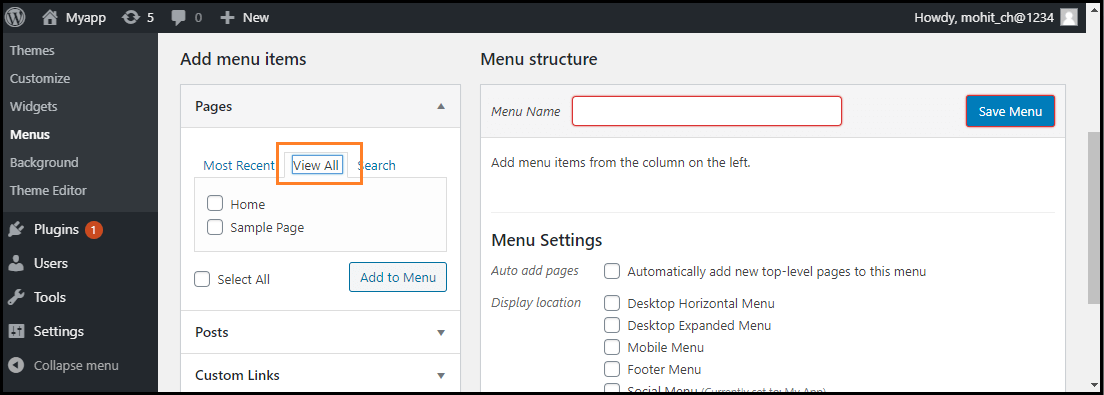
Step 3: Now, we can add Pages by clicking the checkbox corresponding to each page title.

Step 4: To add our selection to the menu that we created in the previous step, click on the "Add to Menu" button shown in the red rectangular box at the bottom of this page.

WordPress Menus

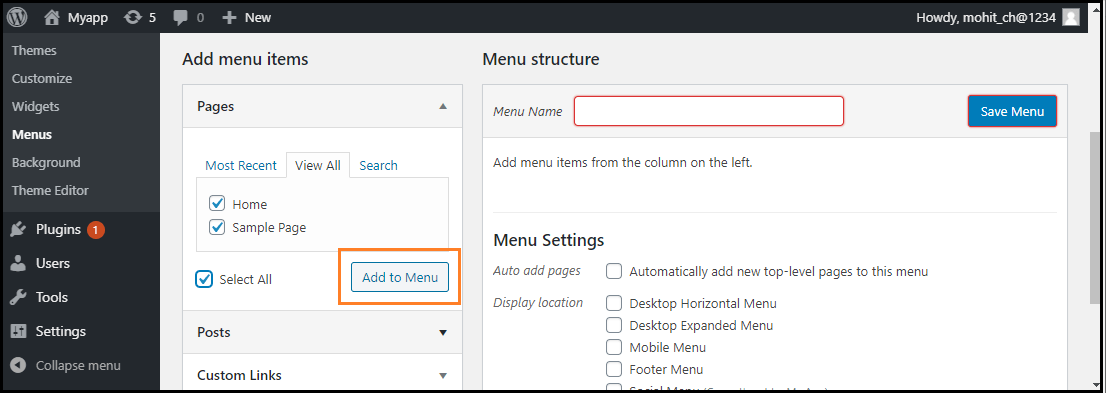
Step 5: After that, click on the "Save Menu" button.

WordPress Menus

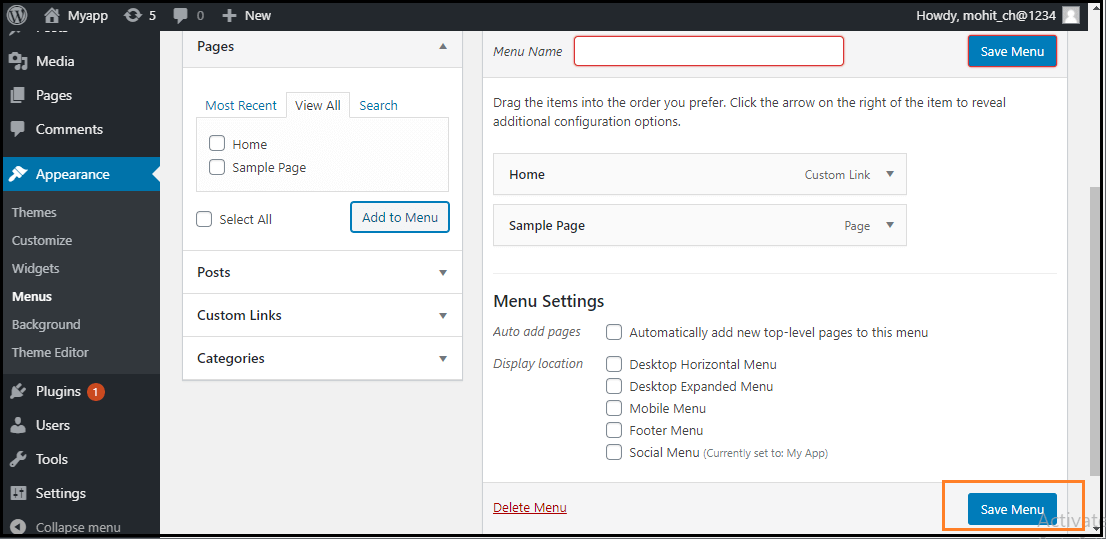
Now, the new custom menu has been saved in the WordPress site.

Deleting a Menu Item

If we want to delete an item form the menu, we can use the following steps:

Step 1: First, find the menu items that we want to delete in the menu editor window.

Step 2: Next, click the arrow icon at the top right corner of the menu item.

Step 3: Click on the "Remove" option. The menu item or box will be removed immediately.

WordPress Menus

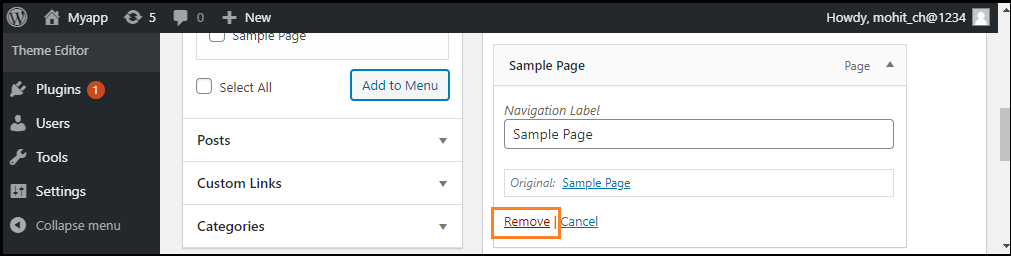
Step 4: Finally, click on the "Save Menu" button to save the changes.

Customizing Menu Items

There are various customization Menu items available; some of them are as follows:

  • Navigation Label
  • Title Attribute
  • Link Target
  • Link Relationship
  • CSS Classes
  • Original

Navigation Label

This field defines the title of the item on our custom menu. Our visitors will see this when they visit our site or blog.

Title Attribute

This field defines the alternative text ('Alt') for the menu item. This text will be shown when the user's mouse is hovering over the menu item.

Link Target

It allows users to choose the "Same window or tab" or "New window or tab" from the dropdown menu.

Link Relationship

It allows us to automatically create XFN features to demonstrate how we are connected with the authors or owners of the site to whom we are linking.

CSS Classes

It provides the optional CSS classes to the menu item.

Original

It provides a link to the source of the menu item that helps us to see the page or post.

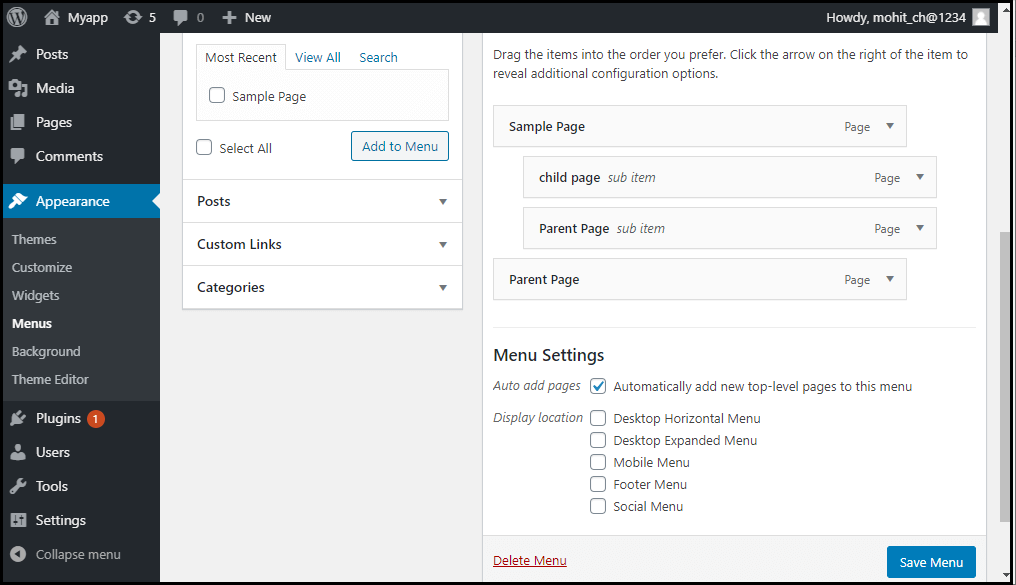
Creating Multi-Level Menus

WordPress Menu Editor helps us to build a multi-level menu using the "drag and drop" interface. We can drag the menu items up or down to change the order you want to appear in the WordPress menu. We can also drag menu items left or right to build sub-levels in the Menu.

If we want to create a menu item a subordinate of another, it is required to place the "child" under its "parent" and then drag it slightly to the right. If we want to create a multi-level menu, we can use the following steps:

Step 1: Firstly, move the cursor over the "child" menu item.

Step 2: Drag it to the right while holding the left button of the mouse.

Step 3: Now, release the mouse button.

Step 4: Repeat all these items for every sub-menu items.

Step 5: To save the changes, click on the "Save Menu" button in the Menu Editor.

WordPress Menus

How to add custom links to the Menu

If we want to add the WordPress menu's custom links, we need to follow these steps:

Step 1: First, we need to click on the Custom link option in the menu's left column. Every custom link requires a URL and the Link Text.

Step 2: After that, click on the "Add to Menu" button to add a link.

WordPress Menus

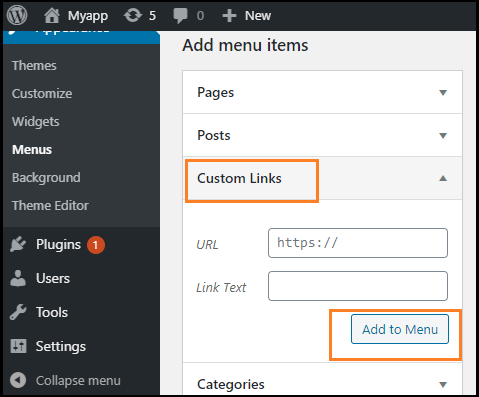
These custom links are useful for situations when we need to link to a page not listed in the left column, such as an external website.

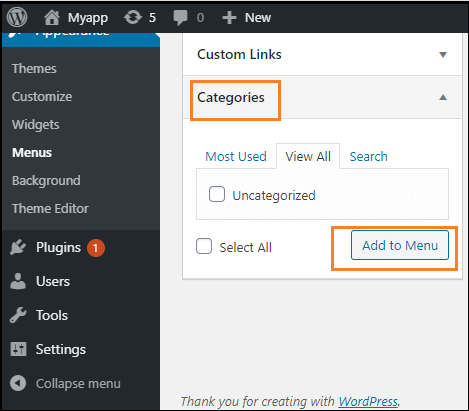
How to link to category pages or tags

If we want to add the post categories or tags to our menu, we can use the following steps:

Step 1: First, click on the categories tab in the left side column.

Step 2: Now, choose the one tab that should appear in the menu.

Step 3: After that, click on the "Add to Menu" button to add a category or tab.

WordPress Menus

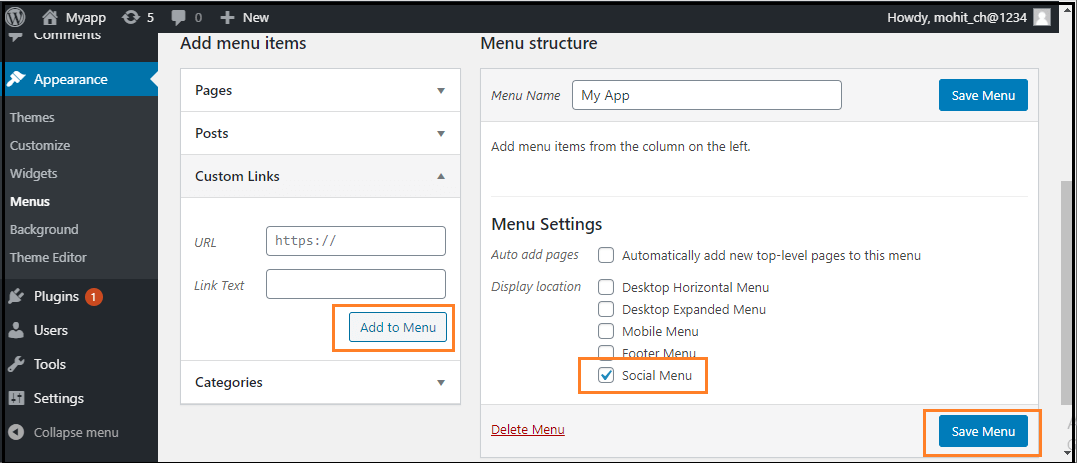
How to Add a social menu

Creating a menu for our social accounts is much easier than creating a regular one. To create a social account in the WordPress Menu Editor, we can use the following steps:

Step 1: First, click on the "Create a new menu" link.

Step 2: Now, input the name of the menu and click on the Create Menu.

Step 3: Next, check the bottom of the "Social Links" menu box, and use the Custom Links tab to add links to the social media menu.

Step 4: After completing all these steps, click on the "Add to Menu" button to add a social menu.

WordPress Menus
  • Share This:  
  •  Facebook
  •  Twitter
  •  Google+
  •  Stumble
  •  Digg
Email ThisBlogThis!Share to XShare to Facebook

Related Posts:

  • WordPress Review Plugin WordPress Review PluginThe review plugins help us to make the content more attractive and SEO friendly when we write product reviews on the site… Read More
  • Difference between WordPress Themes and Plugins Difference between WordPress Themes and PluginsAlthough, themes also add some features and functionality to a site but they are different from p… Read More
  • How to install WordPress plugins How to install WordPress pluginsInstalling plugins will provide extra functionality to your site. To install a plugin, you just need to put the … Read More
  • WordPress PluginsWordPress PluginsWordPress plugins are programs written in PHP scripting language that extends the functionality or add some new features to our WordP… Read More
  • Free vs Paid WordPress Theme Free vs Paid WordPress ThemeAs you already know there are two types of WordPress themes, one is paid (premium) and other one is free. Both are f… Read More
Newer Post Older Post Home

0 comments:

Post a Comment

Thanks

Meta

Popular Posts

  • Spring boot app (error: method getFirst()) failed to run at local machine, but can run on server
    The Spring boot app can run on the online server. Now, we want to replicate the same app at the local machine but the Spring boot jar file f...
  • Log activity in a Laravel app with Spatie/Laravel-Activitylog
      Requirements This package needs PHP 8.1+ and Laravel 9.0 or higher. The latest version of this package needs PHP 8.2+ and Laravel 8 or hig...
  • Failed to install 'cordova-plugin-firebase': CordovaError: Uh oh
    I had follow these steps to install an configure firebase to my cordova project for cloud messaging. https://medium.com/@felipepucinelli/how...
  • Laravel auth login with phone or email
          <?php     Laravel auth login with phone or email     <? php     namespace App \ Http \ Controllers \ Auth ;         use ...
  • Cashier package and Blade files
    I'm a little confused about this Cashier package. I installed it using the Laravel website (with composer), but noticed there's no...

Categories

  • Ajax (26)
  • Bootstrap (30)
  • DBMS (42)
  • HTML (12)
  • HTML5 (45)
  • JavaScript (10)
  • Jquery (34)
  • Jquery UI (2)
  • JqueryUI (32)
  • Laravel (1017)
  • Laravel Tutorials (23)
  • Laravel-Question (6)
  • Magento (9)
  • Magento 2 (95)
  • MariaDB (1)
  • MySql Tutorial (2)
  • PHP-Interview-Questions (3)
  • Php Question (13)
  • Python (36)
  • RDBMS (13)
  • SQL Tutorial (79)
  • Vue.js Tutorial (68)
  • Wordpress (150)
  • Wordpress Theme (3)
  • codeigniter (108)
  • oops (4)
  • php (853)

Social Media Links

  • Follow on Twitter
  • Like on Facebook
  • Subscribe on Youtube
  • Follow on Instagram

Pages

  • Home
  • Contact Us
  • Privacy Policy
  • About us

Blog Archive

  • September (100)
  • August (50)
  • July (56)
  • June (46)
  • May (59)
  • April (50)
  • March (60)
  • February (42)
  • January (53)
  • December (58)
  • November (61)
  • October (39)
  • September (36)
  • August (36)
  • July (34)
  • June (34)
  • May (36)
  • April (29)
  • March (82)
  • February (1)
  • January (8)
  • December (14)
  • November (41)
  • October (13)
  • September (5)
  • August (48)
  • July (9)
  • June (6)
  • May (119)
  • April (259)
  • March (122)
  • February (368)
  • January (33)
  • October (2)
  • July (11)
  • June (29)
  • May (25)
  • April (168)
  • March (93)
  • February (60)
  • January (28)
  • December (195)
  • November (24)
  • October (40)
  • September (55)
  • August (6)
  • July (48)
  • May (2)
  • January (2)
  • July (6)
  • June (6)
  • February (17)
  • January (69)
  • December (122)
  • November (56)
  • October (92)
  • September (76)
  • August (6)

  • Failed to install 'cordova-plugin-firebase': CordovaError: Uh oh - 9/21/2024
  • pyspark XPath Query Returns Lists Omitting Missing Values Instead of Including None - 9/20/2024
  • SQL REPL from within Python/Sqlalchemy/Psychopg2 - 9/20/2024
  • MySql Explain with Tobias Petry - 9/20/2024
  • How to combine information from different devices into one common abstract virtual disk? [closed] - 9/20/2024

Laravel News

  • Customize URL Handling with Laravel's Macroable URI Class - 5/13/2025
  • Use Passkeys in Your Laravel App - 5/13/2025
  • Laravel Seeder Generator - 5/12/2025
  • Improve HTTP Error Testing with Laravel's requestException() Method - 5/12/2025
  • Track Metrics Effortlessly with Laravel's Context Increment and Decrement Methods - 5/4/2025

Copyright © 2025 CoderFunda | Powered by Blogger
Design by Coderfunda | Blogger Theme by Coderfunda | Distributed By Coderfunda