Directives are instruction for VueJS to do things in a certain way. We have already seen directives such as v-if, v-show, v-else, v-for, v-bind , v-model, v-on, etc.
In this chapter, we will take a look at custom directives. We will create global directives similar to how we did for components.
Syntax
Vue.directive('nameofthedirective', {
bind(e1, binding, vnode) {
}
})
We need to create a directive using Vue.directive. It takes the name of the directive as shown above. Let us consider an example to show the details of the working of directives.
Example
<html>
   <head>
      <title>VueJs Instance</title>
      <script type = "text/javascript" src = "js/vue.js"></script>
   </head>
   <body>
      <div id = "databinding">
         <div v-changestyle>VueJS Directive</div>
      </div>
      <script type = "text/javascript">
         Vue.directive("changestyle",{
            bind(e1,binding, vnode) {
               console.log(e1);
               e1.style.color = "red";
               e1.style.fontSize = "30px";
            }
         });
         var vm = new Vue({
            el: '#databinding',
            data: {
            },
            methods : {
            },
         });
      </script>
   </body>
</html>
In this example, we have created a custom directive changestyle as shown in the following piece of code.
Vue.directive("changestyle",{
   bind(e1,binding, vnode) {
      console.log(e1);
      e1.style.color = "red";
      e1.style.fontSize = "30px";
   }
});
We are assigning the following changestyle to a div.
<div v-changestyle>VueJS Directive</div>
If we see in the browser, it will display the text VueJs Directive in red color and the fontsize is increased to 30px.
Output

We have used the bind method, which is a part of the directive. It takes three arguments e1, the element to which the custom directive needs to be applied. Binding is like arguments passed to the custom directive, e.g. v-changestyle = ”{color:’green’}”, where green will be read in the binding argument and vnode is the element, i.e. nodename.
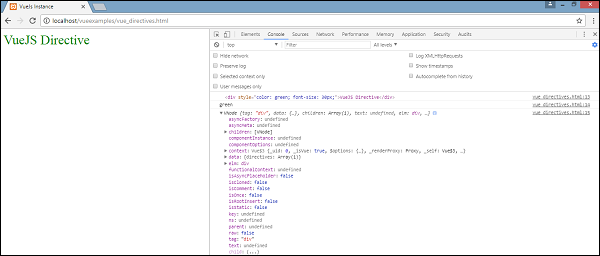
In the next example, we have consoled all the arguments and its shows what details each of them give.
Following is an example with a value passed to the custom directive.
<html>
   <head>
      <title>VueJs Instance</title>
      <script type = "text/javascript" src = "js/vue.js"></script>
   </head>
   <body>
      <div id = "databinding">
         <div v-changestyle = "{color:'green'}">VueJS Directive</div>
      </div>
      <script type = "text/javascript">
         Vue.directive("changestyle",{
            bind(e1,binding, vnode) {
               console.log(e1);
               console.log(binding.value.color);
               console.log(vnode);
               e1.style.color=binding.value.color;
               e1.style.fontSize = "30px";
            }
         });
         var vm = new Vue({
            el: '#databinding',
            data: {
            },
            methods : {
            },
         });
      </script>
   </body>
</html>
Output

The color of the text is changed to green. The value is passed using the following piece of code.
<div v-changestyle = "{color:'green'}">VueJS Directive</div>
And it is accessed using the following piece of code.
Vue.directive("changestyle",{
   bind(e1,binding, vnode) {
      console.log(e1);
      console.log(binding.value.color);
      console.log(vnode);
      e1.style.color=binding.value.color;
      e1.style.fontSize = "30px";
   }
});
Filters
VueJS supports filters that help with text formatting. It is used along with v-bind and interpolations ({{}}). We need a pipe symbol at the end of JavaScript expression for filters.
Example
<html>
   <head>
      <title>VueJs Instance</title>
      <script type = "text/javascript" src = "js/vue.js"></script>
   </head>
   <body>
      <div id = "databinding">
         <input  v-model = "name" placeholder = "Enter Name" /><br/>
         <span style = "font-size:25px;"><b>Letter count is : {{name | countletters}}</b></span>
      </div>
      <script type = "text/javascript">
         var vm = new Vue({
            el: '#databinding',
            data: {
               name : ""
            },
            filters : {
               countletters : function(value) {
                  return value.length;
               }
            }
         });
      </script>
   </body>
</html>
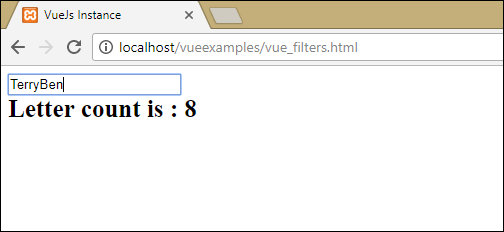
In the above example, we have created a simple filter countletters. Countletters filter counts the numbers of characters entered in the textbox. To make use of filters, we need to use the filter property and define the filter used, by the following piece of code.
filters : {
   countletters : function(value) {
      return value.length;
   }
}
We are defining the method countletters and returning the length of the string entered.
To use filter in the display, we have used the pipe operator and the name of the filter, i.e. countletters.
<span style = "font-size:25px;"><b>Letter count is : {{name | countletters}}</b></span>
Following is the display in the browser.

We can also pass arguments to the filter using the following piece of code.
<span style = "font-size:25px;"><b>Letter count is : {{name | countletters('a1', 'a2')}}</b></span>
Now, the countletters will have three params, i.e. message, a1, and a2.
We can also pass multiple filters to the interpolation using the following piece of code.
<span style = "font-size:25px;"><b>Letter count is : {{name | countlettersA, countlettersB}}</b></span>
In the filter property countlettersA and countlettersB will be the two methods and the countlettersA will pass the details to countlettersB.

0 comments:
Post a Comment
Thanks