
WordPress Installation using MS Webmatrix
Webmatrix is a free and lightweight software tool launched by Windows to download different applications. This software is only for Window users. It is very easy to download WordPress from Webmatrix. You can create a website on WordPress using Webmatrix very easily.
Steps to install WordPress
- Download and Install Webmatrix
- Open installed Webmatrix
- Opening App Gallery
- Choosing Web Application
- Selecting Database
- Selecting Password and admin name
- Start Insatallation
- Installation complete
- Running site first time
- Entering information
Download and Install Webmatrix
Download Webmatrix in your system with the following link
Look at the above snapshot, you will see this type of file getting downloaded. This is a file with .exe extension.
On opening this file, you'll be directed to the following window.
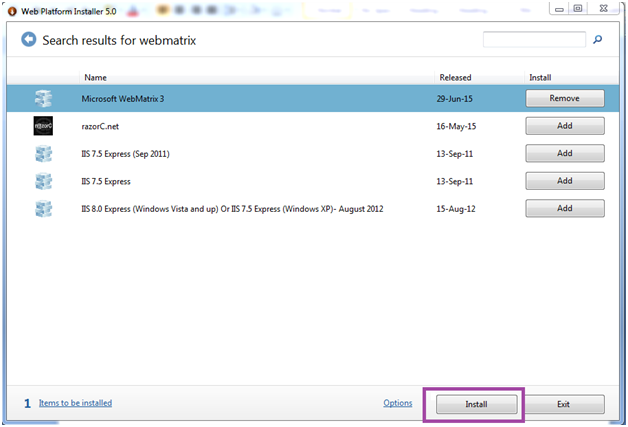
Look at the above snapshot, on the top right search for Webmatrix. Now, click on add button in front of Microsoft Webmatrix 3. This button will be converted into Remove icon. Now click on install.
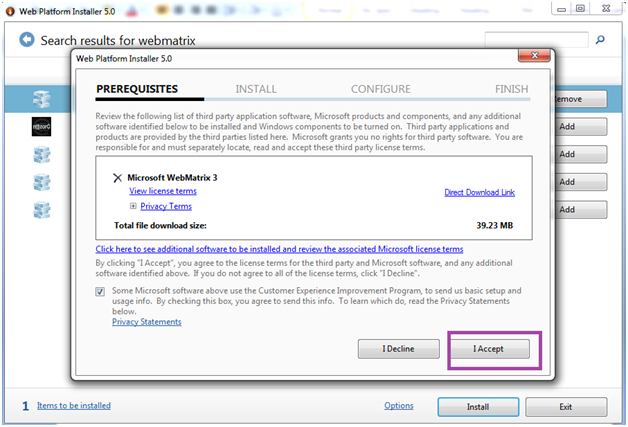
Look at the above snapshot, click on I agree to start installation.

Look at the above snapshot, all the servers are getting installed.
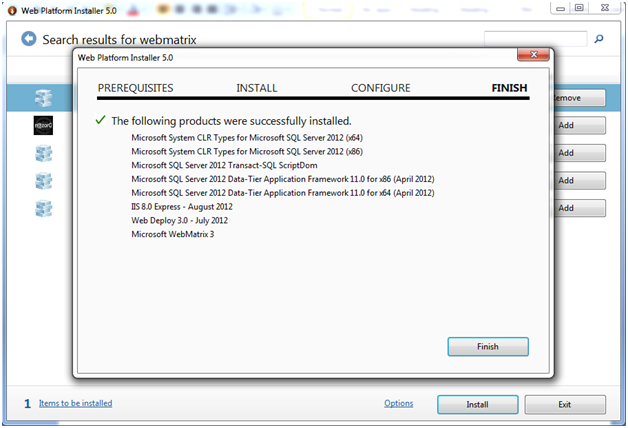
Look at the above snapshot, we have successfully installed Webmatrix on our system with above mentioned applications.
Open Quick Start Webmatrix
Once you have downloaded Webmatrix, open it on your system to install WordPress.
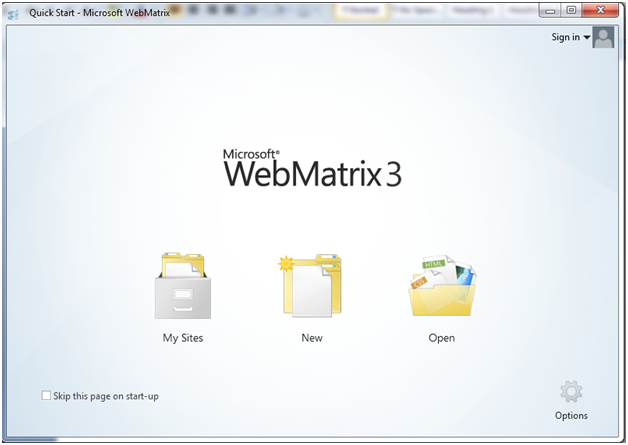
Look at the above snapshot, the above window is the Quick Start page.
Click on New, you'll be directed to the following page.
Note: If you don't want this page to appear every time, click on the check-box.
Opening App Gallery
There are three options displayed. You have to go to App Gallery which will provide you a lot of options to create a website.
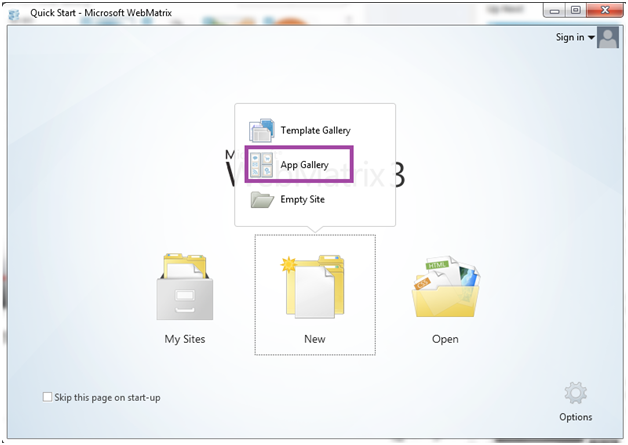
Look at the above snapshot, on clicking New, three options generated out of which you have to select App Gallery.
Choosing Web Application
Here, we have to choose WodPress application.
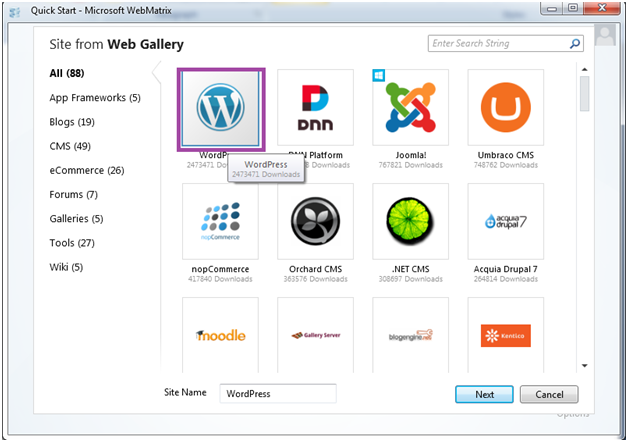
Look at the above snapshot, these are the applications which Microsoft Webmatrix offers. Select WordPress from this and click on Next.
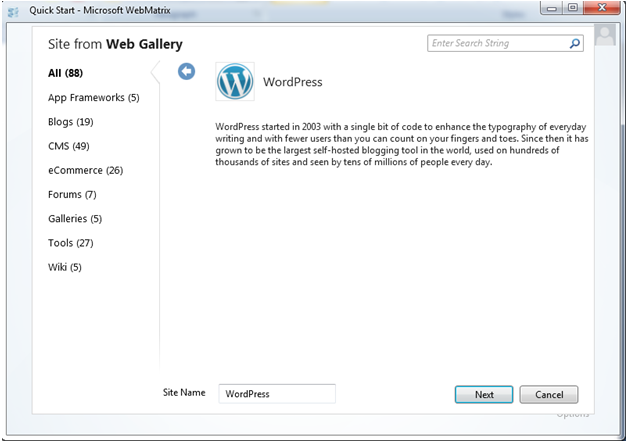
This page will appear, again click on Next.
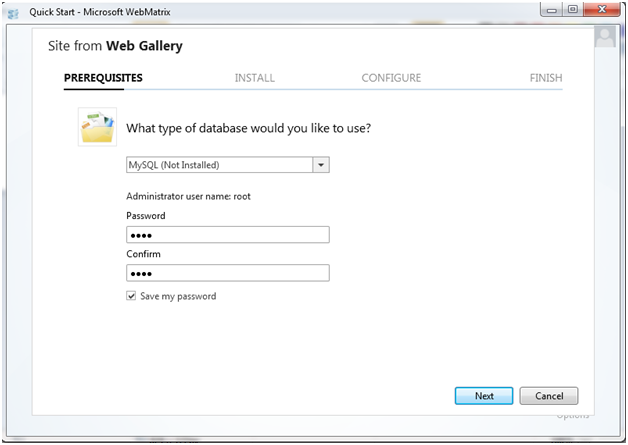
Selecting Database
We need to select database. By default, WordPress is only compatible with MySQL. If MySQL is not installed on your system, Webmatrix will install it.
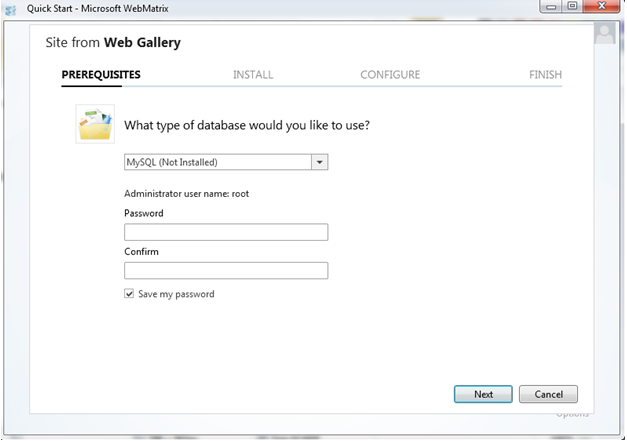
Look at the above snapshot, by default Webmatrix selects MySQL database.
Selecting Password and admin name
Here, default administrator name will be root. You can type any Password, but remember the admin name and password.
Start Insatallation
This page will display you all the applications required to be installed with the WordPress. All the software will be installed by itself, you don't have to do anything.
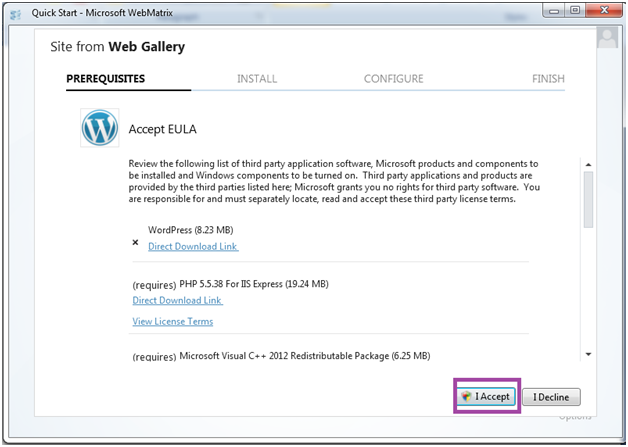
Look at the above snapshot, after accepting EULA (End User License Agreement), installation begins.
If your Internet connection is good, then your installation will approximately take 1-2 minutes.
Installation complete
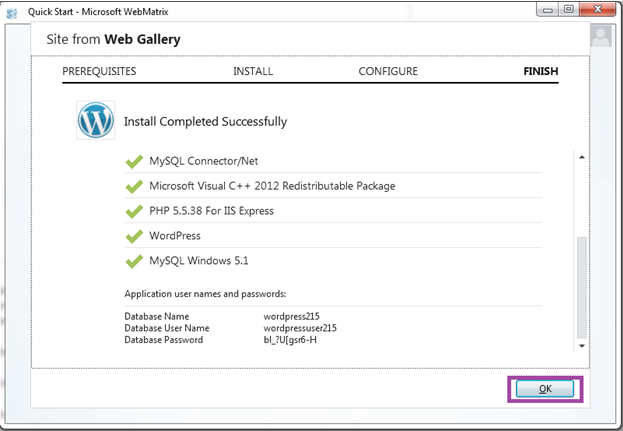
Look at the above snapshot, installation is complete. It shows the list of the applications which we have installed just now.
It also shows user name and password
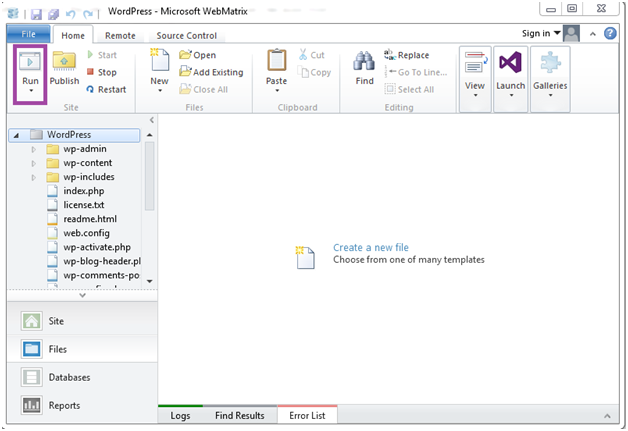
Running site first time
After finishing installation, workspace appears in Webmatrix site. In the Webmatrix ribbon click on Run.
Look at the above snapshot, after clicking on Run button, you have to select language.
Entering information
After selecting language, you have to enter further information about your site.
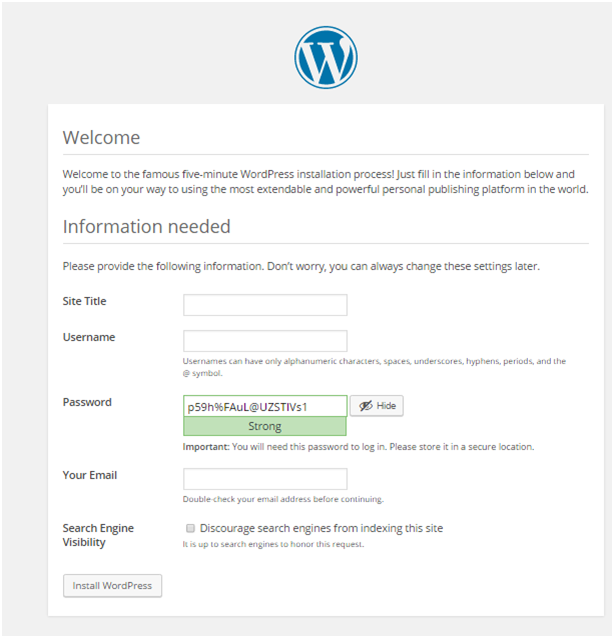
Look at the above snapshot, in above information you can fill anything as per your wish.
If you will not provide a password, it will automatically generate a password for you.
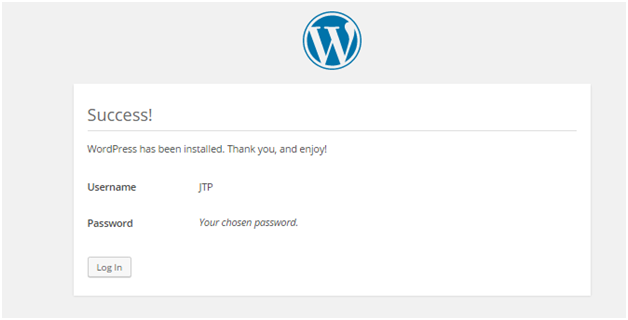
Look at the above snapshot, it shows successfully installed WordPress with username as JTP and a password.
Note: If a username and password will not be provided, then by default username will be admin and password will be generated itself.


0 comments:
Post a Comment
Thanks