
Magento 2 Create View: Block, Layouts, Templates
In this topic Magento 2 Create: Block, Layouts, Templates we will learn about View in Magento 2 including Block, Layouts and Templates. In previous topic, we discussed about CRUD Models . As you know, a View will be use to output representation of the page. In Magento 2, View is built by three path: block, layout and template. We will find how it work by building the simple module Hello World using View path.
To create view in Magento 2
- Step 1: Create controller
- Step 2: Create layout file .xml
- Step 3: Create block
- Step 4. Create template file .phtml
Step 1: Create controller
Firstly, We will create a controller to call the layout file .xml
File: app/code/Mageplaza/HelloWorld/Controller/Index/Display.php
<?php
namespace Mageplaza\HelloWorld\Controller\Index;

class Display extends \Magento\Framework\App\Action\Action
{
	protected $_pageFactory;
	public function __construct(
		\Magento\Framework\App\Action\Context $context,
		\Magento\Framework\View\Result\PageFactory $pageFactory)
	{
		$this->_pageFactory = $pageFactory;
		return parent::__construct($context);
	}

	public function execute()
	{
		return $this->_pageFactory->create();
	}
}
We have to declare the PageFactory and create it in execute method to render view.
Step 2: Create layout file .xml
The Layout is the major path of view layer in Magento 2 module. The layout file is a XML file which will define the page structure and will be locate in {module_root}/view/{area}/layout/ folder. The Area path can be frontend or adminhtml which define where the layout will be applied.
There is a special layout file name default.xml which will be applied for all the page in it’s area. Otherwhile, the layout file will have name as format: {router_id}_{controller_name}_{action_name}.xml.
You can understand the layout in detail in this Magento topic , and the instruction of a layout structure.
When rendering page, Magento will check the layout file to find the handle for the page and then load Block and Template. We will create a layout handle file for this module:
File: app/code/Mageplaza/HelloWorld/view/frontend/layout/helloworld_index_display.xml
<?xml version="1.0"?>
<page xmlns:xsi="http://www.w3.org/2001/XMLSchema-instance" layout="1column" xsi:noNamespaceSchemaLocation="urn:magento:framework:View/Layout/etc/page_configuration.xsd">
    <referenceContainer name="content">
        <block class="Mageplaza\HelloWorld\Block\Display" name="helloworld_display" template="Mageplaza_HelloWorld::sayhello.phtml" />
    </referenceContainer>
</page>
In this file, we define the block and template for this page:
Block class: Mageplaza\HelloWorld\Block\Display
Template file: Mageplaza_HelloWorld::sayhello.phtml
name: It is the required attribute and is used to identify a block as a reference
Step 3: Create block
The Block file should contain all the view logic required, it should not contain any kind of html or css. Block file are supposed to have all application view logic.
Create a file:
app/code/Mageplaza/HelloWorld/Block/Display.php
Contents would be:
<?php
namespace Mageplaza\HelloWorld\Block;
class Display extends \Magento\Framework\View\Element\Template
{
	public function __construct(\Magento\Framework\View\Element\Template\Context $context)
	{
		parent::__construct($context);
	}

	public function sayHello()
	{
		return __('Hello World');
	}
}
Every block in Magento 2 must extend from Magento\Framework\View\Element\Template. In this block we will define a method sayHello() to show the word “Hello World”. We will use it in template file.
Step 4. Create template file
Create a template file call sayhello.phtml
app/code/Mageplaza/HelloWorld/view/frontend/templates/sayhello.phtml
Insert the following code:
<?php

/**
 * @var \Mageplaza\HelloWorld\Block\Display $block
 */

echo $block->sayHello();
In the layout file, we define the template by Mageplaza_HelloWorld::sayhello.phtml. It mean that Magento will find the file name sayhello.phtml in templates folder of module Mageplaza_HelloWorld. The template folder of the module is app/code/{vendor_name}/{module_name}/view/frontend/templates/.
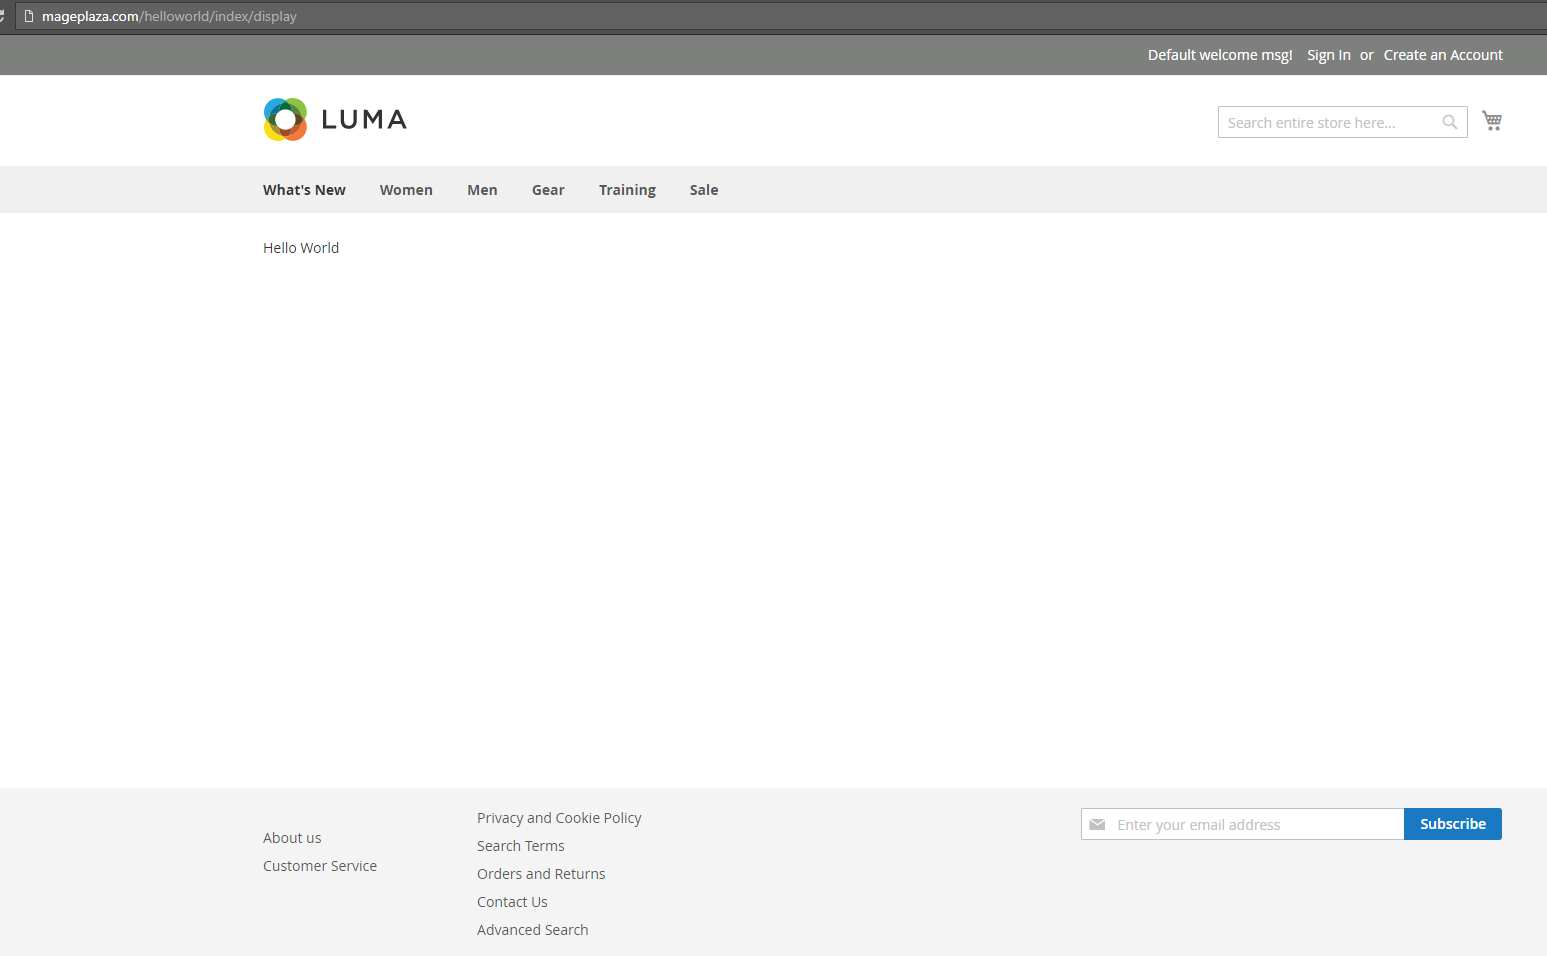
In the template file, we can use the variable $block for the block object. As you see, we call the method sayHello() in Block. It’s done, please access to this page again (http://
In the previous Models (CRUD), we called postFactory model in controller. Now, we try show all data on table use block and template.
We edited file app/code/Mageplaza/HelloWorld/Block/Display.php
Contents would be:
<?php
namespace Mageplaza\HelloWorld\Block;
class Display extends \Magento\Framework\View\Element\Template
{
	protected $_postFactory;
	public function __construct(
		\Magento\Framework\View\Element\Template\Context $context,
		\Mageplaza\HelloWorld\Model\PostFactory $postFactory
	)
	{
		$this->_postFactory = $postFactory;
		parent::__construct($context);
	}

	public function sayHello()
	{
		return __('Hello World');
	}

	public function getPostCollection(){
		$post = $this->_postFactory->create();
		return $post->getCollection();
	}
}
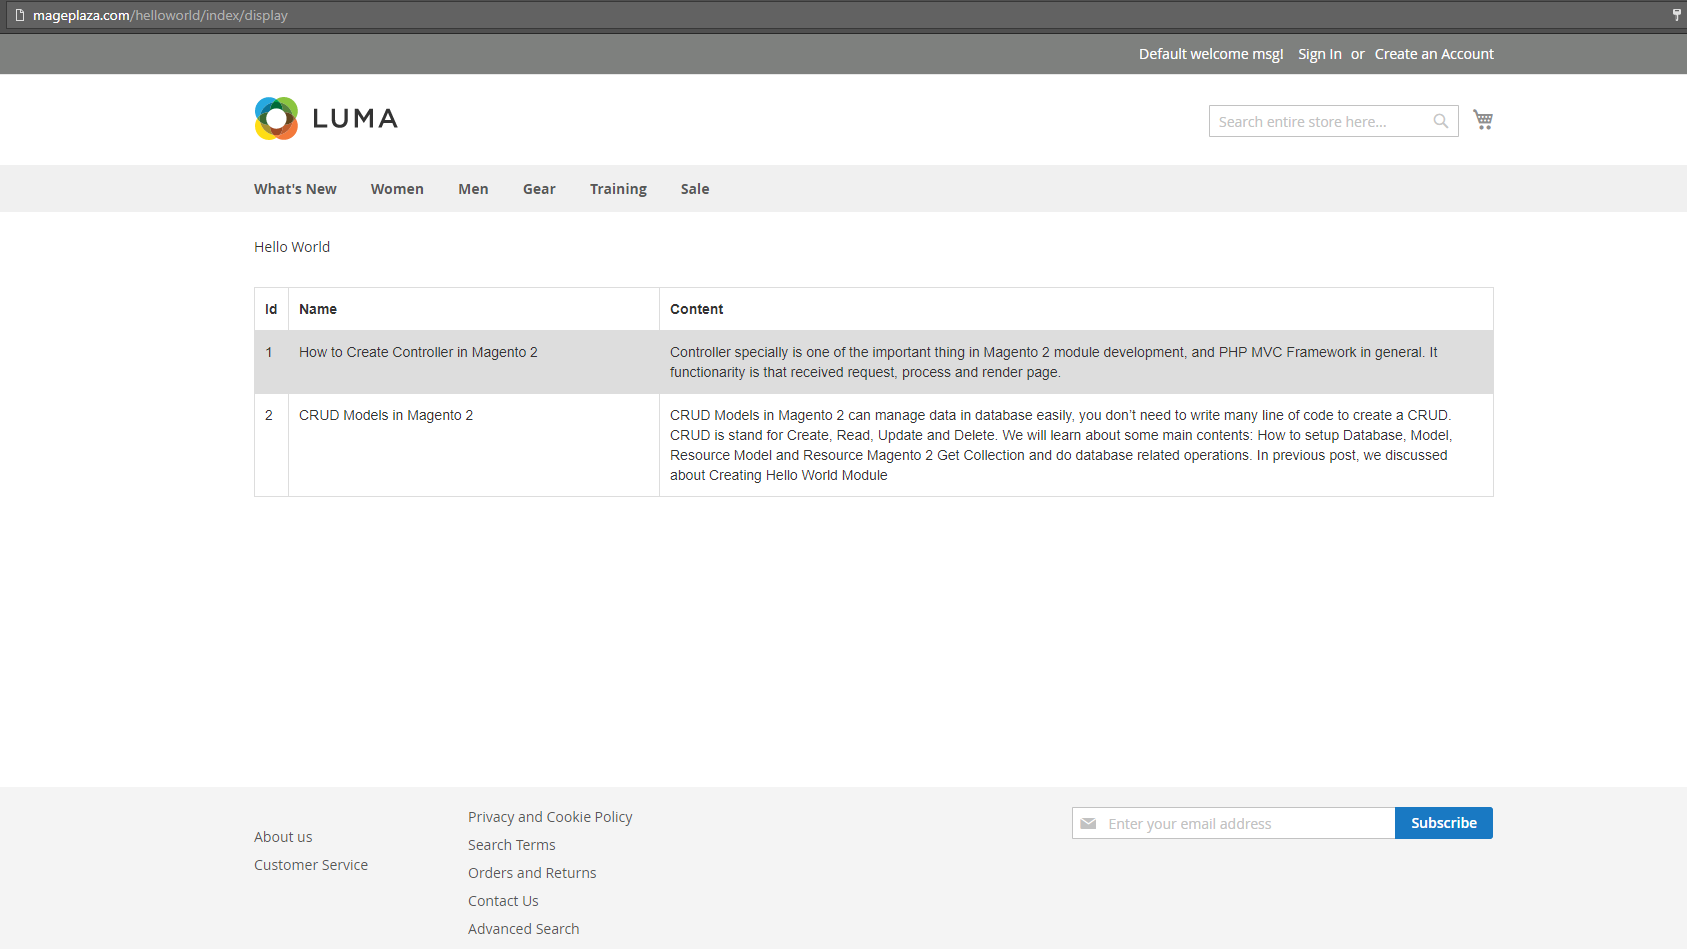
In block file we created a method getPostCollection to get all data on mageplaza_helloworld_post table and we will call it in template.
We edited file app/code/Mageplaza/HelloWorld/view/frontend/templates/sayhello.phtml
Contents would be:
<?php

/**
 * @var \Mageplaza\HelloWorld\Block\Display $block
 */

echo $block->sayHello();

?>

<style>
table {  font-family: arial, sans-serif;  border-collapse: collapse;  width: 100%;  margin-top: 30px;}
td, th {  border: 1px solid #dddddd;  text-align: left;  padding: 8px;  }
tr:nth-child(even) { background-color: #dddddd; }
.post-id{width:2%} .post-name{width:30%}

</style>

<table>
  <tr>
    <th class="post-id">Id</th>
    <th class="post-name">Name</th>
    <th>Content</th>
  </tr>
    <?php
        foreach ($block->getPostCollection() as $key=>$post){
            echo '<tr>
                    <td>'.$post->getPostId().'</td>
                    <td>'.$post->getName().'</td>
                    <td>'.$post->getPostContent().'</td>
                  </tr>';
        }
    ?>
</table>

</body>
</html>
After completing, please run php bin/magento cache:clean and check the result. It will show like this
If you got this error message: Exception printing is disabled by default for security reasons, this topic may help.

0 comments:
Post a Comment
Thanks