WordPress Table
WordPress table is an easy way to show the data in the table format. In the past, we had used the HTML code or table plugin to create a table in WordPress page or post. In this topic, we will discuss how to create a table in WordPress site and page without using HTML code or table plugin.
Creating a table in WordPress Block Editor
If we want to create a table in WordPress site, page, post or blog, we can use the WordPress Block Editor.
Firstly, we need to create a post, page, or edit an existing page or site. Inside the WordPress block editor, click on the plus (+) sign button to add a new block on the page, and then choose the "Table" option.
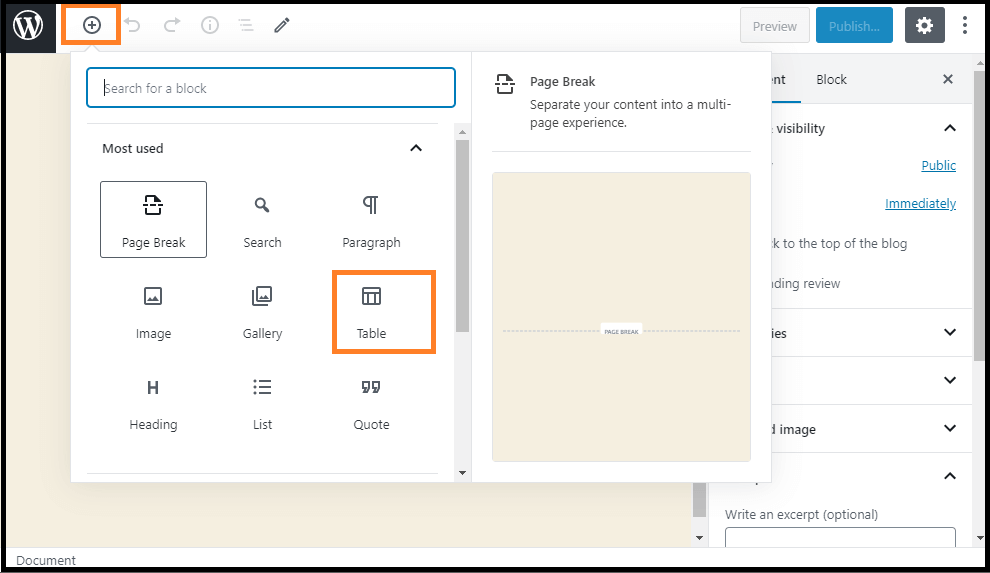
We can find the "Table" option by selecting the Formatting option or directly type its name into the "Search for a block" bar.
Now, we will be prompted to select how many rows and columns we want to keep in the table. By default, both figures two rows and columns.
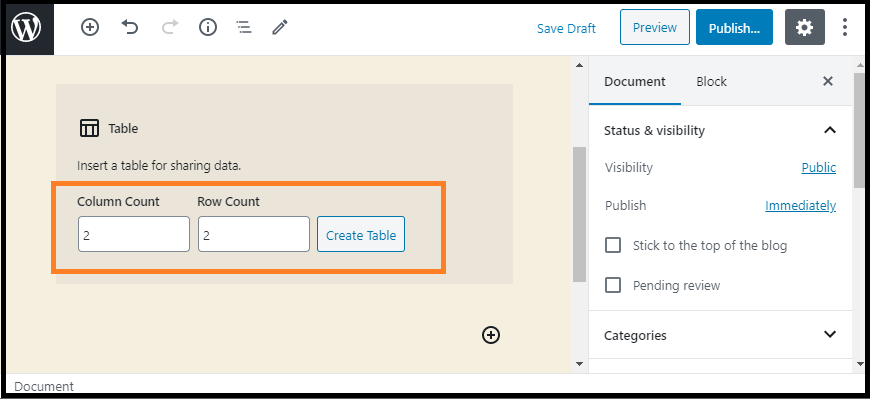
In WordPress sites, we can anytime add or remove the table rows and columns. Here, we can select any rows and columns according to the requirements.
We can type into the table cells, and they will resize automatically depending on how much content there is in each one. If we want to select a fixed width for our table cells, we can set this option to the right side.
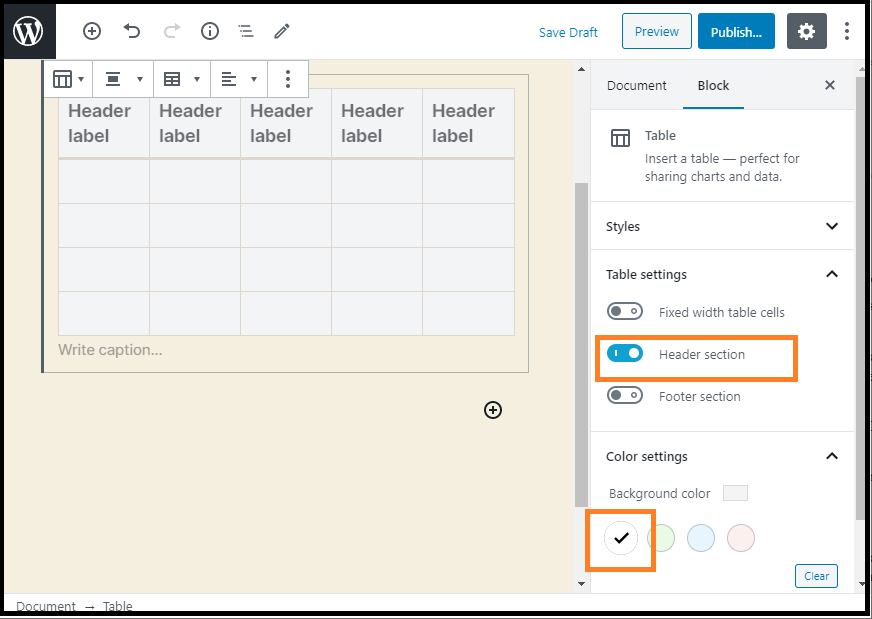
We may also add a table header or footer section in the table. Let's take an example to understand this:
We've added a header to our table and set the background color to grey under the "Color Settings" tab.
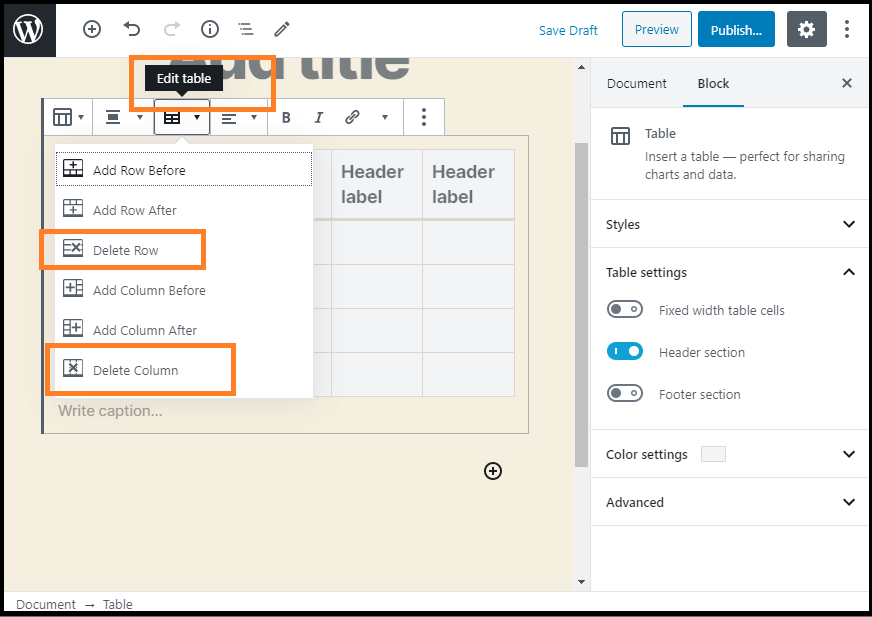
If we want to add a new row or column in the table, click on the table cell to add them. After that, click on the "Edit Table" button. Now, we can add a new column and row in our table.
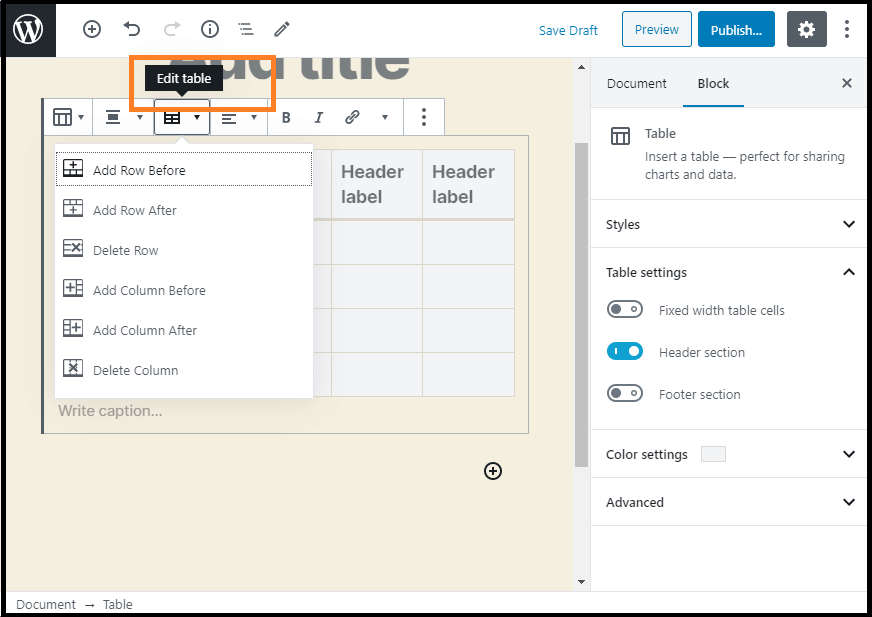
Similarly, we can also delete rows and columns. If we want to delete a cell, click on the table cell that we want to remove, and then choose the "Delete Row" or "Delete Column" option from the "Edit Table" menu.
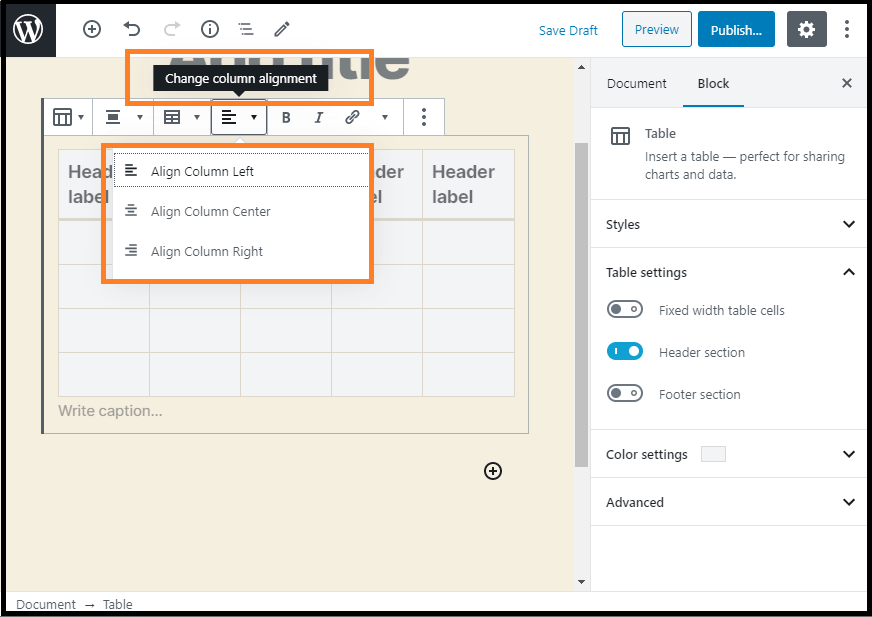
By default, the text in our table columns aligns to the left. By clicking the column, we can change this alignment and then click the "Change Column Alignment" button.
We can change the alignment within the entire table's page or post by clicking on the "Change Alignment" button and choosing an option from the list.
Now the table is set to "Wide Width" as it appears on the site.
As we can see, the post extends beyond the area's left and right edges. The table tools developed in the Gutenberg editor provide us with a great deal of versatility on how our tables are presented. However, table blocks do not have some advanced features such as custom sorting, search filtering, etc. It doesn't permit us to use a single table in different website areas, including sidebar widgets or other websites. If we want to build advanced tables, it is required to use a WordPress table plugin.
Create Tables using the TablePress plugin
It is one of the best table plugins available in the market to create and manage tables easily. This plugin's important thing is that we may edit our table separately and even add many rows and columns. If we use an old classic WordPress editor that does not come with table functionality, TablePress plugin is also required.
TablePress lets us build and handle beautiful tables with ease. With a quick Shortcode, we can insert the tables into pages, posts, or text widgets. Tables can contain any data type, including formulas to be evaluated. An additional JavaScript library adds many features for site visitors, such as searching, sorting, pagination, etc.
Installation of TablePress Plugin
We can use the following steps to install the WordPress Table plugin.
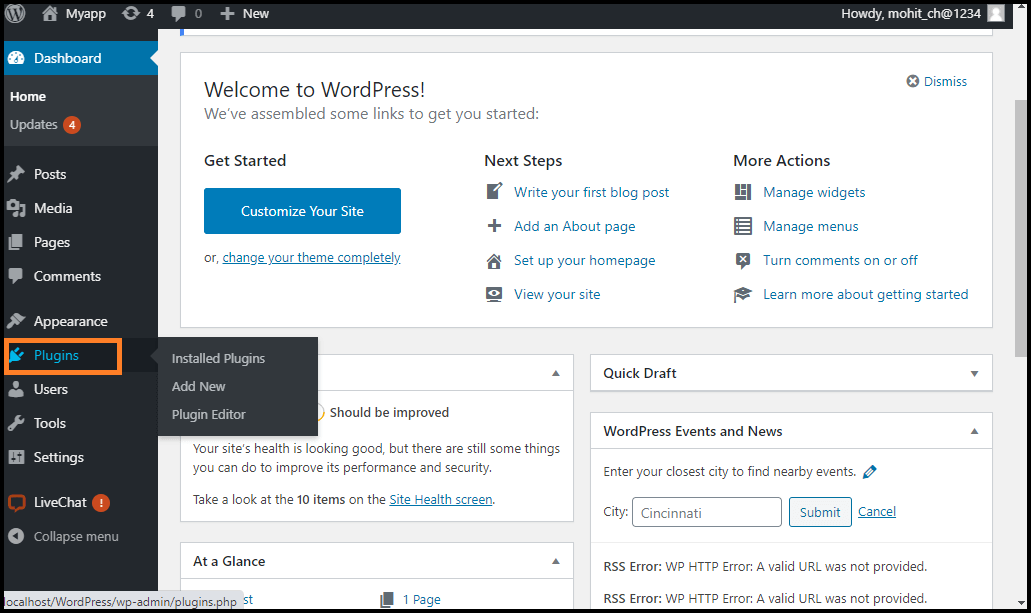
Step 1: Firstly, go to the WordPress dashboard and choose the "plugin" option.
Step 2: Next, go to the search box and enter the plugin name you want to install.
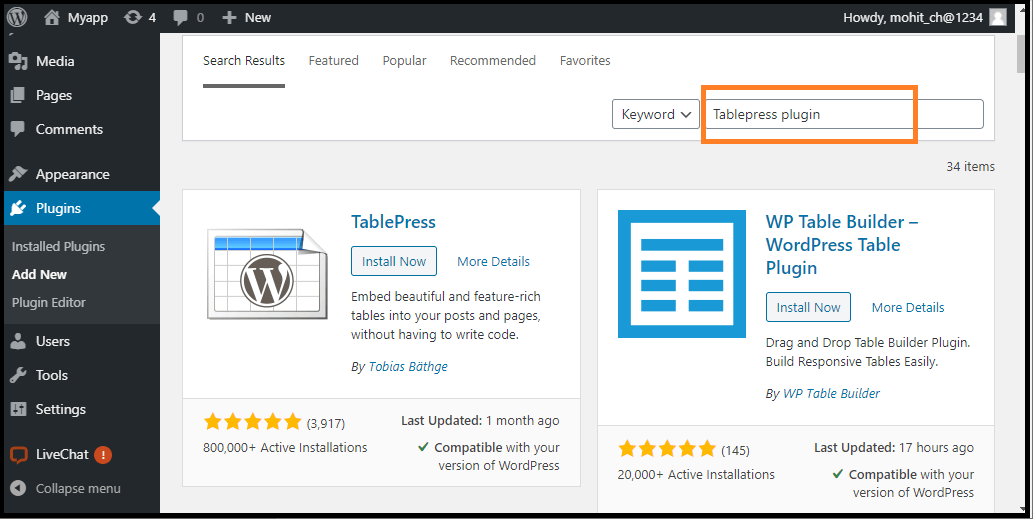
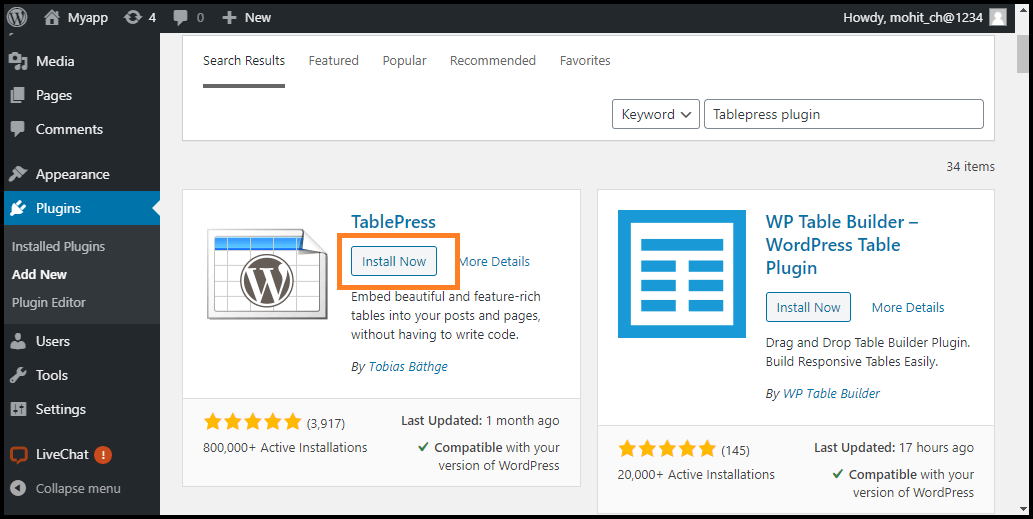
Step 3: Once we find the plugin, click on the "Install Now" button.
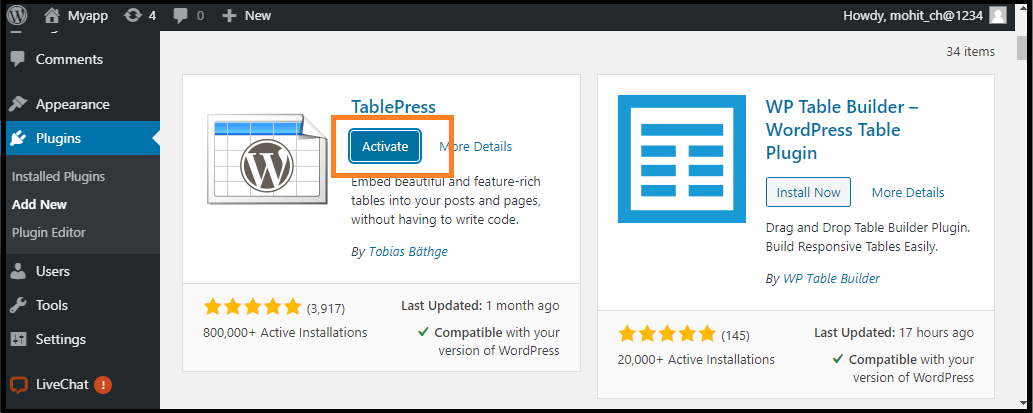
Step 4: After completing all the installation process, activate the plugin.
How to create a table using TablePress plugin?
We can the following steps to create a table using the TablePress plugin:
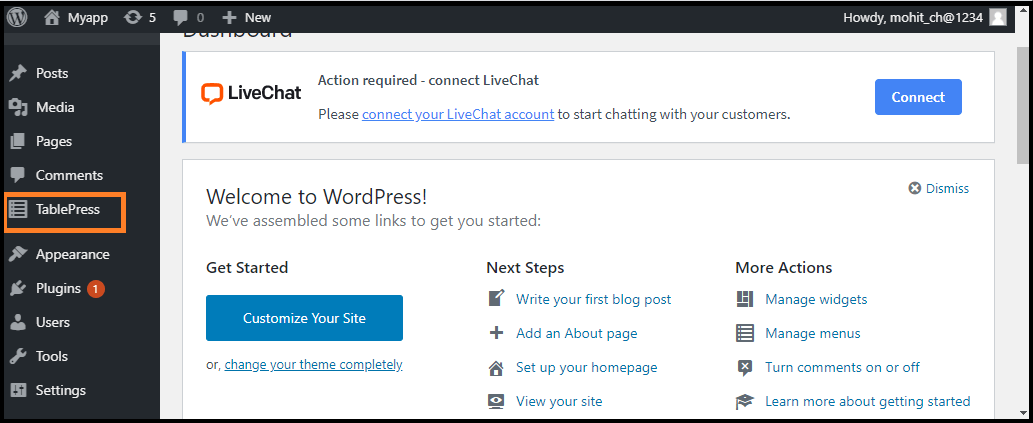
Step 1: Firstly, go to the WordPress dashboard and click on the TablePress option.
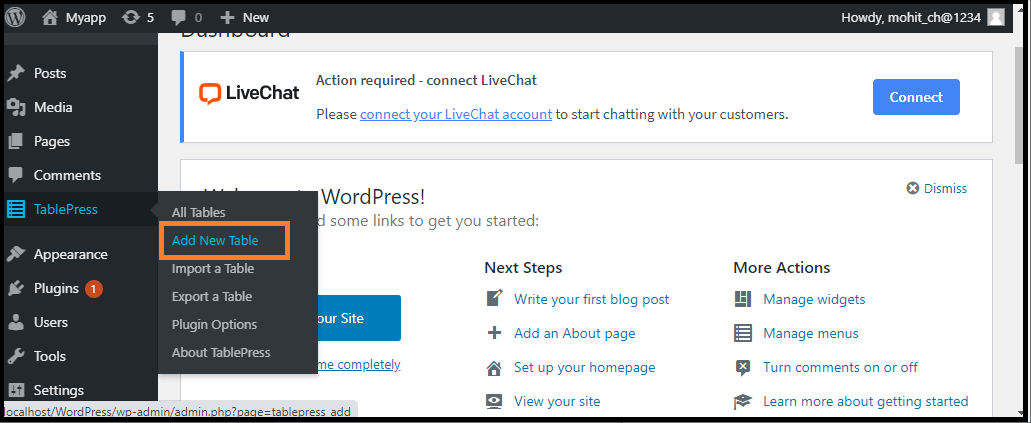
Step 2: Next, click on the "Add New Table" button to create a table.
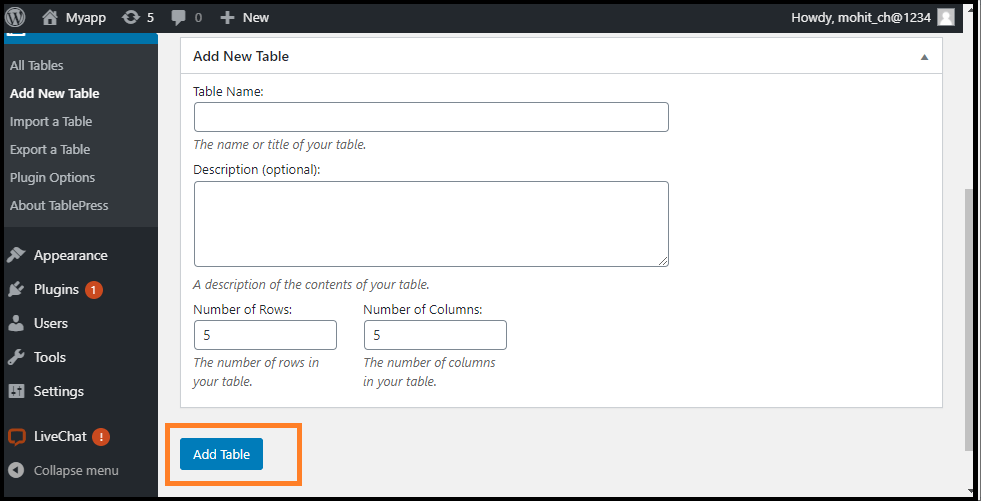
Step 3: After that, we need to type the name of the table, and then select the rows and columns whatever we want. We can anytime add or remove the rows and columns from the table cells.
Step 4: Once the table name, rows, and columns have been inserted, click the "Add Table" button to create a table.
Here, we can see all the table information and an area where we can add the content.
Step 5: Similarly, type the rows and column numbers in the table cell. We may sort the table columns using the arrows above them. These sorting will act in numerical order and alphabetical.
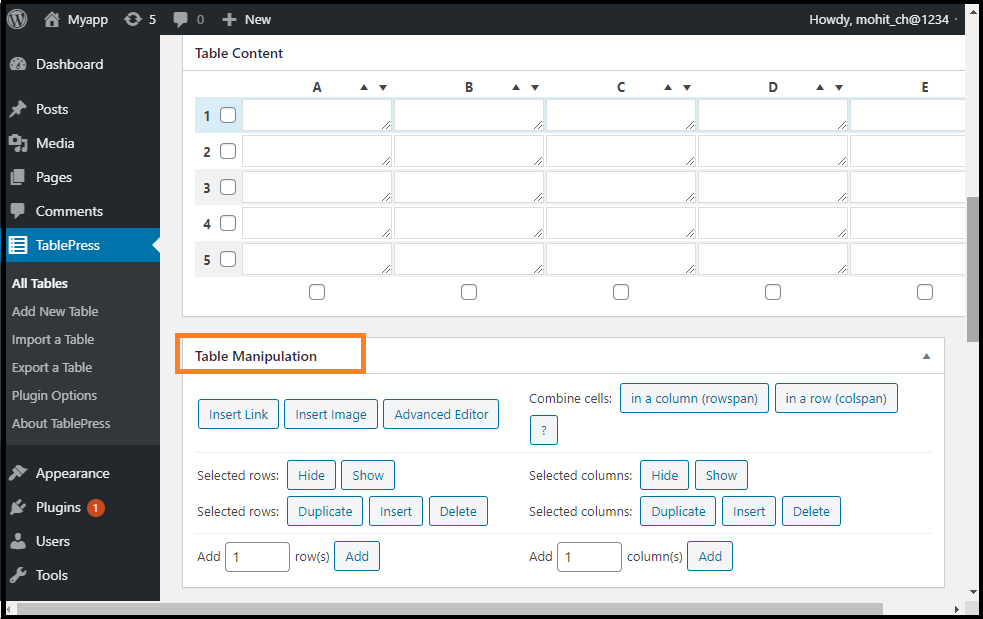
Some advanced features are shown below the "Table Content" area. In "Table Manipulation", we can insert, remove, and duplicate rows in the table cell.
In "Table Options", we can also include a header or footer row in the table that would not be sorted with the data. We may also decide where we want to display the table name and description.
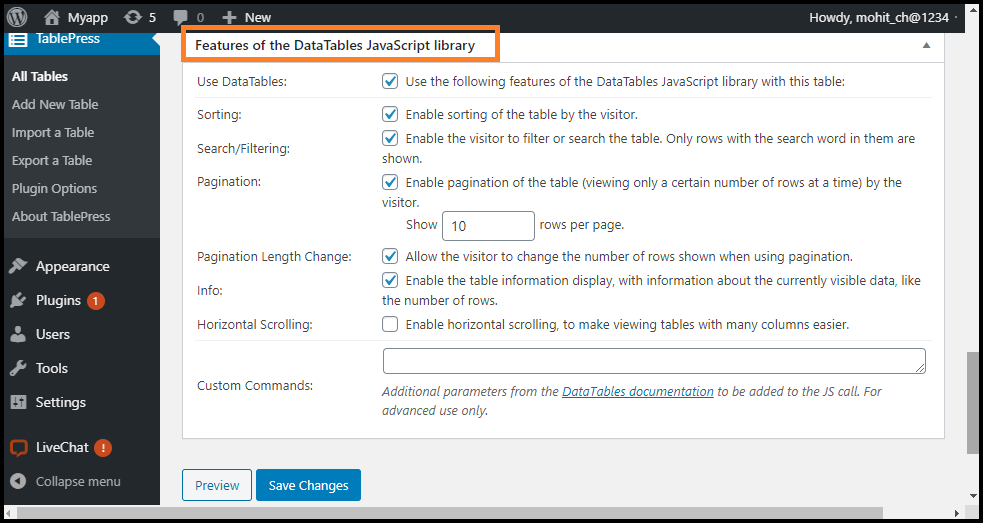
Step 6: We can fix several options in the "Features of the DataTables JavaScript library" section. It helps us to create a responsive table that can be searched, filtered, and sorted by the visitors.
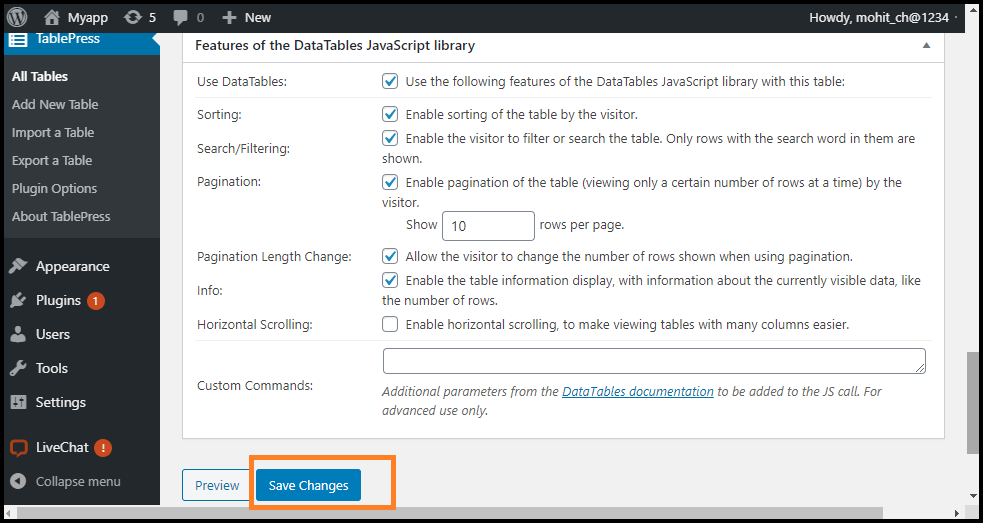
Step 7: After completing all the process, click on the "Save Changes" button.
If we want to modify the table in the future, we can just use the TablePress in the WordPress dashboard and modify the table. The table would be automatically updated on any pages or posts that we have used in it. TablePress can also import data from CSV and spreadsheet files. Similarly, we may also transfer data to a CSV file from a TablePress table that we can open with any spreadsheet software like Google Sheets or Microsoft Excel.

0 comments:
Post a Comment
Thanks