CoderFunda
  • Home
  • About us
    • Contact Us
    • Disclaimer
    • Privacy Policy
    • About us
  • Home
  • Php
  • HTML
  • CSS
  • JavaScript
    • JavaScript
    • Jquery
    • JqueryUI
    • Stock
  • SQL
  • Vue.Js
  • Python
  • Wordpress
  • C++
    • C++
    • C
  • Laravel
    • Laravel
      • Overview
      • Namespaces
      • Middleware
      • Routing
      • Configuration
      • Application Structure
      • Installation
    • Overview
  • DBMS
    • DBMS
      • PL/SQL
      • SQLite
      • MongoDB
      • Cassandra
      • MySQL
      • Oracle
      • CouchDB
      • Neo4j
      • DB2
      • Quiz
    • Overview
  • Entertainment
    • TV Series Update
    • Movie Review
    • Movie Review
  • More
    • Vue. Js
    • Php Question
    • Php Interview Question
    • Laravel Interview Question
    • SQL Interview Question
    • IAS Interview Question
    • PCS Interview Question
    • Technology
    • Other

23 February, 2022

How to Create Controller in Magento 2

 Programing Coderfunda     February 23, 2022     Magento 2, MAGENTO TUTORIALS     No comments   


Controller specially is one of the important thing in Module development series, and PHP MVC Framework in general. It functionarity is that received request, process and render page.

In Magento 2 Controller has one or more files in Controller folder of module, it includes actions of class which contain execute() method. There are 2 different controllers, they are frontend controller and backend controller. They are generally similar of workflow, but admin controller is a little different. There is a checking permission method in admin controller, it calls form key.

How controller work?

It receive an request from end-user (browser or comamnd line), for example:

http://example.com/route_name/controller/action
  • route_name is a unique name which is set in routes.xml.
  • controller is the folder inside Controller folder.
  • action is a class with execute method to process request.

One of the important in Magento system is frontController (Magento\Framework\App\FrontController), it alway receives request then route controller, action by route_name Let’s take an example of routing an request:

foreach ($this->_routerList as $router) {
   try {
      $actionInstance = $router->match($request);
   …
}

If there is an action of controller class found, execute() method will be run.

How to create a controller in Magento 2?

To Create Controller in Magento 2:

  • Step 1: Create routes.xml file
  • Step 2: Create controller file
  • Step 3: Create controller Layout file
  • Step 4: Create controller Block file
  • Step 5: Create controller template file
  • Step 6: Flush Magento cache
  • Step 7: Run a test new controller

To create a controller, we need to create a folder inside Controller folder of module and declare an action class inside it. For example, we create a index controller and a index action for module Mageplaza_HelloWorld:

Step 1: Create routes.xml file.

File: app/code/Mageplaza/HelloWorld/etc/frontend/routes.xml

<?xml version="1.0" ?>
<config xmlns:xsi="http://www.w3.org/2001/XMLSchema-instance" xsi:noNamespaceSchemaLocation="urn:magento:framework:App/etc/routes.xsd">
    <router id="standard">
        <route frontName="helloworld" id="helloworld">
            <module name="Mageplaza_HelloWorld"/>
        </route>
    </router>
</config>

In the previous How to Create Module in Magento 2 , we created file routes.xml. If you created it, you can ignore this step.

Step 2: Create controller file

File: app/code/Mageplaza/HelloWorld/Controller/Index/Index.php

<?php
namespace Mageplaza\HelloWorld\Controller\Index;

class Index extends \Magento\Framework\App\Action\Action
{
	protected $_pageFactory;

	public function __construct(
		\Magento\Framework\App\Action\Context $context,
		\Magento\Framework\View\Result\PageFactory $pageFactory)
	{
		$this->_pageFactory = $pageFactory;
		return parent::__construct($context);
	}

	public function execute()
	{
		return $this->_pageFactory->create();
	}
}

As you see, all controllers must be extended \Magento\Framework\App\Action\Action class which has dispatch method which will call execute() method in action class. In this execute() method, we will write all of our controller logic and will return response for the request.

Step 3: Create Layout file

File: app/code/Mageplaza/HelloWorld/view/frontend/layout/helloworld_index_index.xml

<?xml version="1.0"?>
<page xmlns:xsi="http://www.w3.org/2001/XMLSchema-instance" layout="1column" xsi:noNamespaceSchemaLocation="urn:magento:framework:View/Layout/etc/page_configuration.xsd">
    <referenceContainer name="content">
        <block class="Mageplaza\HelloWorld\Block\Index" name="helloworld_index_index" template="Mageplaza_HelloWorld::index.phtml" />
    </referenceContainer>
</page>

Step 4: Create Block file

File: app/code/Mageplaza/HelloWorld/Block/Index.php

<?php
namespace Mageplaza\HelloWorld\Block;
class Index extends \Magento\Framework\View\Element\Template
{

}

Step 5: Create template file

File: app/code/Mageplaza/HelloWorld/view/frontend/templates/index.phtml

<h2>Welcome to Mageplaza.com</h2>

We can learn more View: Layout, Block, Template in this topic.

Step 6: Flush Magento cache

How to flush Magento cache here

Step 7: Run a test

Let’s open browser and navigate to

http://<yourhost.com>/helloworld/index/index

or

http://<yourhost.com>/helloworld/
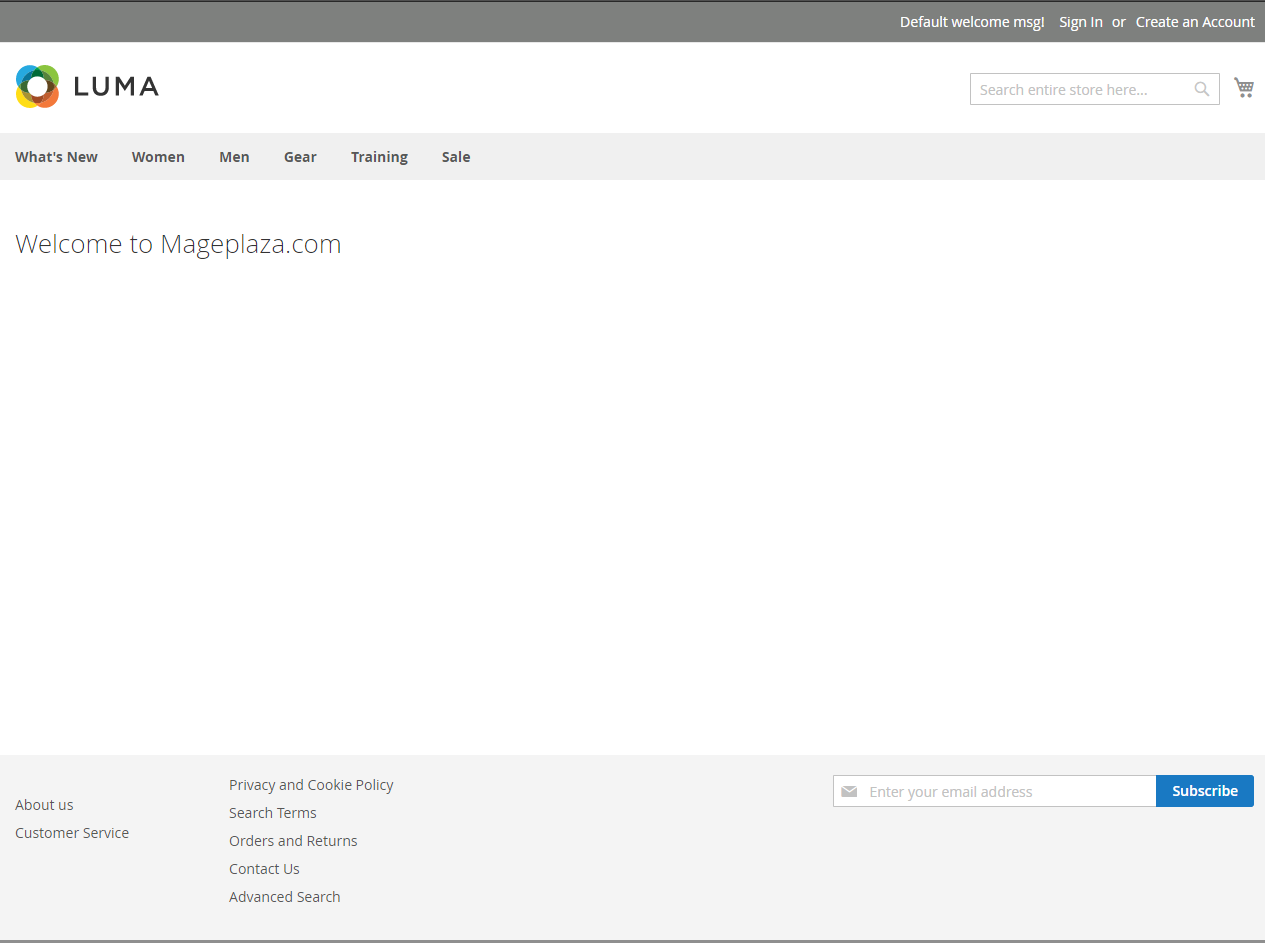
welcome to Mageplaz.com

Permission - ACL

There is a checking permission method in admin controller. Let’s take an example:

protected function _isAllowed()
{
    return $this->_authorization->isAllowed('Magento_AdminNotification::show_list');
}

It will check the current user has right to access this action or not, learn more Admin ACL Access Control Lists

Other methods in Magento 2 Controller

_forward() and _redirect() action.

\Magento\Framework\App\Action\Action class provide us 2 important methods: _forward and _redirect.

Forward method

_forward() protected function will edit the request to transfer it to another controller/action class. This will not change the request url. For example, we have 2 actions Forward and Hello World like this:

namespace Mageplaza\HelloWorld\Controller\Test;
class Forward extends \Magento\Framework\App\Action\Action
{
	public function execute()
	{
		$this->_forward('hello');
	}
}

If you make a request to http://example.com/route_name/test/forward , here are result will be displied on the screen.

Hello World! Welcome to Mageplaza.com

You can also change the controller, module and set param for the request when forward. Please check the _forward() function for more information:

protected function _forward($action, $controller = null, $module = null, array $params = null)
{
    $request = $this->getRequest();

    $request->initForward();

    if (isset($params)) {
        $request->setParams($params);
    }

    if (isset($controller)) {
        $request->setControllerName($controller);

        // Module should only be reset if controller has been specified
        if (isset($module)) {
            $request->setModuleName($module);
        }
    }

    $request->setActionName($action);
    $request->setDispatched(false);
}

Redirect method

This method will transfer to another controller/action class and also change the response header and the request url. With above example, if we replace _forward() method by this _redirect() method:

	$this->_redirect('*/*/hello');

Then after access from the url http://example.com/route_name/test/forward, the url will be change to http://example.com/route_name/test/hello and show the message Hello World! Welcome to Mageplaza.com on the screen.

If you got this error message: Exception printing is disabled by default for security reasons, this topic may help.

Now it comes to the end of Create a controller topic, in the next tutorial, I will show you how to create a model in Magento 2.
Read More
  • Share This:  
  •  Facebook
  •  Twitter
  •  Google+
  •  Stumble
  •  Digg

Magento 2 Module Development - Simple Hello World Module

 Programing Coderfunda     February 23, 2022     Magento 2, MAGENTO TUTORIALS     No comments   

 Magento 2 Module development or Magento 2 Hello World trends is increase rapidly while Magento release official version. That why we - Mageplaza - are wring about a topic that introduces how to create a simple Module.

As you know, the module is a directory that contains blocks, controllers, models, helper, etc - that are related to a specific business feature. The etc folder contains admin ACL, admin menu, configuration . In Magento 2, modules will be live in app/code directory of a Magento installation, with this format: app/code/<Vendor>/<ModuleName>. Now we will follow this steps to create a simple module which work on Magento 2 and display Hello World.

Basic Topics

  • Create Controller
  • Create Model
  • Create View
  • Admin Menu
  • Configuration
  • Admin Grid

Create Hello World module for Magento 2

To create Hello World module, you need to complete the following high-level steps:

  • Step 1: Create the folder of Hello World module
  • Step 2: Create etc/module.xml file
  • Step 3: Create etc/registration.php file
  • Step 4: Enable the module

Step 1: Create the folder of Hello World module

Name of the module is defined as VendorName_ModuleName. First part is name of the vendor and last part is name of the module: For example: Magento_HelloWorld, Mageplaza_PdfInvoice. Focus on following guide to create the folders:

  app/code/Mageplaza/HelloWorld

Step 2: Create etc/module.xml file.

Then, it is necessary to create etc folder and add the module.xml file

  app/code/Mageplaza/HelloWorld/etc/module.xml

Contents would be:

<?xml version="1.0"?>
<config xmlns:xsi="http://www.w3.org/2001/XMLSchema-instance" xsi:noNamespaceSchemaLocation="urn:magento:framework:Module/etc/module.xsd">
    <module name="Mageplaza_HelloWorld" setup_version="1.0.0">
    </module>
</config>

Step 3: Create registration.php file

In this step, we will add registration.php as following guide:

  app/code/Mageplaza/HelloWorld/registration.php

Contents would be:

<?php
\Magento\Framework\Component\ComponentRegistrar::register(
	\Magento\Framework\Component\ComponentRegistrar::MODULE,
	'Mageplaza_HelloWorld',
	__DIR__
);

Step 4: Enable the module

Finish the step 3, we have already created the HelloWorld module. And we will enable this module in this step

After create the module if you run the command as:

  php bin/magento module:status

You should see the module is disable now:

List of disabled modules: Mageplaza_HelloWorld

Follow exact guide to enable the module right now, let run the command as:

  php bin/magento module:enable Mageplaza_HelloWorld

Or other way, you can access the file:

  app/etc/config.php

You will see a long list of modules there, just add your module as well

  ...
  'Mageplaza_HelloWorld' => 1, 
  ...

Your module should be available now.

After this step, when you open your website in browser you will get an error saying

Please upgrade your database: Run bin/magento setup:upgrade from the Magento root directory.

Let run the command:

  php bin/magento setup:upgrade

After complete,when you open your website in browser you will see the layout of the website is broken.

magento 2 broken upgrade

Please run the deloy command line to fix it.

php bin/magento setup:static-content:deploy

After deploy completed, you can also see your module from backend at System Configuration -> Advanced -> Disable Modules Output.

Now, we will create a controller to test module.

Before create a controller, we will create a route for HelloWorld module.

Route’s in magento are divided into 3 parts: Route frontname, controller and action as following example:

http://mageplaza.com/index.php/frontname/controller/action

To add route, it is necessary to create routes.xml file

app/code/Mageplaza/HelloWorld/etc/frontend/routes.xml

since this is a frontend route, we added it in frontend/ folder else we need to add it to adminhtml/ folder

Content would be:

<?xml version="1.0" ?>
<config xmlns:xsi="http://www.w3.org/2001/XMLSchema-instance" xsi:noNamespaceSchemaLocation="urn:magento:framework:App/etc/routes.xsd">
    <router id="standard">
        <route frontName="helloworld" id="helloworld">
            <module name="Mageplaza_HelloWorld"/>
        </route>
    </router>
</config>

After defining the first part of the route, the URL will be displayed as:

  http://<yourhost.com>/helloworld/*

E.g: http://localhost/helloworld/*

Then, we will continue to create the controller and action

The folder and file you need to create is:

app/code/Mageplaza/HelloWorld/Controller/Index/Test.php

Contents would be:

<?php
namespace Mageplaza\HelloWorld\Controller\Index;

class Test extends \Magento\Framework\App\Action\Action
{
	protected $_pageFactory;

	public function __construct(
		\Magento\Framework\App\Action\Context $context,
		\Magento\Framework\View\Result\PageFactory $pageFactory)
	{
		$this->_pageFactory = $pageFactory;
		return parent::__construct($context);
	}

	public function execute()
	{
		echo "Hello World";
		exit;
	}
}

After completed, please run php bin/magento cache:clean to check result.

Your URL now should be as:

 http://<yourhost.com>/helloworld/index/test

After finish all steps, the output Hello World should be displayed in your browser when you open the URL. We hope our guide is very useful and effective for you. Any questions, feel free to leave a commend below. In the next tutorial, you will learn how to create a controller.

Read More
  • Share This:  
  •  Facebook
  •  Twitter
  •  Google+
  •  Stumble
  •  Digg

How to add a custom Zipcode validator in checkout page Magento 2

 Programing Coderfunda     February 23, 2022     Magento 2, MAGENTO TUTORIALS     No comments   


How to add a custom Zipcode validator in checkout page Magento 2

In Magento 2, it’s not difficult to customize zip code validation and or add a custom zipcode validator on the checkout page.

Magento uses Regular Expression (re) to check whether the entered zipcode/postcode is correct.

In this article, we will add our own expression to validate the zipcode.

In Magento default, all patterns are defined in this file:

vendor/magento/module-directory/etc/zip_codes.xml

To add your pattern, or customize zip code validation on the checkout page to suit a specific country, create a new zip_codes.xml inside your own module

Here’s an example:

I choose NL (Dutch language) and add the zip_codes.xml to Mageplaza\HelloWorld\etc folder

<?xml version="1.0"?>
<config xmlns:xsi="http://www.w3.org/2001/XMLSchema-instance" xsi:noNamespaceSchemaLocation="urn:magento:module:Magento_Directory:etc/zip_codes.xsd">
    <zip countryCode="NL">
            <codes>
                <code id="pattern_1" active="true" example="1234 AB">^[0-9]{4}\s[a-zA-Z]{2}$</code>
                <code id="pattern_2" active="true" example="1234AB">^[0-9]{4}\s?[a-zA-Z]{2}$</code>
            </codes>
        </zip>
</config>

The pattern_2 is quite similar to the first one, except that it allows users to enter space character.
I leave 2 patterns there so that you can see the difference, when apply to your store, you can remove the first pattern, pattern_2 still covers cases from pattern_1.

Now time to flush cache and test your result. You will no longer see this warning

Ductch lang warning

Read More
  • Share This:  
  •  Facebook
  •  Twitter
  •  Google+
  •  Stumble
  •  Digg

How to add custom shipping validations Magento 2

 Programing Coderfunda     February 23, 2022     Magento 2, MAGENTO TUTORIALS     No comments   

 In Magento 2, it’s possible to set shipping validations. This action is also essential because it ensures the transparance and right form of required shipping information.

For developers, this shipping validator will trigger the checkout module to load (ajax) the shipping method details when users entering information.
This is an essential part of the bigger task of adding a custom shipping method to your Magento store.

In this article, we will take a look at Magento default/native carriers and then implement our own rules/validator.

Having issues with adding custom shipping validations in Magento 2? Don’t worry! This tutorial is all you need.

Customize shipping carrier validator.

  • Step 1: Understand TableRate validators.
  • Step 2: Add our custom rules/validator.
    • 2.1 Add Shipping rate validation rules
    • 2.2: Add Shipping Rates Validator
    • 2.3: Registering our validator
    • 2.4 Add the validation to the checkout layout
  • Step 3: Flush cache and test result

You should know how to create a basic Magento 2 module. All of customized files will be inside this module.

Let’s begin.

Step 1: Understand TableRate validator.

Since the validator bases on the rules we will check the rules first.
Just bear with me a bit, we will know exactly what they are soon.

The code from the TableRate Rules js/model/shipping-rates-validation-rules/tablerate.js as below

/**
 * Copyright © 2013-2017 Magento, Inc. All rights reserved.
 * See COPYING.txt for license details.
 */
/*global define*/
define(
    [],
    function () {
        "use strict";
        return {
            getRules: function() {
                return {
                    'postcode': {
                        'required': true
                    },
                    'country_id': {
                        'required': true
                    },
                    'region_id': {
                        'required': true
                    },
                    'region_id_input': {
                        'required': true
                    }
                };
            }
        };
    }
);

Only one defined function getRules, this is where we define our rules.
For the tableRate, it requires country, state, postcode to be filled in before loading/triggering the Shipping method details.

This is the code from TableRate Validator /js/model/shipping-rates-validator/tablerate.js

/**
 * Copyright © 2013-2017 Magento, Inc. All rights reserved.
 * See COPYING.txt for license details.
 */
/*global define*/
define(
    [
        'jquery',
        'mageUtils',
        '../shipping-rates-validation-rules/tablerate',
        'mage/translate'
    ],
    function ($, utils, validationRules, $t) {
        'use strict';
        return {
            validationErrors: [],
            validate: function (address) {
                var self = this;
                this.validationErrors = [];
                $.each(validationRules.getRules(), function (field, rule) {
                    if (rule.required && utils.isEmpty(address[field])) {
                        var message = $t('Field ') + field + $t(' is required.');
                        var regionFields = ['region', 'region_id', 'region_id_input'];
                        if (
                            $.inArray(field, regionFields) === -1
                            || utils.isEmpty(address['region']) && utils.isEmpty(address['region_id'])
                        ) {
                            self.validationErrors.push(message);
                        }
                    }
                });
                return !Boolean(this.validationErrors.length);
            }
        };
    }
);

The main method here is the validate method, this method is required for every validator.
The code is simple, what it does is checking whether those required fields have been fulfilled.

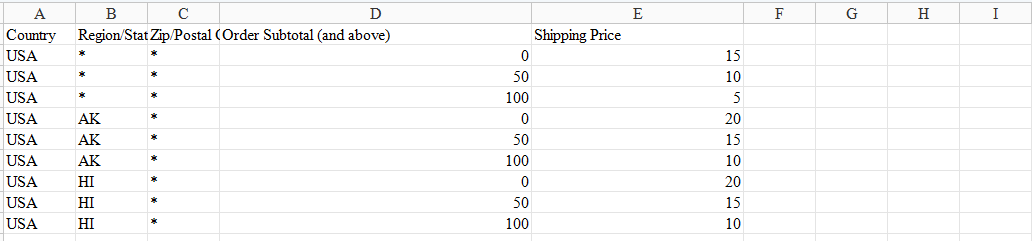
Here is the price information bases on each country/region
tableRate information

To test this validator, you should use TableRates as the only Shipping Carrier. Read more about Shipping Settings here

First, I add a $45 item to the cart which will result in $15 shipping price, fill in all required information except for State/Province information. When I change the State to Alaska (abbr: AK), the shipping method will reload.
Here is the video that demonstrates step by step: https://www.screencast.com/t/PuK9hy5zYaP

Step 2: Create a custom rule/validator.

We need 3 files: 2 files to define getRules and validate functions. The last file is responsible for letting Magento knows the existence of our new code (Registering our validator).
Since we don’t have a new carrier, we will overwrite tablerate. Instead of using Magento’s table rate rules and validator, it will use our created rules and validator.

Step 2.1 Add Shipping rate validation rules

Create the tablerate.js file under Mageplaza/HelloWorld/view/frontend/web/js/model/shipping-rates-validation-rules directory.

define(
    [],
    function () {
        "use strict";
        return {
            getRules: function() {
                return {
                    'region_id': {
                        'required': true
                    },
                    'region_id_input': {
                        'required': true
                    },
                    'telephone': {
                        'required': true
                    }
                };
            }
        };
    }
);

Step 2.2: Add Shipping Rates Validator

Create the tablerate.js file under Mageplaza/HelloWorld/view/frontend/web/js/model/shipping-rates-validator directory.

define(
    [
        'jquery',
        'mageUtils',
        '../shipping-rates-validation-rules/tablerate',
        'mage/translate'
    ],
    function ($, utils, validationRules, $t) {
        'use strict';
        return {
            validationErrors: [],
            validate: function (address) {
                var self = this;
                this.validationErrors = [];

                $.each(validationRules.getRules(), function (field, rule) {
                    if (rule.required && field === 'telephone' & address[field] !== '911') {
                        self.validationErrors.push(1);
                    }
                });
                return !!!(this.validationErrors.length);
            }
        };
    }
);

Step 2.3: Registering our validator

To register our new validator, we must add it to the pool of validators.
To do this, in the Mageplaza/HelloWorld/view/frontend/web/js/view directory create a new tablerate.js file with the following content:

define(
    [
        'uiComponent',
        'Magento_Checkout/js/model/shipping-rates-validator',
        'Magento_Checkout/js/model/shipping-rates-validation-rules',
        '../model/shipping-rates-validator/tablerate',
        '../model/shipping-rates-validation-rules/tablerate'
    ],
    function (
        Component,
        defaultShippingRatesValidator,
        defaultShippingRatesValidationRules,
        shippingRatesValidator,
        shippingRatesValidationRules
    ) {
        'use strict';
        defaultShippingRatesValidator.registerValidator('tablerate', shippingRatesValidator);
        defaultShippingRatesValidationRules.registerRules('tablerate', shippingRatesValidationRules);
        return Component;
    }
);

Step 2.4 Add the validation to the checkout layout

Add the following code to Mageplaza/HelloWorld/view/frontend/layout/checkout_index_index.xml

 <page xmlns:xsi="http://www.w3.org/2001/XMLSchema-instance" layout="1column" xsi:noNamespaceSchemaLocation="urn:magento:framework:View/Layout/etc/page_configuration.xsd">
     <body>
         <referenceBlock name="checkout.root">
                 <arguments>
                     <argument name="jsLayout" xsi:type="array">
                         <item name="components" xsi:type="array">
                             <item name="checkout" xsi:type="array">
                                 <item name="children" xsi:type="array">
                                     <item name="steps" xsi:type="array">
                                         <item name="children" xsi:type="array">
                                             <item name="shipping-step" xsi:type="array">
                                                 <item name="children" xsi:type="array">
                                                     <!-- add a new validator-->
                                                     <item name="step-config" xsi:type="array">
                                                         <item name="children" xsi:type="array">
                                                             <item name="shipping-rates-validation" xsi:type="array">
                                                                 <item name="children" xsi:type="array">
                                                                     <item name="tablerate" xsi:type="array">
                                                                         <item name="component" xsi:type="string">Mageplaza_HelloWorld/js/view/tablerate</item>
                                                                     </item>
                                                                 </item>
                                                             </item>
                                                         </item>
                                                     </item>
                                                 </item>
                                             </item>
                                         </item>
                                     </item>
                                 </item>
                             </item>
                         </item>
                     </argument>
                 </arguments>
         </referenceBlock>
     </body>
 </page>

The code is simple, it only applies TableRate when the telephone field has the value of 911.

Step 3: Flush cache and test result

Now time to flush cache and test your result. If you have any issue, feel free to leave a comment below, Mageplaza and Magento community are willing to help.

Final words

That’s all about custom shipping validations in Magento 2. I hope this tutorial is helpful for you. If you have any questions, feel free to let me know in the comment section. Thanks for reading!


by mageplaza.com

Read More
  • Share This:  
  •  Facebook
  •  Twitter
  •  Google+
  •  Stumble
  •  Digg
Newer Posts Older Posts Home

Meta

Popular Posts

  • Generate Migrations from an Existing Database With the Migration Generator Package
    Laravel Migration Generator Migration Generator for Laravel is a package by Bennett Treptow to generate migrations from existing database ...
  • Search Through Models with Laravel Searchable
      Laravel Searchable   is a package by   Spatie   to search through models and other sources pragmatically. Using this package, you can get ...
  • Laravel Razorpay Integration | Payment gateway integration Laravel in 30 mins | Laravel Razorpay
    1 Integration of Razorpay with Laravel. In this tutorial, I have taught how to integrate payment gateway with laravel with mini-project. If...
  • Vue.js Render functions
        Vue.js Render functions Vue.js recommends us to use templates to build HTML. Here, we can use the render function as a closer-to-the-co...
  • Tailwindcss best practices for responsive design
    Tailwind CSS provides powerful utilities for responsive design out of the box. To use it effectively and maintain clean, scalable code, here...

Categories

  • Ajax (26)
  • Bootstrap (30)
  • DBMS (42)
  • HTML (12)
  • HTML5 (45)
  • JavaScript (10)
  • Jquery (34)
  • Jquery UI (2)
  • JqueryUI (32)
  • Laravel (1017)
  • Laravel Tutorials (23)
  • Laravel-Question (6)
  • Magento (9)
  • Magento 2 (95)
  • MariaDB (1)
  • MySql Tutorial (2)
  • PHP-Interview-Questions (3)
  • Php Question (13)
  • Python (36)
  • RDBMS (13)
  • SQL Tutorial (79)
  • Vue.js Tutorial (69)
  • Wordpress (150)
  • Wordpress Theme (3)
  • codeigniter (108)
  • oops (4)
  • php (853)

Social Media Links

  • Follow on Twitter
  • Like on Facebook
  • Subscribe on Youtube
  • Follow on Instagram

Pages

  • Home
  • Contact Us
  • Privacy Policy
  • About us

Blog Archive

  • ▼  2026 (12)
    • ▼  07/26 - 08/02 (11)
      • 'The Odyssey' crosses USD 639.6 million globally
      • 'Ramayana' to have 'Baahubali'-style cliffhanger e...
      • Kim Kardashian remember late granny on 92nd heaven...
      • Emma Roberts weds Cody John in intimate Idaho cere...
      • 'Jana Nayagan' BO day 4: Film crosses Rs 100 Cr Net
      • 'Chennai Love Story' BO jumps 11.1%
      • China’s new hybrid rice can preserve its high-yiel...
      • Quote of the day by Thucydides: 'Self-control is t...
      • Quote of the day by Slavoj Žižek: 'The problem for...
      • A stormwater pond in Calgary appears filled with P...
      • Inside Kriti Sanon's duplex sea-facing penthouse w...
    • ►  06/28 - 07/05 (1)
  • ►  2025 (4)
    • ►  07/06 - 07/13 (2)
    • ►  06/29 - 07/06 (2)
  • ►  2024 (486)
    • ►  09/15 - 09/22 (30)
    • ►  09/08 - 09/15 (35)
    • ►  09/01 - 09/08 (35)
    • ►  08/11 - 08/18 (2)
    • ►  08/04 - 08/11 (33)
    • ►  07/28 - 08/04 (30)
    • ►  07/07 - 07/14 (11)
    • ►  06/30 - 07/07 (35)
    • ►  06/23 - 06/30 (5)
    • ►  06/02 - 06/09 (31)
    • ►  05/26 - 06/02 (20)
    • ►  05/05 - 05/12 (29)
    • ►  04/28 - 05/05 (26)
    • ►  04/07 - 04/14 (10)
    • ►  03/31 - 04/07 (34)
    • ►  03/24 - 03/31 (10)
    • ►  03/03 - 03/10 (35)
    • ►  02/25 - 03/03 (15)
    • ►  02/04 - 02/11 (22)
    • ►  01/28 - 02/04 (30)
    • ►  01/07 - 01/14 (8)
  • ►  2023 (484)
    • ►  12/31 - 01/07 (35)
    • ►  12/24 - 12/31 (10)
    • ►  12/03 - 12/10 (33)
    • ►  11/26 - 12/03 (20)
    • ►  11/05 - 11/12 (35)
    • ►  10/29 - 11/05 (20)
    • ►  10/22 - 10/29 (9)
    • ►  10/15 - 10/22 (7)
    • ►  10/08 - 10/15 (9)
    • ►  10/01 - 10/08 (10)
    • ►  09/24 - 10/01 (9)
    • ►  09/17 - 09/24 (9)
    • ►  09/10 - 09/17 (7)
    • ►  09/03 - 09/10 (9)
    • ►  08/27 - 09/03 (9)
    • ►  08/20 - 08/27 (8)
    • ►  08/13 - 08/20 (8)
    • ►  08/06 - 08/13 (8)
    • ►  07/30 - 08/06 (8)
    • ►  07/23 - 07/30 (7)
    • ►  07/16 - 07/23 (8)
    • ►  07/09 - 07/16 (7)
    • ►  07/02 - 07/09 (8)
    • ►  06/25 - 07/02 (7)
    • ►  06/18 - 06/25 (7)
    • ►  06/11 - 06/18 (7)
    • ►  06/04 - 06/11 (11)
    • ►  05/28 - 06/04 (7)
    • ►  05/21 - 05/28 (8)
    • ►  05/14 - 05/21 (11)
    • ►  05/07 - 05/14 (7)
    • ►  04/30 - 05/07 (7)
    • ►  04/23 - 04/30 (8)
    • ►  04/16 - 04/23 (9)
    • ►  04/09 - 04/16 (7)
    • ►  04/02 - 04/09 (4)
    • ►  03/26 - 04/02 (21)
    • ►  03/19 - 03/26 (2)
    • ►  03/12 - 03/19 (9)
    • ►  03/05 - 03/12 (26)
    • ►  02/26 - 03/05 (25)
    • ►  01/15 - 01/22 (7)
    • ►  01/08 - 01/15 (1)
  • ►  2022 (1037)
    • ►  12/11 - 12/18 (13)
    • ►  12/04 - 12/11 (1)
    • ►  11/27 - 12/04 (40)
    • ►  11/06 - 11/13 (1)
    • ►  10/16 - 10/23 (13)
    • ►  09/04 - 09/11 (5)
    • ►  08/21 - 08/28 (24)
    • ►  08/14 - 08/21 (24)
    • ►  07/03 - 07/10 (9)
    • ►  06/19 - 06/26 (3)
    • ►  05/29 - 06/05 (3)
    • ►  05/22 - 05/29 (3)
    • ►  05/15 - 05/22 (109)
    • ►  05/01 - 05/08 (7)
    • ►  04/24 - 05/01 (7)
    • ►  04/17 - 04/24 (64)
    • ►  04/10 - 04/17 (115)
    • ►  04/03 - 04/10 (73)
    • ►  03/27 - 04/03 (77)
    • ►  03/13 - 03/20 (2)
    • ►  03/06 - 03/13 (25)
    • ►  02/27 - 03/06 (18)
    • ►  02/20 - 02/27 (153)
    • ►  02/13 - 02/20 (187)
    • ►  01/30 - 02/06 (45)
    • ►  01/23 - 01/30 (15)
    • ►  01/16 - 01/23 (1)
  • ►  2021 (412)
    • ►  10/24 - 10/31 (2)
    • ►  07/25 - 08/01 (1)
    • ►  07/11 - 07/18 (10)
    • ►  06/13 - 06/20 (29)
    • ►  05/23 - 05/30 (1)
    • ►  05/02 - 05/09 (24)
    • ►  04/25 - 05/02 (24)
    • ►  04/18 - 04/25 (112)
    • ►  04/11 - 04/18 (1)
    • ►  04/04 - 04/11 (6)
    • ►  03/28 - 04/04 (86)
    • ►  03/21 - 03/28 (19)
    • ►  03/14 - 03/21 (2)
    • ►  03/07 - 03/14 (10)
    • ►  02/28 - 03/07 (1)
    • ►  02/21 - 02/28 (29)
    • ►  02/14 - 02/21 (13)
    • ►  02/07 - 02/14 (12)
    • ►  01/31 - 02/07 (6)
    • ►  01/17 - 01/24 (2)
    • ►  01/10 - 01/17 (8)
    • ►  01/03 - 01/10 (14)
  • ►  2020 (376)
    • ►  12/27 - 01/03 (37)
    • ►  12/20 - 12/27 (92)
    • ►  12/13 - 12/20 (29)
    • ►  12/06 - 12/13 (37)
    • ►  11/29 - 12/06 (4)
    • ►  11/15 - 11/22 (14)
    • ►  11/08 - 11/15 (8)
    • ►  11/01 - 11/08 (2)
    • ►  10/18 - 10/25 (14)
    • ►  10/11 - 10/18 (16)
    • ►  10/04 - 10/11 (10)
    • ►  09/20 - 09/27 (10)
    • ►  09/06 - 09/13 (19)
    • ►  08/30 - 09/06 (26)
    • ►  08/23 - 08/30 (4)
    • ►  08/16 - 08/23 (2)
    • ►  07/12 - 07/19 (48)
    • ►  05/17 - 05/24 (2)
    • ►  01/05 - 01/12 (2)
  • ►  2019 (74)
    • ►  07/07 - 07/14 (6)
    • ►  06/16 - 06/23 (6)
    • ►  02/10 - 02/17 (17)
    • ►  01/13 - 01/20 (37)
    • ►  01/06 - 01/13 (8)
  • ►  2018 (376)
    • ►  12/30 - 01/06 (24)
    • ►  12/16 - 12/23 (8)
    • ►  12/09 - 12/16 (98)
    • ►  12/02 - 12/09 (16)
    • ►  11/18 - 11/25 (36)
    • ►  11/04 - 11/11 (18)
    • ►  10/28 - 11/04 (10)
    • ►  10/21 - 10/28 (26)
    • ►  10/14 - 10/21 (52)
    • ►  10/07 - 10/14 (4)
    • ►  09/30 - 10/07 (2)
    • ►  09/23 - 09/30 (68)
    • ►  09/16 - 09/23 (4)
    • ►  09/09 - 09/16 (4)
    • ►  08/26 - 09/02 (6)

Data Publish News

Loading...

Al Jazeera – Breaking News, World News and Video from Al Jazeera

Loading...

Laravel News

Loading...

Copyright © CoderFunda | Powered by Blogger
Design by Coderfunda | Blogger Theme by Coderfunda | Distributed By Coderfunda