CoderFunda
  • Home
  • About us
    • Contact Us
    • Disclaimer
    • Privacy Policy
    • About us
  • Home
  • Php
  • HTML
  • CSS
  • JavaScript
    • JavaScript
    • Jquery
    • JqueryUI
    • Stock
  • SQL
  • Vue.Js
  • Python
  • Wordpress
  • C++
    • C++
    • C
  • Laravel
    • Laravel
      • Overview
      • Namespaces
      • Middleware
      • Routing
      • Configuration
      • Application Structure
      • Installation
    • Overview
  • DBMS
    • DBMS
      • PL/SQL
      • SQLite
      • MongoDB
      • Cassandra
      • MySQL
      • Oracle
      • CouchDB
      • Neo4j
      • DB2
      • Quiz
    • Overview
  • Entertainment
    • TV Series Update
    • Movie Review
    • Movie Review
  • More
    • Vue. Js
    • Php Question
    • Php Interview Question
    • Laravel Interview Question
    • SQL Interview Question
    • IAS Interview Question
    • PCS Interview Question
    • Technology
    • Other

09 February, 2021

Vue.js Routing

 Programing Coderfunda     February 09, 2021     Vue.js Tutorial     No comments   


Vue.js Routing

Vue.js does not have a built-in router feature, but you can easily create a single page application that supports routing using the recommended and officially-supported vue-router library.

There are some steps that you have to follow to install the router in Vue.js. You can use router by direct download it from CDN or using NPM or using Github.

Download from CDM directly

You can directly download the latest version of vue-router from CDN. It is available at https://unpkg.com/vue-router/dist/vue-router.js.

The unpkg.com contains the npm-based cdn links and always updated to the recent version. After downloading the unpkg.com file, host it to server, and use it with a script tag along with Vue.js as follows.

  1. <script src = "/path/to/vue.js"></script>  
  2. <script src = "/path/to/vue-router.js"></script>  

If you want to use it without downloading, you can use it as follows:

  1. <script src="https://unpkg.com/vue-router/dist/vue-router.js"></script>  

Install router using NPM

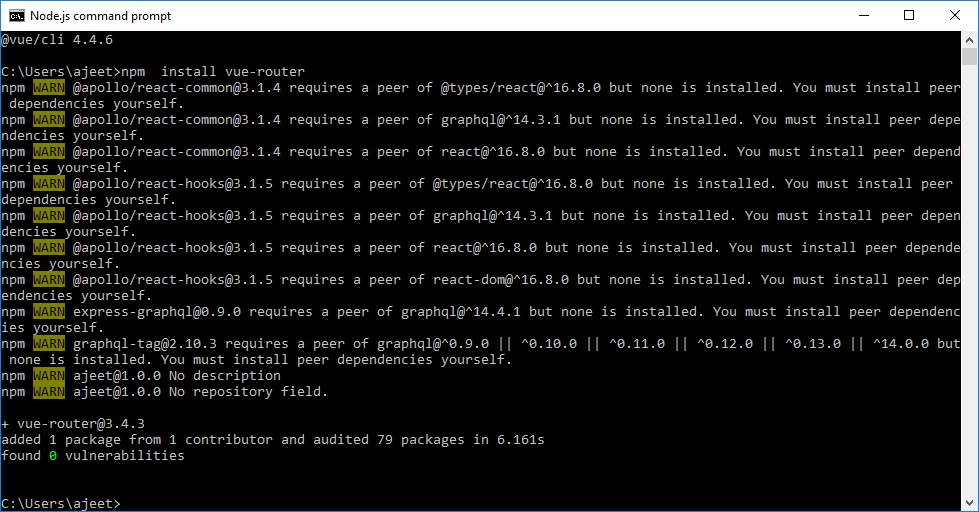
Open the Node.js command prompt and run the following command to install the vue-router.

  1. npm  install vue-router  

Vue.js Routing

Install router using GitHub

Run the following commands to clone the router repository from GitHub:

  1. git clone https://github.com/vuejs/vue-router.git node_modules/vue-router  
  2. cd node_modules/vue-router  
  3. npm install  
  4. npm run build  

Let's take a simple example to understand the concept of routing in Vue.js:

Example

Index.html file:

  1. <html>  
  2.    <head>  
  3.       <title>Vue.js Routing</title>  
  4.       <link rel="stylesheet" href="index.css">  
  5.         <script src="https://cdn.jsdelivr.net/npm/vue/dist/vue.js"></script>  
  6. <script src="https://unpkg.com/vue/dist/vue.js"></script>  
  7.  <script src="https://unpkg.com/vue-router/dist/vue-router.js"></script>  
  8.     </head>  
  9.     <body>  
  10.       <div id = "router_1">  
  11.          <h2>This is Routing Example</h2>  
  12.          <p>  
  13. <!-- use router-link component for navigation. -->  
  14. <!-- `<router-link>` will be rendered as an `<a>` tag by default -->  
  15.             <router-link to = "/route1">Click on Router Link 1</router-link>  
  16.             <router-link to = "/route2"> Click on Router Link 2</router-link>  
  17.          </p>  
  18.          <!-- route outlet -->  
  19.          <!-- component matched by the route will render here -->  
  20.          <router-view></router-view>  
  21.       </div>  
  22.       <script type = "text/javascript">  
  23.          const Route1 = { template: '<div style = "border-radius:30px;background-color:lightpink;width:300px;height:100px;margin:10px;font-size:25px;padding:10px;">You are seeing router link 1</div>' }  
  24.          const Route2 = { template: '<div style = "border-radius:20px;background-color:lightgreen;width:300px;height:100px;margin:10px;font-size:25px;padding:10px;"> You are seeing router link 2</div>' }  
  25.          const routes = [  
  26.             { path: '/route1', component: Route1 },  
  27.             { path: '/route2', component: Route2 }  
  28.          ];  
  29.          const router = new VueRouter({  
  30.             routes // short for `routes: routes`  
  31.          });  
  32.       </script>  
  33.       <script src="index.js"></script>  
  34.    </body>  
  35. </html>  

Index.js file:

  1. var vm = new Vue({  
  2.             el: '#router_1',  
  3.             router  
  4.          })  

Let's use a simple CSS file to make the output more attractive.

Index.css file:

  1. html, body {  
  2.     margin: 5px;  
  3.     padding: 0;  
  4. }  

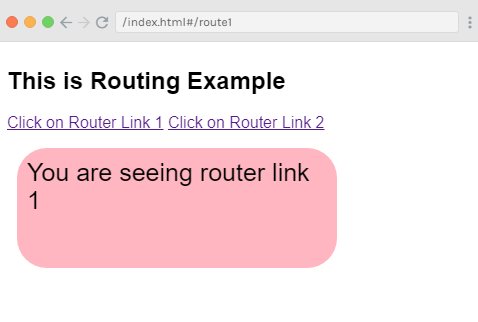
After the execution of the program, you will see the following output:

Output:
Vue.js Routing

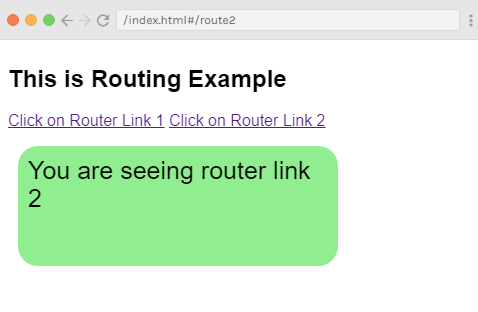
Click on the router link 2, and you will see that it is redirected to the following result.
Vue.js Routing

Example Explanation

In the above example, you can see that we have added the vue-router.js file as follows:

  1. <script src="https://unpkg.com/vue/dist/vue.js"></script>  
  2.  <script src="https://unpkg.com/vue-router/dist/vue-router.js"></script>4  

In the following code, we have created two router links. We have defined these router links in the body section as follows:

  1. <router-link to = "/route1">Click on Router Link 1</router-link>  
  2.  <router-link to = "/route2"> Click on Router Link 2</router-link>  

Here, <router-link> is a component used to navigate to the HTML content and display it to the user. The to property specifies the destination. For example, the file where the link is displayed which you have to click.

The router is initialized in the script section where there are two constants created as follows:

  1. const Route1 = { template: '<div style = "border-radius:30px;background-color:lightpink;width:300px;height:100px;margin:10px;font-size:25px;padding:10px;">You are seeing router link 1</div>' }  
  2.          const Route2 = { template: '<div style = "border-radius:20px;background-color:lightgreen;width:300px;height:100px;margin:10px;font-size:25px;padding:10px;"> You are seeing router link 2</div>' }  

In the above code, we have specifies the templates that would be shown when you click on the router link.

Next is the routes const where we have defined the path which have to be displayed in the URL.

  1. const routes = [  
  2.    { path: '/route1', component: Route1 },  
  3.    { path: '/route2', component: Route2 }  
  4. ];  

Routes are used to define the path and the component. The path will be displayed in the output when the user clicks on the router link.

The component takes the names of the templates to be displayed. The path from the routes needs to match with the router link to the property.

For example,

  1. <router-link to = "name_of_-the_path"></router-link>  

Now, we have created the VueRouter instance using the following code:

  1. const router = new VueRouter({  
  2.    routes // short for `routes: routes`  
  3. });  

The VueRouter constructor takes the routes as the param. We have used the following code to assign the router object to the main Vue instance.

  1. var vm = new Vue({  
  2.             el: '#router_1',  
  3.             router  
  4.          })  

After executing the above example, you will see the output in the browser. If you can inspect and check the router link, we will find that it adds class to the active element. The class added is class = "router-link-exact-active router-link-active".

Pass Props to Router Link

Let's see how to pass properties to Router Link. In the above example, we have passed a property "to" to the router link as follows:

  1. <router-link to = "/route1">Click on Router Link 1</router-link>  
  2. <router-link to = "/route2"> Click on Router Link 2</router-link>  

This property can be passed in many other ways to the router link.

The to prop

It is used to specify the destination path given to the <router-link>. When you click on the link, it will pass the value to router.push() internally. The value needs to be a string or a location object. There are three ways to pass the value using the "to" property.

Example 1:

  1. <router-link to = "/route1">Click on Router Link 1</router-link>  
  2. It is rendered as:   
  3. <a href = "#/route">Router Link </a>  

Example 2:

  1. <router-link v-bind:to = "{path:'/route1'}">Click on Router Link 2</router-link> // When using an object, it is recommended to bind it as shown in e.g. 2.  

Example 3:

  1. <router-link v-bind:to = "{path:'/route1', query: { name: 'Alex' }}">Click on Router Link 3</router-link>//You can pass a query string  as shown in e.g. 3. This is an example of router link with query string.  

We have used the example 1 method in the above examples. Let's see the second and third method in the following example.

Index.html file:

  1. <html>  
  2.    <head>  
  3.       <title>Vue.js Routing</title>  
  4.       <link rel="stylesheet" href="index.css">  
  5.         <script src="https://cdn.jsdelivr.net/npm/vue/dist/vue.js"></script>  
  6. <script src="https://unpkg.com/vue/dist/vue.js"></script>  
  7.  <script src="https://unpkg.com/vue-router/dist/vue-router.js"></script>  
  8.     </head>  
  9.     <body>  
  10.       <div id = "router_1">  
  11.          <h2>This is Routing Example</h2>  
  12.          <p>  
  13. <!-- use router-link component for navigation. -->  
  14. <!-- `<router-link>` will be rendered as an `<a>` tag by default -->  
  15.             <router-link v-bind:to = "{path:'/route2'}">Click on Router Link 2</router-link>   
  16.             <router-link v-bind:to = "{path:'/route3', query: { name: 'Alex' }}">Click on Router Link 3</router-link>  
  17.          </p>  
  18.          <!-- route outlet -->  
  19.          <!-- component matched by the route will render here -->  
  20.          <router-view></router-view>  
  21.       </div>  
  22.       <script type = "text/javascript">  
  23.          const Route2 = { template: '<div style = "border-radius:30px;background-color:lightpink;width:300px;height:100px;margin:10px;font-size:25px;padding:10px;">You are seeing router link 2</div>' }  
  24.          const Route3 = { template: '<div style = "border-radius:20px;background-color:lightgreen;width:300px;height:100px;margin:10px;font-size:25px;padding:10px;"> You are seeing router link 3</div>' }  
  25.          const routes = [  
  26.             { path: '/route2', component: Route2 },  
  27.             { path: '/route3', component: Route3 }  
  28.          ];  
  29.          const router = new VueRouter({  
  30.             routes // short for `routes: routes`  
  31.          });  
  32.       </script>  
  33.       <script src="index.js"></script>  
  34.    </body>  
  35. </html>  

Index.js file:

  1. var vm = new Vue({  
  2.             el: '#router_1',  
  3.             router  
  4.          })  

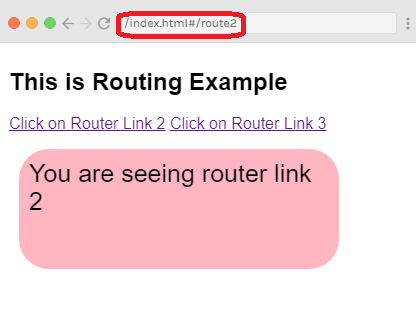
After the execution of the program, you will see the following output:

Output:
Vue.js Routing

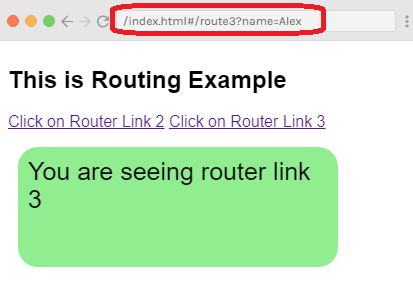
Now, click on the router link 3, and you will see the set name as a query string in the url. See the output:
Vue.js Routing

The replace prop

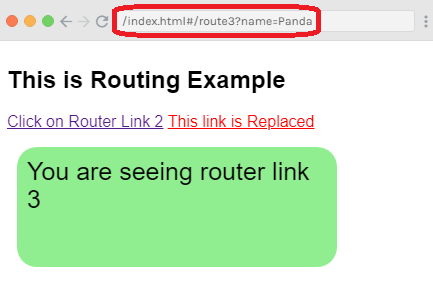
The replace property is used to replace the router link and call the router.replace() instead of router.push(). If yu use replace prop, the navigation history is not stored.

Index.html file:

  1. <html>  
  2.    <head>  
  3.       <title>Vue.js Routing</title>  
  4.       <link rel="stylesheet" href="index.css">  
  5.         <script src="https://cdn.jsdelivr.net/npm/vue/dist/vue.js"></script>  
  6. <script src="https://unpkg.com/vue/dist/vue.js"></script>  
  7.  <script src="https://unpkg.com/vue-router/dist/vue-router.js"></script>  
  8.     </head>  
  9.     <body>  
  10.       <div id = "router_1">  
  11.          <h2>This is Routing Example</h2>  
  12.          <p>  
  13. <!-- use router-link component for navigation. -->  
  14. <!-- `<router-link>` will be rendered as an `<a>` tag by default -->  
  15.             <router-link v-bind:to = "{path:'/route2'}">Click on Router Link 2</router-link>   
  16.             <router-link v-bind:to = "{path:'/route3', query: { name: 'Panda' }}"   replace>This link is Replaced</router-link>  
  17.          </p>  
  18.          <!-- route outlet -->  
  19.          <!-- component matched by the route will render here -->  
  20.          <router-view></router-view>  
  21.       </div>  
  22.       <script type = "text/javascript">  
  23.          const Route2 = { template: '<div style = "border-radius:30px;background-color:lightpink;width:300px;height:100px;margin:10px;font-size:25px;padding:10px;">You are seeing router link 2</div>' }  
  24.          const Route3 = { template: '<div style = "border-radius:20px;background-color:lightgreen;width:300px;height:100px;margin:10px;font-size:25px;padding:10px;"> You are seeing router link 3</div>' }  
  25.          const routes = [  
  26.             { path: '/route2', component: Route2 },  
  27.             { path: '/route3', component: Route3 }  
  28.          ];  
  29.          const router = new VueRouter({  
  30.             routes // short for `routes: routes`  
  31.          });  
  32.       </script>  
  33.       <script src="index.js"></script>  
  34.    </body>  
  35. </html>  

Index.js file will be same.

After the execution of the program, you will see the following output:

Output:
Vue.js Routing

You can see that when you click on the "This link is Replaced" link, the name is changed in the url.

The append prop

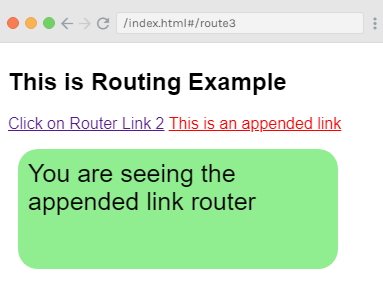
The append tag is used to add with the <router-link><router-link> link to make the path relative.

Index.html file:

  1. <html>  
  2.    <head>  
  3.       <title>Vue.js Routing</title>  
  4.       <link rel="stylesheet" href="index.css">  
  5.         <script src="https://cdn.jsdelivr.net/npm/vue/dist/vue.js"></script>  
  6. <script src="https://unpkg.com/vue/dist/vue.js"></script>  
  7.  <script src="https://unpkg.com/vue-router/dist/vue-router.js"></script>  
  8.     </head>  
  9.     <body>  
  10.       <div id = "router_1">  
  11.          <h2>This is Routing Example</h2>  
  12.          <p>  
  13. <!-- use router-link component for navigation. -->  
  14. <!-- `<router-link>` will be rendered as an `<a>` tag by default -->  
  15.             <router-link v-bind:to = "{path:'/route2'}">Click on Router Link 2</router-link>   
  16.             <router-link v-bind:to = "{ path: '/route3'}" append>This is an appended link</router-link>  
  17.          </p>  
  18.          <!-- route outlet -->  
  19.          <!-- component matched by the route will render here -->  
  20.          <router-view></router-view>  
  21.       </div>  
  22.       <script type = "text/javascript">  
  23.          const Route2 = { template: '<div style = "border-radius:30px;background-color:lightpink;width:300px;height:100px;margin:10px;font-size:25px;padding:10px;">You are seeing router link 2</div>' }  
  24.          const Route3 = { template: '<div style = "border-radius:20px;background-color:lightgreen;width:300px;height:100px;margin:10px;font-size:25px;padding:10px;"> You are seeing the appended link router</div>' }  
  25.          const routes = [  
  26.             { path: '/route2', component: Route2 },  
  27.             { path: '/route3', component: Route3 }  
  28.          ];  
  29.          const router = new VueRouter({  
  30.             routes // short for `routes: routes`  
  31.          });  
  32.       </script>  
  33.       <script src="index.js"></script>  
  34.    </body>  
  35. </html>  

Index.js file:

  1. var vm = new Vue({  
  2.             el: '#router_1',  
  3.             router  
  4.          })  

Let's use a simple CSS file to make the output more attractive.

Index.css file:

  1. html, body {  
  2.     margin: 5px;  
  3.     padding: 0;  
  4. }  

After the execution of the program, you will see the following output:

Output:
Vue.js Routing

The append prop

The append tag is used to add with the <router-link > to make the path relative. Let's take an example.

Example:

Index.html file:

  1. <html>  
  2.    <head>  
  3.       <title>Vue.js Routing</title>  
  4.       <link rel="stylesheet" href="index.css">  
  5.         <script src="https://cdn.jsdelivr.net/npm/vue/dist/vue.js"></script>  
  6. <script src="https://unpkg.com/vue/dist/vue.js"></script>  
  7.  <script src="https://unpkg.com/vue-router/dist/vue-router.js"></script>  
  8.     </head>  
  9.     <body>  
  10.       <div id = "router_1">  
  11.          <h2>This is Routing Example</h2>  
  12.          <p>  
  13. <!-- use router-link component for navigation. -->  
  14. <!-- `<router-link>` will be rendered as an `<a>` tag by default -->  
  15.             <router-link v-bind:to = "{path:'/route2'}">Click on Router Link 2</router-link>   
  16.             <router-link v-bind:to = "{ path: '/route3'}" append>This is an appended link</router-link>  
  17.          </p>  
  18.          <!-- route outlet -->  
  19.          <!-- component matched by the route will render here -->  
  20.          <router-view></router-view>  
  21.       </div>  
  22.       <script type = "text/javascript">  
  23.          const Route2 = { template: '<div style = "border-radius:30px;background-color:lightpink;width:300px;height:100px;margin:10px;font-size:25px;padding:10px;">You are seeing router link 2</div>' }  
  24.          const Route3 = { template: '<div style = "border-radius:20px;background-color:lightgreen;width:300px;height:100px;margin:10px;font-size:25px;padding:10px;"> You are seeing the appended link router</div>' }  
  25.          const routes = [  
  26.             { path: '/route2', component: Route2 },  
  27.             { path: '/route3', component: Route3 }  
  28.          ];  
  29.          const router = new VueRouter({  
  30.             routes // short for `routes: routes`  
  31.          });  
  32.       </script>  
  33.       <script src="index.js"></script>  
  34.    </body>  
  35. </html>  

Index.js file:

  1. var vm = new Vue({  
  2.             el: '#router_1',  
  3.             router  
  4.          })  

Let's use a simple CSS file to make the output more attractive.

Index.css file:

  1. html, body {  
  2.     margin: 5px;  
  3.     padding: 0;  
  4. }  

After the execution of the program, you will see the following output:

Output:
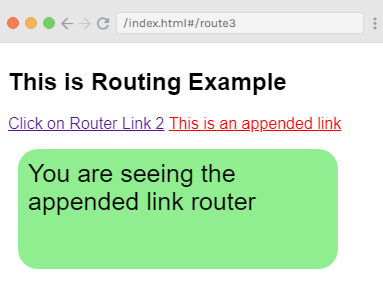
Vue.js Routing

The tag prop

The <router-link> is rendered as a tag. The tag prop is used when you want to render it as some other tag. For example, if you want to render <router-link> as "span", you should specify it as tag = "span". Let's take a simple example.

Example:

Index.html file:

  1. <html>  
  2.    <head>  
  3.       <title>Vue.js Routing</title>  
  4.       <link rel="stylesheet" href="index.css">  
  5.         <script src="https://cdn.jsdelivr.net/npm/vue/dist/vue.js"></script>  
  6. <script src="https://unpkg.com/vue/dist/vue.js"></script>  
  7.  <script src="https://unpkg.com/vue-router/dist/vue-router.js"></script>  
  8.     </head>  
  9.     <body>  
  10.       <div id = "router_1">  
  11.          <h2>This is Routing Example</h2>  
  12.          <p>  
  13.              <router-link v-bind:to = "{ path: '/route2'}" tag = "span">Click on Router Link 2</router-link>   
  14.             <router-link v-bind:to = "{ path: '/route3'}" tag = "span">Click on Router Link 3</router-link>  
  15.          </p>  
  16.          <!-- route outlet -->  
  17.          <!-- component matched by the route will render here -->  
  18.          <router-view></router-view>  
  19.       </div>  
  20.       <script type = "text/javascript">  
  21.          const Route2 = { template: '<div style = "border-radius:30px;background-color:lightpink;width:300px;height:100px;margin:10px;font-size:25px;padding:10px;">You are seeing router link 2</div>' }  
  22.          const Route3 = { template: '<div style = "border-radius:20px;background-color:lightgreen;width:300px;height:100px;margin:10px;font-size:25px;padding:10px;"> You are seeing router link 3</div>' }  
  23.          const routes = [  
  24.             { path: '/route2', component: Route2 },  
  25.             { path: '/route3', component: Route3 }  
  26.          ];  
  27.          const router = new VueRouter({  
  28.             routes // short for `routes: routes`  
  29.          });  
  30.       </script>  
  31.       <script src="index.js"></script>  
  32.    </body>  
  33. </html>  

Index.js file:

The index.js file would be same as we used in previous examples.

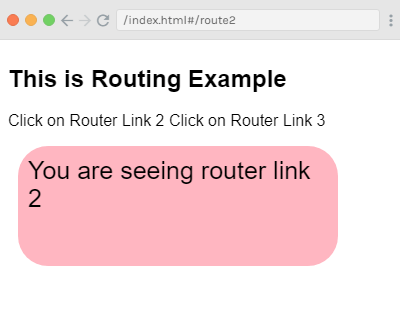
After the execution of the program, you will see the following output:

Output:
Vue.js Routing

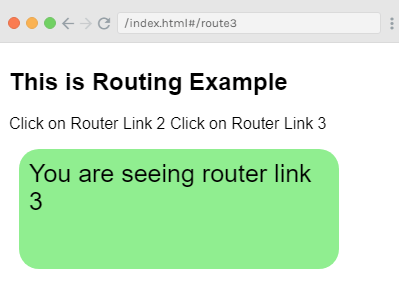
In the above example, you can see that the tag displayed now is a span tag. They are not seen as a clickable link but you can click them. Now, click on the router link 3 and see the result.
Vue.js Routing

The active-class prop

The active-class property is added to <router-link> when you want to make it active. It is used to show that the router link is active. It is added as active-class = "_active".

The following code specifies how to use it in an example.

Syntax:

  1. <style>  
  2.    ._active{  
  3.       background-color : red;  
  4.    }  
  5. </style>  
  6. <p>  
  7. <router-link v-bind:to = "{ path: '/route2'}" active-class = "._active">Click on Router Link 2</router-link>  
  8. <router-link v-bind:to = "{ path: '/route3'}" tag = "span">Click on Router Link 3</router-link>  
  9. </p>  

It will make the "Click on Router Link 2" path active while "Click on Router Link 3" will be same.

The exact-active-class prop

The exact-active-class configures the active CSS class applied when the link is active with an exact match. The default exact active class is applied as router-link-exact-active.

The following code specifies how to use it in an example.

Syntax:

  1. <style>  
  2.    ._active{  
  3.       background-color : red;  
  4.    }  
  5. </style>  
  6. <p>  
  7. <router-link v-bind:to = "{ path: '/route2'}" exact-active-class = "._active">Click on Router Link 2</router-link>  
  8. <router-link v-bind:to = "{ path: '/route3'}" tag = "span">Click on Router Link 3</router-link>  
  9. </p>  

The event prop

In the previous example you have seen that the by default event for router-link is click event. When you clicked on the link, the router links were shown. You can change this by using the event property. See the following example:

Example:

Index.html file:

  1. <html>  
  2.    <head>  
  3.       <title>Vue.js Routing</title>  
  4.       <link rel="stylesheet" href="index.css">  
  5.         <script src="https://cdn.jsdelivr.net/npm/vue/dist/vue.js"></script>  
  6. <script src="https://unpkg.com/vue/dist/vue.js"></script>  
  7.  <script src="https://unpkg.com/vue-router/dist/vue-router.js"></script>  
  8.     </head>  
  9.     <body>  
  10.       <div id = "router_1">  
  11.          <h2>This is Routing Example</h2>  
  12. <style>  
  13.    ._active{  
  14.       background-color : red;  
  15.    }  
  16. </style>  
  17. <p>  
  18. <router-link v-bind:to = "{ path: '/route2'}" event = "mouseover">Hover this link</router-link>  
  19.             <router-link v-bind:to = "{ path: '/route3'}" tag = "span">Click on Router Link 3</router-link>  
  20.          </p>  
  21.          <!-- route outlet -->  
  22.          <!-- component matched by the route will render here -->  
  23.          <router-view></router-view>  
  24.       </div>  
  25.       <script type = "text/javascript">  
  26.          const Route2 = { template: '<div style = "border-radius:30px;background-color:lightpink;width:300px;height:100px;margin:10px;font-size:25px;padding:10px;">You are seeing router link 2</div>' }  
  27.          const Route3 = { template: '<div style = "border-radius:20px;background-color:lightgreen;width:300px;height:100px;margin:10px;font-size:25px;padding:10px;"> You are seeing router link 3</div>' }  
  28.          const routes = [  
  29.             { path: '/route2', component: Route2 },  
  30.             { path: '/route3', component: Route3 }  
  31.          ];  
  32.          const router = new VueRouter({  
  33.             routes // short for `routes: routes`  
  34.          });  
  35.       </script>  
  36.       <script src="index.js"></script>  
  37.    </body>  
  38. </html>  

Index.js file:

The Index.js file will be same as above example.

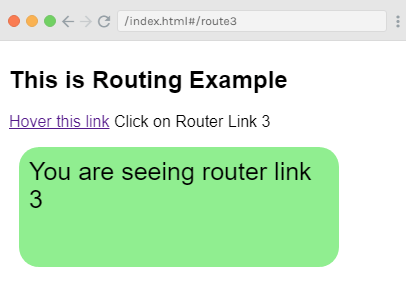
After the execution of the program, you will see the following output:

Output:
Vue.js Routing

When you hover your mouse cursor on the first link, you will see the following result.

Sources by : javatpoint
Read More
  • Share This:  
  •  Facebook
  •  Twitter
  •  Google+
  •  Stumble
  •  Digg

Vue.js Reactivity System

 Programing Coderfunda     February 09, 2021     Vue.js Tutorial     No comments   


Vue.js Reactivity System

The reactivity system is one of the most distinctive features of Vue.js. In Vue.js, models are plain JavaScript objects. When we have to modify the models, the views are updated. This makes state management simple and intuitive, but it's also essential to understand how it works to avoid some common upcoming problems. Here, we will see how to deal with these problems by using the reactivity system.

How does it work?

If you pass a plain JavaScript object to a Vue.js instance as its data option, you will see that Vue.js makes this pass through all of its properties and convert them to getter/setters using Object.defineProperty.

This is an un-shimmable and an ES5-only feature. Because of this feature, Vue doesn't support IE8 and below versions.

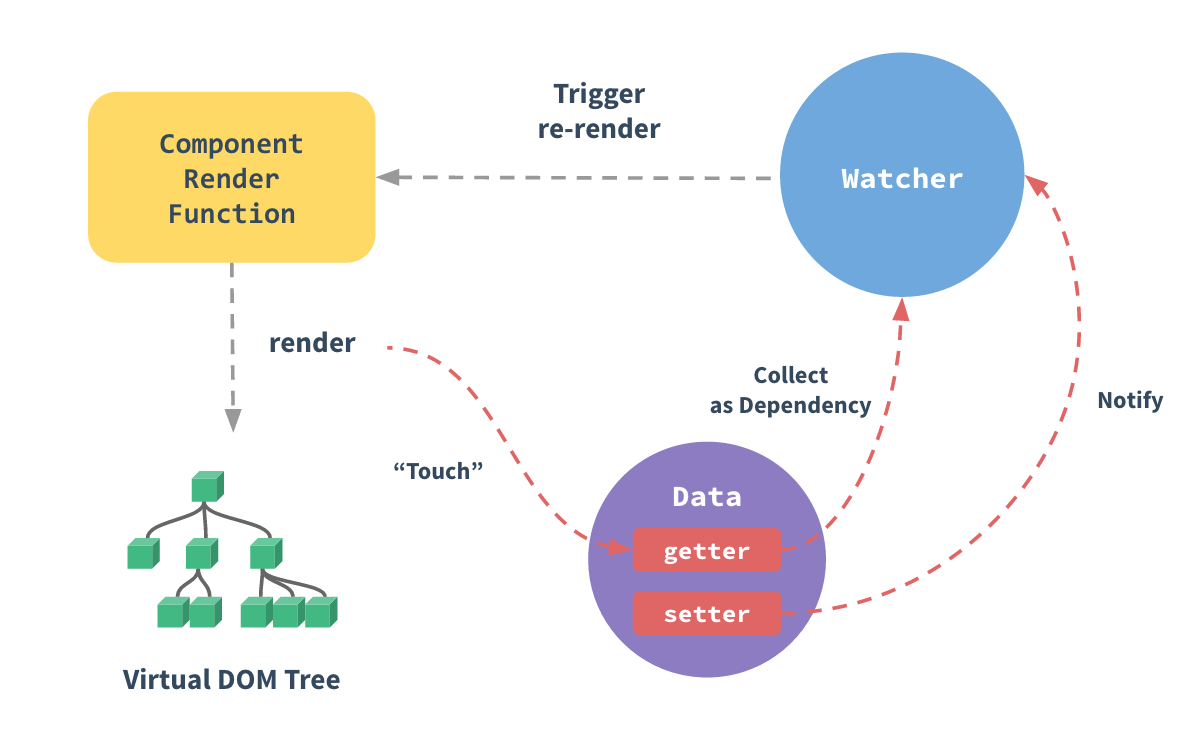
The getter and setters are not visible to the user, but under the hood, they make Vue.js able to perform dependency-tracking and change-notification when you have to change or access the property. You can see the getter/setters properties changes on the browser's console. If you want to see them, you have to install vue-devtools for a more inspection-friendly interface.

Every component instance has a corresponding watcher instance. This is used to record the properties "touched" during the component's render as dependencies. After that, when a dependency's setter is triggered, it notifies the watcher, which re-render the component in turn.

Vue.js Reactivity System

Vue.js Reactive Interface

Vue.js provides us an option to add reactivity to the dynamically added properties. Suppose, we have already created Vue.js instance and we want to add the watch property. See the following example:

Example:

Index.html file:

  1. <html>    
  2.    <head>    
  3.       <title>Vue.js Reactive Interface</title>    
  4.       <link rel="stylesheet" href="index.css">    
  5.         <script src="https://cdn.jsdelivr.net/npm/vue/dist/vue.js"></script>    
  6.     </head>    
  7.     <body>    
  8.       <div id = "reactivity_1">  
  9.          <p style = "font-size:25px;">Counter: {{ counter }}</p>  
  10.          <button @click = "counter++" style = "font-size:25px;">Click Here</button>  
  11.       </div>   
  12.       <script src="index.js"></script>    
  13.    </body>    
  14. </html>   

Index.js file:

  1. var vm = new Vue({  
  2.             el: '#reactivity_1',  
  3.             data: {  
  4.                counter: 1  
  5.             }  
  6.          });  
  7.          vm.$watch('counter', function(nval, oval) {  
  8.             alert('Counter is incremented :' + oval + ' to ' + nval + '!');  
  9.          });  
  10.          setTimeout(  
  11.             function(){  
  12.                vm.counter = 10;  
  13.             },1000  
  14.          )  

Let's use a simple CSS file to make the output more attractive.

Index.css file:

  1. html, body {  
  2.     margin: 5px;  
  3.     padding: 0;  
  4. }  

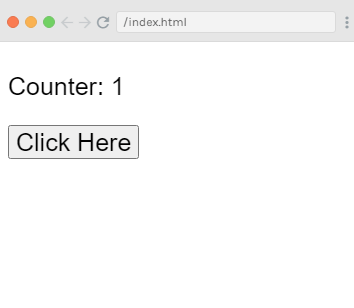
After the execution of the program, you will see the following output:

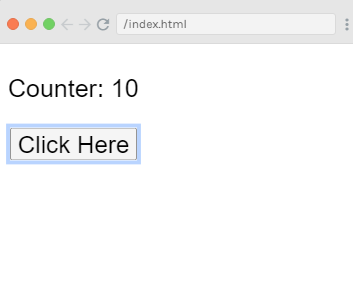
Output:

Vue.js Reactivity System

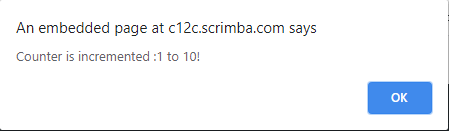
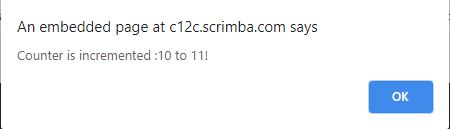
When you click on the "Click Here" button, the counter will be incremented. You will see a pop-up output or an alert message that shows the counter property's changed value.

See the following output after we have clicked on the "Click here" button.

Vue.js Reactivity System

Example Explanation

In the above example, we have defined a property counter that is set to 1 in the data object. When you click on the "Click Here" button, the counter will be incremented.

After creating the Vue.js instance, we have to add the watch property to it.Use the following code to add it:

  1. vm.$watch('counter', function(nval, oval) {  
  2.    alert('Counter is incremented :' + oval + ' to ' + nval + '!');  
  3. });   

We have used the $watch property to add watch outside the Vue instance. We have also added an alert used to show the value change for the counter property. A timer function is also added named setTimeout to set the counter value to 10.

  1. setTimeout(  
  2.    function(){  
  3.       vm.counter = 10;  
  4.    },1000  
  5. );  

Whenever you click the button, the counter will be changed, and the alert from the watch method will get fired.

Add properties at Runtime.

It is the best way always to declare the properties, which need to be reactive upfront in the Vue.js instance because Vue.js cannot detect property addition and deletion.

If you want to add properties at run time, you have to make use of Vue global, Vue.set, and Vue.delete methods.

Vue.set

This is used to set a property on an object. This is used to overcome the limitation that Vue.js cannot detect property additions.

Syntax

  1. Vue.set( target, key, value )  

Here,

target: It can be an object or an array.

key: It can be a string or number.

value: It can be any type.

Let's take a simple example to understand the concept of Vue.set.

Example:

Index.html file:

  1. <html>    
  2.    <head>    
  3.       <title>Vue.js Reactive Interface</title>    
  4.       <link rel="stylesheet" href="index.css">    
  5.         <script src="https://cdn.jsdelivr.net/npm/vue/dist/vue.js"></script>    
  6.     </head>    
  7.     <body>    
  8.       <div id = "reactivity_1">  
  9.          <p style = "font-size:25px;">Counter value: {{ products.id }}</p>  
  10.          <button @click = "products.id++" style = "font-size:25px;">Click Here</button>  
  11.       </div>  
  12.       <script src="index.js"></script>    
  13.    </body>    
  14. </html>    

Index.js file:

  1. var myproduct = {"id":1, name:"shirt", "price":"1000.00"};  
  2.          var vm = new Vue({  
  3.             el: '#reactivity_1',  
  4.             data: {  
  5.                counter: 1,  
  6.                products: myproduct  
  7.             }  
  8.          });  
  9.          vm.products.qty = "1";  
  10.          console.log(vm);  
  11.          vm.$watch('counter', function(nval, oval) {  
  12.             alert('Counter is incremented :' + oval + ' to ' + nval + '!');  
  13.          })   

After the execution of the program, you will see the following output:

Output:

Vue.js Reactivity System

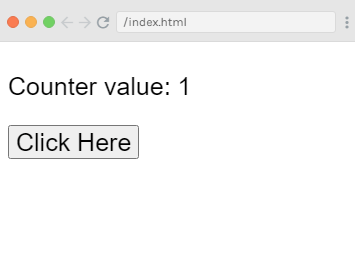
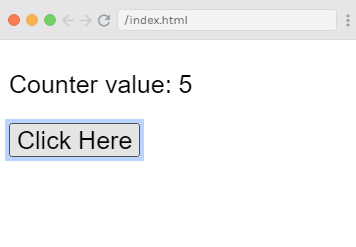
Here, you will see that the counter value will be increased every time when you click on the "Click Here" button. See the following output. Here, we have clicked button for 5 times.

Vue.js Reactivity System

Example Explanation

In the above example, we have created a variable named myproduct at the start using the following code:

  1. var myproduct = {"id":1, name:"shirt", "price":"1000.00"};  

It is given to the data object in Vue.js instance as follows:

  1. var vm = new Vue({  
  2.             el: '#reactivity_1',  
  3.             data: {  
  4.                counter: 1,  
  5.                products: myproduct  
  6.             }  
  7.          });  

Suppose, you have to add one more property to the myproduct array, after the Vue.js instance is created. You can do this by using the following code:

  1. vm.products.qty = "1";   

If you see the output on the console, you will find that in products list, the quantity will be added. The get/set methods, which basically add reactivity, are available for the id, name, and price, and not available for the qty.

So, you can see that the reactivity cannot be achieved by just adding the vue object. In Vue.js, you have to create its all properties at the start. If you want to do it later, we can use Vue.set. See an other example where all the properties are added later.

Example:

Index.html file:

  1. <html>    
  2.    <head>    
  3.       <title>Vue.js Reactive Interface</title>    
  4.       <link rel="stylesheet" href="index.css">    
  5.         <script src="https://cdn.jsdelivr.net/npm/vue/dist/vue.js"></script>    
  6.     </head>    
  7.     <body>    
  8.       <div id = "reactivity_1">  
  9.          <p style = "font-size:25px;">Counter value: {{ products.id }}</p>  
  10.          <button @click = "products.id++" style = "font-size:25px;">Click Here</button>  
  11.       </div>  
  12.       <script src="index.js"></script>    
  13.    </body>    
  14. </html>   

Index.js file:

  1. var myproduct = {"id":1, name:"shirt", "price":"1000.00"};  
  2.          var vm = new Vue({  
  3.             el: '#reactivity_1',  
  4.             data: {  
  5.                counter: 1,  
  6.                products: myproduct  
  7.             }  
  8.          });  
  9.          Vue.set(myproduct, 'qty', 1);  
  10.          console.log(vm);  
  11.          vm.$watch('counter', function(nval, oval) {  
  12.             alert('Counter is incremented :' + oval + ' to ' + nval + '!');  
  13.          })  

In the above example, we have used Vue.set to add the qty to the array using the following code:

  1. Vue.set(myproduct, 'qty', 1);   

If you run this example on the console, you will see that the get/set for qty is added using Vue.set method.

Vue.delete

The Vue.delete function is used to delete the property dynamically. This is also used to overcome the limitation that Vue.js cannot detect property deletion.

Syntax:

  1. Vue.delete( target, key )  

Here,

target: It is used to specify an object or an array.

key: It is used to specify a string or a number.

Let's see an example to demonstrate how to delete any property dynamically in Vue.js using Vue.delete function.

Example

Index.html file:

  1. <html>    
  2.    <head>    
  3.       <title>Vue.js Reactive Interface</title>    
  4.       <link rel="stylesheet" href="index.css">    
  5.         <script src="https://cdn.jsdelivr.net/npm/vue/dist/vue.js"></script>    
  6.     </head>    
  7.     <body>    
  8.       <div id = "reactivity_1">  
  9.          <p style = "font-size:25px;">Counter value: {{ products.id }}</p>  
  10.          <button @click = "products.id++" style = "font-size:25px;">Click Here</button>  
  11.       </div>  
  12.       <script src="index.js"></script>    
  13.    </body>    
  14. </html>    

Index.js file:

  1. var myproduct = {"id":1, name:"shirt", "price":"1000.00"};  
  2.          var vm = new Vue({  
  3.             el: '#reactivity_1',  
  4.             data: {  
  5.                counter: 1,  
  6.                products: myproduct  
  7.             }  
  8.          });  
  9.           Vue.delete(myproduct, 'price');  
  10.          console.log(vm);  
  11.          vm.$watch('counter', function(nval, oval) {  
  12.             alert('Counter is incremented :' + oval + ' to ' + nval + '!');  
  13.          })    

In the above example, we have used the Vue.delete function to delete the price from the array by using the following code:

  1. Vue.delete(myproduct, 'price');  

When you see the output of the above example on the console, you will see that only the id and name are visible on the console as the price is deleted. We will also notice that the get/set methods are deleted. 


Source by : javatpoint.com


Read More
  • Share This:  
  •  Facebook
  •  Twitter
  •  Google+
  •  Stumble
  •  Digg

Vue.js Render functions

 Programing Coderfunda     February 09, 2021     Vue.js Tutorial     No comments   


Vue.js Render functions

Vue.js recommends us to use templates to build HTML. Here, we can use the render function as a closer-to-the-compiler alternative to templates.

Vue.js render functions are also used along with Vue.js components. Most of the time, the render function is created by the Vue.js compiler. When you specify a template on your component, this template's content is processed by the Vue.js compiler that will return a render function. The render function essentially returns a virtual DOM node, which will be rendered by Vue.js in your browser DOM.

What is the virtual Document Object Model or "DOM"?

The virtual DOM allows Vue.js to render your component in its memory before updating your browser. This makes everything faster because it has to do only a few interactions with the browser. When Vue.js updates the browser DOM, it compares the updated virtual DOM to the previous one and updates the real DOM with the modified parts. That's how it enhances performance.


Let's take an example of a simple component and see what the render function puts the effect when we use it within the example.

Index.html file:

  1. <html>    
  2.    <head>    
  3.       <title>Vue.js Component</title>    
  4.       <link rel="stylesheet" href="index.css">    
  5.         <script src="https://cdn.jsdelivr.net/npm/vue/dist/vue.js"></script>    
  6.     </head>    
  7.     <body>    
  8.       <div id = "component_test">    
  9.          <testcomponent></testcomponent>    
  10.       </div>    
  11.       <script src="index.js"></script>    
  12.    </body>    
  13. </html>    

Index.js file:

  1. Vue.component('testcomponent',{    
  2.    template : '<h1>Hello Students!</h1>'    
  3. });    
  4. var vm = new Vue({    
  5.    el: '#component_test'    
  6. })  

Let's use a simple CSS file to make the output more attractive.

Index.css file:

  1. html, body {  
  2.     margin: 5px;  
  3.     padding: 0;  
  4. }  

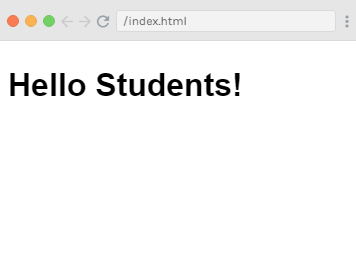
After the execution of the program, you will see the following output:

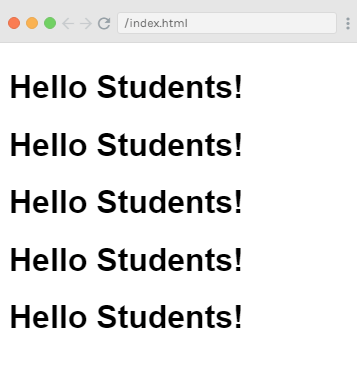
Output:

Vue.js Render functions

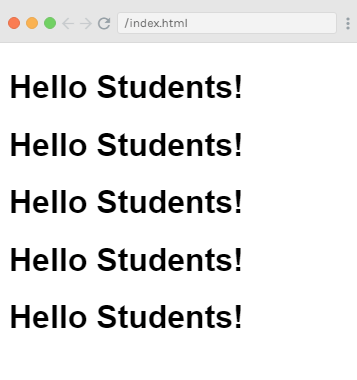
Here, you can see that the component shows the above result as Hello Students. Now, if you reuse the component repeatedly, you will see that the result would be printed again and again. For example,

  1. <div id = "component_test">  
  2.    <testcomponent></testcomponent>  
  3.    <testcomponent></testcomponent>  
  4.    <testcomponent></testcomponent>  
  5.    <testcomponent></testcomponent>  
  6.    <testcomponent></testcomponent>  
  7. </div>   

Output:

Vue.js Render functions

Suppose, you don't want the same text to be printed again and again so, what will you do? Let's make some changes and type something inside the component as follows:

Index.html file:

  1. <html>    
  2.    <head>    
  3.       <title>Vue.js Component</title>    
  4.       <link rel="stylesheet" href="index.css">    
  5.         <script src="https://cdn.jsdelivr.net/npm/vue/dist/vue.js"></script>    
  6.     </head>    
  7.     <body>    
  8.       <div id = "component_test">    
  9.    <testcomponent>Hello Rahul!</testcomponent>  
  10.    <testcomponent>Hello James!</testcomponent>  
  11.    <testcomponent>Hello Alex!</testcomponent>  
  12.    <testcomponent>Hello Priti!</testcomponent>  
  13.    <testcomponent>Hello Mohan!</testcomponent>  
  14.       </div>    
  15.       <script src="index.js"></script>    
  16.    </body>    
  17. </html>    

Index.js file will be same as above.

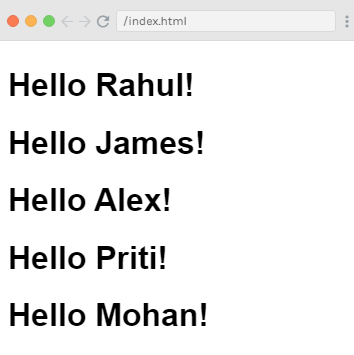
After the execution of the program, you will see the following output:

Output:

Vue.js Render functions

You can see that the output remains the same as earlier. It does not change the text as we want.

Use of Slot

Now, we will use slots that are provided by components to get the desired result.

Syntax:

  1. template : '<h1><slot></slot></h1>',  

See the following example:

Index.html file:

  1. <html>    
  2.    <head>    
  3.       <title>Vue.js Component</title>    
  4.       <link rel="stylesheet" href="index.css">    
  5.         <script src="https://cdn.jsdelivr.net/npm/vue/dist/vue.js"></script>    
  6.     </head>    
  7.     <body>    
  8.       <div id = "component_test">    
  9.    <testcomponent>Hello Rahul!</testcomponent>  
  10.    <testcomponent>Hello James!</testcomponent>  
  11.    <testcomponent>Hello Alex!</testcomponent>  
  12.    <testcomponent>Hello Priti!</testcomponent>  
  13.    <testcomponent>Hello Mohan!</testcomponent>  
  14.       </div>    
  15.       <script src="index.js"></script>    
  16.    </body>    
  17. </html>    

Index.js file:

  1. Vue.component('testcomponent',{    
  2.     template : '<h1><slot></slot></h1>',    
  3. });    
  4. var vm = new Vue({    
  5.    el: '#component_test'    
  6. })  

After the execution of the program, you will see the following output:

Output:

Vue.js Render functions

How to use render Function?

Suppose, you have to change the color and size of the results in output for example, we were using h1 tag in our previous examples and we want to change the HTML tag to p tag or div tag or any other tag for the same component. We have all the flexibility to do the changes by using the render function. Render function helps make the component dynamic and use the way it is required by keeping it common and helping pass arguments using the same component.

Let's see an example to demonstrate the use of render function:

Index.html file:

  1. <html>    
  2.    <head>    
  3.       <title>Vue.js Component</title>    
  4.       <link rel="stylesheet" href="index.css">    
  5.         <script src="https://cdn.jsdelivr.net/npm/vue/dist/vue.js"></script>    
  6.     </head>    
  7.     <body>    
  8.       <div id = "component_test">    
  9.    <testcomponent :elementtype = "'div,red,25,div1'">Hello Rahul!</testcomponent>  
  10.    <testcomponent :elementtype = "'h2,brown,25,div1'">Hello James!</testcomponent>  
  11.    <testcomponent :elementtype = "'p,blue,25,ptag'">Hello Alex!</testcomponent>  
  12.    <testcomponent :elementtype = "'div,green,25,divtag'">Hello Priti!</testcomponent>  
  13.    <testcomponent :elementtype = "'h4,blue,25,ptag'">Hello Mohan!</testcomponent>  
  14.       </div>    
  15.       <script src="index.js"></script>    
  16.    </body>    
  17. </html>    

Index.js file:

  1. Vue.component('testcomponent',{    
  2.     render :function(createElement){  
  3.                var a = this.elementtype.split(",");  
  4.                return createElement(a[0],{  
  5.                   attrs:{  
  6.                      id:a[3],  
  7.                      style:"color:"+a[1]+";font-size:"+a[2]+";"  
  8.                   }  
  9.                },  
  10.                this.$slots.default  
  11.                )  
  12.             },  
  13.             props:{  
  14.                elementtype:{  
  15.                   attributes:String,  
  16.                   required:true  
  17.                }  
  18.             }  
  19.          });  
  20.          var vm = new Vue({  
  21.             el: '#component_test'  
  22.          })  

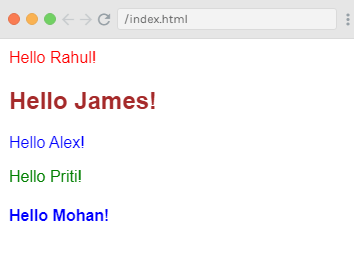
After the execution of the program, you will see the following output:

Output:

Vue.js Render functions

Example Explanation

In the above example, you can see that we have changed the component and added the render function with props property using the following code in the Index.js file:

  1. Vue.component('testcomponent',{    
  2.     render :function(createElement){  
  3.                var a = this.elementtype.split(",");  
  4.                return createElement(a[0],{  
  5.                   attrs:{  
  6.                      id:a[3],  
  7.                      style:"color:"+a[1]+";font-size:"+a[2]+";"  
  8.                   }  
  9.                },  
  10.                this.$slots.default  
  11.                )  
  12.             },  
  13.             props:{  
  14.                elementtype:{  
  15.                   attributes:String,  
  16.                   required:true  
  17.                }  
  18.             }  
  19.          });  

Here, the props property looks like the following code:

  1. props:{  
  2.                elementtype:{  
  3.                   attributes:String,  
  4.                   required:true  
  5.                }  
  6.             }  
  7.          });  

When we use components with render functions, they do not have a template tag or property. Instead of them, they define a function called render that receives a createElement in the following structure:

Syntax:

  1. (renderElement: String | Component, definition: Object, children: String | Array) argument   

You can see it in the example as follows:

  1. render :function(createElement){  
  2.                var a = this.elementtype.split(",");  
  3.                return createElement(a[0],{  
  4.                   attrs:{  
  5.                      id:a[3],  
  6.                      style:"color:"+a[1]+";font-size:"+a[2]+";"  
  7.                   }  

We have also defined a property named elementtype, which takes attributes field of type string. In another required field, we have mentioned that the field is mandatory.

See the render function code where we have used the elementtype property as follows:

  1. render :function(createElement){  
  2.                var a = this.elementtype.split(",");  
  3.                return createElement(a[0],{  
  4.                   attrs:{  
  5.                      id:a[3],  
  6.                      style:"color:"+a[1]+";font-size:"+a[2]+";"  
  7.                   }  
  8.                },  
  9.                this.$slots.default  
  10.                )  
  11.             },  

The render function gets createElement as the argument and returns the same. The CreateElement creates the DOM element in the same way as it does in JavaScript. We have also split the elementtype on comma, using the values in the attrs field.

CreateElement takes the first param as the elementtag to be created. It is passed to the component as follows:

  1. <testcomponent :elementtype = "'div,red,25,div1'">Hello Rahul!</testcomponent>   

The component accepts the props field as the above code. It starts with the symbol : and after that the name of the props is specified. After specifying the prop's name, we have to pass the element tag, color, fontsize, and the id of the element.

In the render function, you can see that the first element is the elementtag in createElement field which is given to the createElemet as follows:

  1. return createElement(a[0],{  
  2.                   attrs:{  
  3.                      id:a[3],  
  4.                      style:"color:"+a[1]+";font-size:"+a[2]+";"  
  5.                   }  
  6.                },  
  7.                this.$slots.default  
  8.                )  
  9.             },  

In the above code, the a[0] is the html element tag. The next parameters are the attributes for the element tag. They are defined in the attr field as follows:

  1. attrs:{  
  2.                      id:a[3],  
  3.                      style:"color:"+a[1]+";font-size:"+a[2]+";"  
  4.                   }  
  5.                },  

Here, we have defined two attributes for the element tag: id tag and style tag.

  • In the id tag, we have passed a[3], which is the value we have after splitting on comma.
  • In the style tag, we have passed a[1] and a[2] respectively to define color and fontsize.

The message we have given in component is specified as follows:

  1. <testcomponent :elementtype = "'div,red,25,div1'">Hello Rahul!</testcomponent>  

The slots field is used to define the text that we want to print in the createElement using the following code:

  1. this.$slots.default  

After the execution of the program when you see the output, you will see that all the output entries are displayed in a specific way. This is because of the elements f the component structure we have defined in a specific way.

  1. <div id = "component_test">    
  2.    <testcomponent :elementtype = "'div,red,25,div1'">Hello Rahul!</testcomponent>  
  3.    <testcomponent :elementtype = "'h2,brown,25,div1'">Hello James!</testcomponent>  
  4.    <testcomponent :elementtype = "'p,blue,25,ptag'">Hello Alex!</testcomponent>  
  5.    <testcomponent :elementtype = "'div,green,25,divtag'">Hello Priti!</testcomponent>  
  6.    <testcomponent :elementtype = "'h4,blue,25,ptag'">Hello Mohan!</testcomponent>  
  7.       </div>  

Event binding in Vue.js render functions

Let's see an example to demonstrate event binding in Vue.js render function. See the following example:

Example

Index.html file:

  1. <html>    
  2.    <head>    
  3.       <title>Vue.js Event binding in render function</title>    
  4.       <link rel="stylesheet" href="index.css">    
  5.         <script src="https://cdn.jsdelivr.net/npm/vue/dist/vue.js"></script>    
  6.     </head>    
  7.     <body>    
  8.       <div id="render_1"></div>  
  9.       <script src="index.js"></script>    
  10.    </body>    
  11. </html>  

Index.js file:

  1. new Vue({  
  2.   el: '#render_1',  
  3.   data() {  
  4.     return {  
  5.       clickCount: 0,  
  6.     }  
  7.   },  
  8.   methods: {  
  9.     onClick() {  
  10.       this.clickCount += 1;  
  11.     }  
  12.   },  
  13.   render(createElement) {  
  14.     const button = createElement('button', {  
  15.       on: {  
  16.         click: this.onClick  
  17.       }  
  18.     }, 'Click me');  
  19.     const counter = createElement('span', [  
  20.       'Number of clicks:',  
  21.       this.clickCount  
  22.     ]);  
  23.     return createElement('div', [  
  24.       button, counter  
  25.     ])  
  26.   }  
  27. });  

After the execution of the program, you will see the following output:

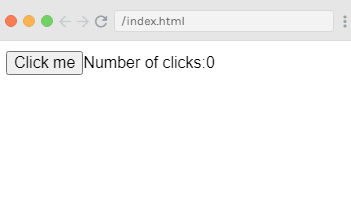
Output:

Vue.js Render functions

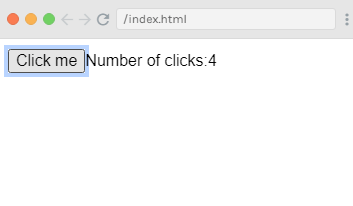
When you click on the "Click me" button, you will see that the number of clicks has been displayed as how many times you have clicked on the button. See the output:

Vue.js Render functions

In the above example, the button is clicked four times.


Source by : javatpoint.com


Read More
  • Share This:  
  •  Facebook
  •  Twitter
  •  Google+
  •  Stumble
  •  Digg

Vue.js Tutorial

 Programing Coderfunda     February 09, 2021     Vue.js Tutorial     No comments   


Vue.js Tutorial

  • Vue.js Tutorial
  •  
  • Vue.js Tutorial open link 
  • Vue.js Installation
  •  
    Vue.js Getting started
  •  
    Declarative Rendering
  •  
    Conditions & Loops
  •  
    Vue.js Instances
  •  
    Vue.js Template
  •  
    Vue.js Components
  •  
    Computed Properties
  •  
    Vue.js Watch Property
  •  
    Vue.js Event Handling
  •  
    Data Binding
  •  
    Vue.js Data Binding
  •  
    Form Input Bindings

     
  • Transition & Animation

  • Transition & Animation

    Vue.js Animation
  •  
    Explicit Transition
  •  
    Vue.js Custom Directives
  •  
    Vue.js Routing
  •  
    Vue.js Mixins
  •  
    Vue.js Render functions
  •  
    Vue.js Reactivity System


Read More
  • Share This:  
  •  Facebook
  •  Twitter
  •  Google+
  •  Stumble
  •  Digg
Newer Posts Older Posts Home

Meta

Popular Posts

  • Generate Migrations from an Existing Database With the Migration Generator Package
    Laravel Migration Generator Migration Generator for Laravel is a package by Bennett Treptow to generate migrations from existing database ...
  • Tailwindcss best practices for responsive design
    Tailwind CSS provides powerful utilities for responsive design out of the box. To use it effectively and maintain clean, scalable code, here...
  • Search Through Models with Laravel Searchable
      Laravel Searchable   is a package by   Spatie   to search through models and other sources pragmatically. Using this package, you can get ...
  • Laravel Razorpay Integration | Payment gateway integration Laravel in 30 mins | Laravel Razorpay
    1 Integration of Razorpay with Laravel. In this tutorial, I have taught how to integrate payment gateway with laravel with mini-project. If...
  • Vue.js Render functions
        Vue.js Render functions Vue.js recommends us to use templates to build HTML. Here, we can use the render function as a closer-to-the-co...

Categories

  • Ajax (26)
  • Bootstrap (30)
  • DBMS (42)
  • HTML (12)
  • HTML5 (45)
  • JavaScript (10)
  • Jquery (34)
  • Jquery UI (2)
  • JqueryUI (32)
  • Laravel (1017)
  • Laravel Tutorials (23)
  • Laravel-Question (6)
  • Magento (9)
  • Magento 2 (95)
  • MariaDB (1)
  • MySql Tutorial (2)
  • PHP-Interview-Questions (3)
  • Php Question (13)
  • Python (36)
  • RDBMS (13)
  • SQL Tutorial (79)
  • Vue.js Tutorial (69)
  • Wordpress (150)
  • Wordpress Theme (3)
  • codeigniter (108)
  • oops (4)
  • php (853)

Social Media Links

  • Follow on Twitter
  • Like on Facebook
  • Subscribe on Youtube
  • Follow on Instagram

Pages

  • Home
  • Contact Us
  • Privacy Policy
  • About us

Blog Archive

  • ▼  2026 (3)
    • ▼  07/26 - 08/02 (2)
      • A stormwater pond in Calgary appears filled with P...
      • Inside Kriti Sanon's duplex sea-facing penthouse w...
    • ►  06/28 - 07/05 (1)
  • ►  2025 (4)
    • ►  07/06 - 07/13 (2)
    • ►  06/29 - 07/06 (2)
  • ►  2024 (486)
    • ►  09/15 - 09/22 (30)
    • ►  09/08 - 09/15 (35)
    • ►  09/01 - 09/08 (35)
    • ►  08/11 - 08/18 (2)
    • ►  08/04 - 08/11 (33)
    • ►  07/28 - 08/04 (30)
    • ►  07/07 - 07/14 (11)
    • ►  06/30 - 07/07 (35)
    • ►  06/23 - 06/30 (5)
    • ►  06/02 - 06/09 (31)
    • ►  05/26 - 06/02 (20)
    • ►  05/05 - 05/12 (29)
    • ►  04/28 - 05/05 (26)
    • ►  04/07 - 04/14 (10)
    • ►  03/31 - 04/07 (34)
    • ►  03/24 - 03/31 (10)
    • ►  03/03 - 03/10 (35)
    • ►  02/25 - 03/03 (15)
    • ►  02/04 - 02/11 (22)
    • ►  01/28 - 02/04 (30)
    • ►  01/07 - 01/14 (8)
  • ►  2023 (484)
    • ►  12/31 - 01/07 (35)
    • ►  12/24 - 12/31 (10)
    • ►  12/03 - 12/10 (33)
    • ►  11/26 - 12/03 (20)
    • ►  11/05 - 11/12 (35)
    • ►  10/29 - 11/05 (20)
    • ►  10/22 - 10/29 (9)
    • ►  10/15 - 10/22 (7)
    • ►  10/08 - 10/15 (9)
    • ►  10/01 - 10/08 (10)
    • ►  09/24 - 10/01 (9)
    • ►  09/17 - 09/24 (9)
    • ►  09/10 - 09/17 (7)
    • ►  09/03 - 09/10 (9)
    • ►  08/27 - 09/03 (9)
    • ►  08/20 - 08/27 (8)
    • ►  08/13 - 08/20 (8)
    • ►  08/06 - 08/13 (8)
    • ►  07/30 - 08/06 (8)
    • ►  07/23 - 07/30 (7)
    • ►  07/16 - 07/23 (8)
    • ►  07/09 - 07/16 (7)
    • ►  07/02 - 07/09 (8)
    • ►  06/25 - 07/02 (7)
    • ►  06/18 - 06/25 (7)
    • ►  06/11 - 06/18 (7)
    • ►  06/04 - 06/11 (11)
    • ►  05/28 - 06/04 (7)
    • ►  05/21 - 05/28 (8)
    • ►  05/14 - 05/21 (11)
    • ►  05/07 - 05/14 (7)
    • ►  04/30 - 05/07 (7)
    • ►  04/23 - 04/30 (8)
    • ►  04/16 - 04/23 (9)
    • ►  04/09 - 04/16 (7)
    • ►  04/02 - 04/09 (4)
    • ►  03/26 - 04/02 (21)
    • ►  03/19 - 03/26 (2)
    • ►  03/12 - 03/19 (9)
    • ►  03/05 - 03/12 (26)
    • ►  02/26 - 03/05 (25)
    • ►  01/15 - 01/22 (7)
    • ►  01/08 - 01/15 (1)
  • ►  2022 (1037)
    • ►  12/11 - 12/18 (13)
    • ►  12/04 - 12/11 (1)
    • ►  11/27 - 12/04 (40)
    • ►  11/06 - 11/13 (1)
    • ►  10/16 - 10/23 (13)
    • ►  09/04 - 09/11 (5)
    • ►  08/21 - 08/28 (24)
    • ►  08/14 - 08/21 (24)
    • ►  07/03 - 07/10 (9)
    • ►  06/19 - 06/26 (3)
    • ►  05/29 - 06/05 (3)
    • ►  05/22 - 05/29 (3)
    • ►  05/15 - 05/22 (109)
    • ►  05/01 - 05/08 (7)
    • ►  04/24 - 05/01 (7)
    • ►  04/17 - 04/24 (64)
    • ►  04/10 - 04/17 (115)
    • ►  04/03 - 04/10 (73)
    • ►  03/27 - 04/03 (77)
    • ►  03/13 - 03/20 (2)
    • ►  03/06 - 03/13 (25)
    • ►  02/27 - 03/06 (18)
    • ►  02/20 - 02/27 (153)
    • ►  02/13 - 02/20 (187)
    • ►  01/30 - 02/06 (45)
    • ►  01/23 - 01/30 (15)
    • ►  01/16 - 01/23 (1)
  • ►  2021 (412)
    • ►  10/24 - 10/31 (2)
    • ►  07/25 - 08/01 (1)
    • ►  07/11 - 07/18 (10)
    • ►  06/13 - 06/20 (29)
    • ►  05/23 - 05/30 (1)
    • ►  05/02 - 05/09 (24)
    • ►  04/25 - 05/02 (24)
    • ►  04/18 - 04/25 (112)
    • ►  04/11 - 04/18 (1)
    • ►  04/04 - 04/11 (6)
    • ►  03/28 - 04/04 (86)
    • ►  03/21 - 03/28 (19)
    • ►  03/14 - 03/21 (2)
    • ►  03/07 - 03/14 (10)
    • ►  02/28 - 03/07 (1)
    • ►  02/21 - 02/28 (29)
    • ►  02/14 - 02/21 (13)
    • ►  02/07 - 02/14 (12)
    • ►  01/31 - 02/07 (6)
    • ►  01/17 - 01/24 (2)
    • ►  01/10 - 01/17 (8)
    • ►  01/03 - 01/10 (14)
  • ►  2020 (376)
    • ►  12/27 - 01/03 (37)
    • ►  12/20 - 12/27 (92)
    • ►  12/13 - 12/20 (29)
    • ►  12/06 - 12/13 (37)
    • ►  11/29 - 12/06 (4)
    • ►  11/15 - 11/22 (14)
    • ►  11/08 - 11/15 (8)
    • ►  11/01 - 11/08 (2)
    • ►  10/18 - 10/25 (14)
    • ►  10/11 - 10/18 (16)
    • ►  10/04 - 10/11 (10)
    • ►  09/20 - 09/27 (10)
    • ►  09/06 - 09/13 (19)
    • ►  08/30 - 09/06 (26)
    • ►  08/23 - 08/30 (4)
    • ►  08/16 - 08/23 (2)
    • ►  07/12 - 07/19 (48)
    • ►  05/17 - 05/24 (2)
    • ►  01/05 - 01/12 (2)
  • ►  2019 (74)
    • ►  07/07 - 07/14 (6)
    • ►  06/16 - 06/23 (6)
    • ►  02/10 - 02/17 (17)
    • ►  01/13 - 01/20 (37)
    • ►  01/06 - 01/13 (8)
  • ►  2018 (376)
    • ►  12/30 - 01/06 (24)
    • ►  12/16 - 12/23 (8)
    • ►  12/09 - 12/16 (98)
    • ►  12/02 - 12/09 (16)
    • ►  11/18 - 11/25 (36)
    • ►  11/04 - 11/11 (18)
    • ►  10/28 - 11/04 (10)
    • ►  10/21 - 10/28 (26)
    • ►  10/14 - 10/21 (52)
    • ►  10/07 - 10/14 (4)
    • ►  09/30 - 10/07 (2)
    • ►  09/23 - 09/30 (68)
    • ►  09/16 - 09/23 (4)
    • ►  09/09 - 09/16 (4)
    • ►  08/26 - 09/02 (6)

Data Publish News

Loading...

Al Jazeera – Breaking News, World News and Video from Al Jazeera

Loading...

Laravel News

Loading...

Copyright © CoderFunda | Powered by Blogger
Design by Coderfunda | Blogger Theme by Coderfunda | Distributed By Coderfunda